Введение
Make your Xbox 360 S look shiny and new by replacing the outer panels.
Выберете то, что вам нужно
-
-
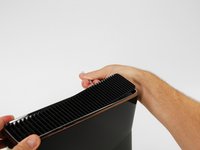
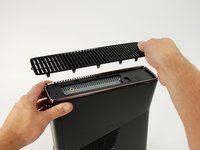
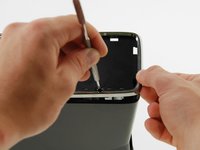
In the following steps, you will remove the top vent, secured to the top panel by the thirteen clips shown.
-
-
-
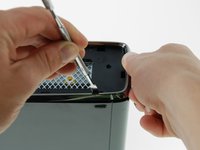
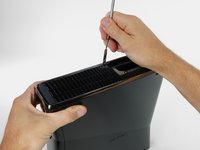
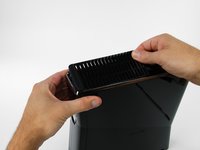
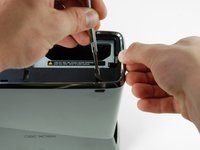
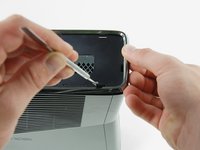
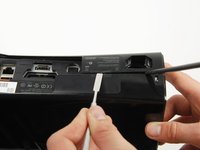
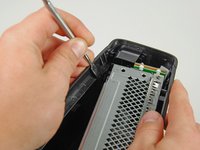
Orient the console so that the words "XBOX 360" on the sides are right-side up, and the faceplate is facing to the left.
-
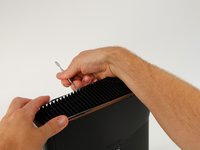
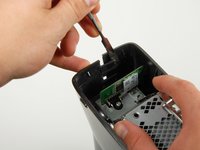
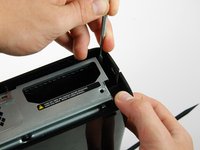
Insert a metal spudger between the top vent and the top bezel near the rear of the Xbox.
-
Rotate the spudger away from the console, prying the edge of the fan vent up until the two plastic clips come free.
This step is and the others following are to rough and not needed, simply put smth in between the lamellar and push it up with littlebit pressure thats better for the plastic parts.
-
-
-
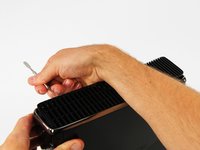
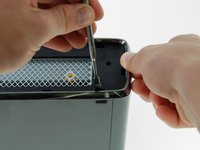
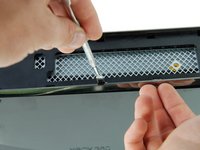
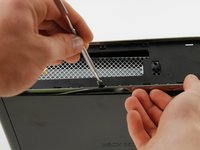
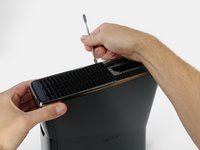
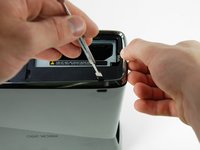
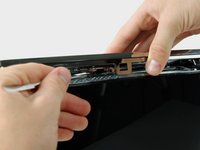
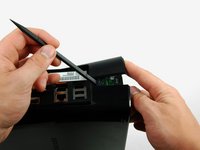
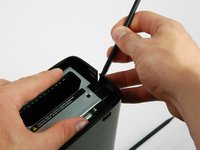
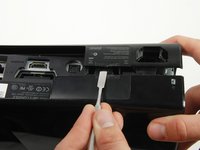
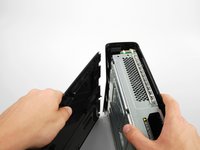
Insert a metal spudger between the fan vent and top bezel along the left side of the console.
-
In the same manner described above, begin prying the left side of the top vent away from the top bezel.
-
Continue prying along the left side of the device, freeing all the clips on that side.
-
-
-
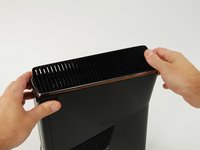
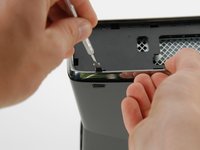
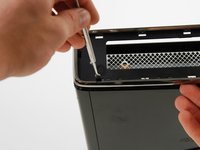
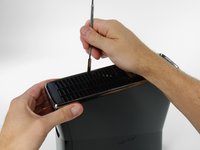
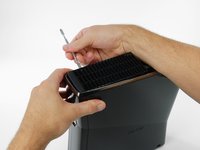
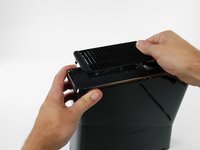
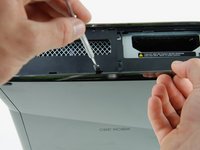
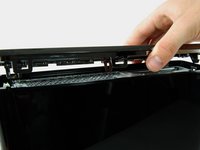
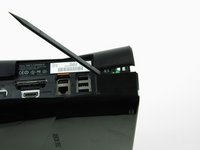
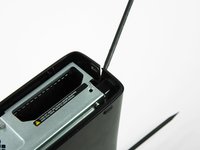
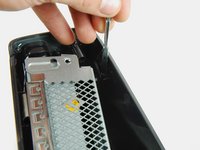
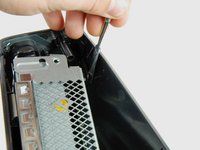
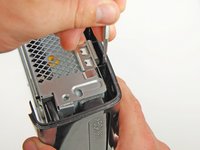
Lift the fan vent up from the freed left side to disengage the clips along the right side.
-
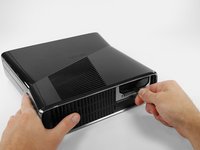
Remove the entire fan vent.
-
-
-
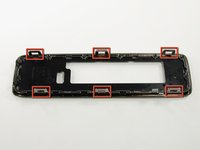
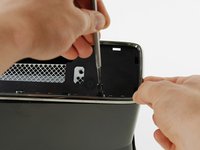
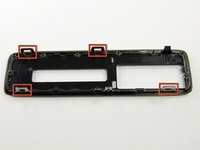
In the following steps, you will be releasing the six clips highlighted in red.
-
-
-
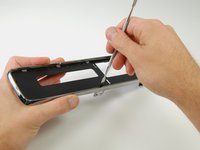
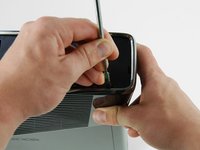
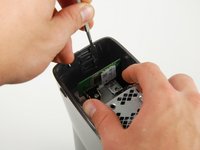
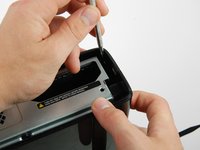
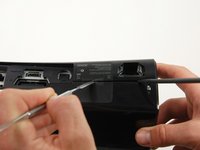
Insert a metal spudger through the front-most slit on the left edge of the top bezel and between the bottom edge of the clip and the left case, as described above.
-
Simultaneously rotate the spudger away from the console and pull up on the top bezel to free the clip.
So I got the fan filter thing off, but the black edge plate thing isn't coming off. All I did was warp my flathead screwdriver and scratch the console.
-
-
-
Using the same method described above, free the two remaining clips along the left edge of the top bezel.
-
-
-
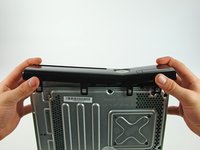
Grab the entire top panel with your hands, lift up the entire left edge high enough to rest the separated clips on top of the left case.
-
-
-
Rotate the console so that the rear of the Xbox 360 S is facing to the right, and the right case is facing you.
-
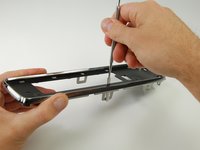
Insert a metal spudger through the rear-most slit on the right edge of the top bezel and between the bottom edge of the clip and the right case.
-
While lifting up on the top bezel with your fingers, rotate the spudger away from the console to free the clip.
-
-
-
In the same manner as described in the previous steps, release the middle and front clips along the right edge of the top panel.
-
-
-
Push the latch holding down the hard drive cover to the left.
-
Pull the hard drive cover away from the console.
-
-
-
-
Firmly grasp the fabric tab labeled with the size of the hard drive (e.g. "250 GB") attached to the hard drive.
-
Pull the hard drive straight out of the console.
If i buy a new xbox 360 and replace the hardrive inside with my own, will i have my account and saves? or will i have to recover my account and start over?
You will still have your saves and account if you replace your hard drive in the new xbox
hola tengo un disco de laptop y quiero ponerle 100 juegos como puedo hacer la xbox me reconose el disco y todo lo configuro pero cuando conecto a mi pc para pasar los juejosel emulador no me deja
-
-
-
Insert a metal spudger between the black bottom vent and the silver rim of the bottom bezel, in the rear right corner of the vent.
-
Rotate the spudger away from the console, prying the vent up from the bottom bezel.
-
-
-
In the same manner as described above, pry the two remaining clips on the bottom right edge.
-
-
-
The clips shown in red can be detached by inserting a metal spudger underneath the bottom edge of the clip. Once underneath the bottom edge, simply prying away from the console will free the clip.
-
-
-
Insert a metal spudger through the slit near the rear left corner of the bottom bezel.
-
Rotate the spudger away from the device while lifting the rear bezel up with the other hand.
These are pretty awkward to remove, but once you understand how they work its easy enough. The goal here is to slot the spudger THROUGH the gap of the silver tabs (visible in previous steps image, circled) and then pry. Put pressure against the wall of the Xbox case and push downwards, once you feel the spudger slot in, then apply force away from the Xbox and pull up a little with your free hand.
-
-
-
Insert a metal spudger through the left middle slit of the bottom bezel, and between the bottom edge of the clip and the left case.
-
Simultaneously pull the bottom bezel up and rotate the spudger away from the console to free the clip.
-
In a similar fashion, free the clip at the front of the bottom bezel's left edge.
-
-
-
Insert the spudger into the rear-most slit on the right edge of the bottom bezel, and wedge it behind the clip by pushing the spudger down while pushing the tip of the spudger against the right case.
-
Simultaneously release the clip and pull the bottom bezel up.
-
-
-
Insert a spudger between the silver rim and bottom bezel directly above the clip shown.
-
Release the clip while pulling up on the bottom bezel.
-
-
-
Lift the left edge of the bottom bezel up enough to gain clearance.
-
Insert a metal spudger behind the left edge of the last clip, and push the clip away from the right case.
-
-
-
-
Locate the two clips connecting the right and left case along the top edge of the console, behind the Wi-Fi card.
-
While pushing the left and right case away from each other with one hand, pry the clips away from the case with a metal spudger.
-
-
-
Insert a spudger between the right and left cases to hold them separate while you work elsewhere.
-
-
-
While pushing the left and right cases apart with one hand, free one clip located beside the hard drive slot.
-
-
-
Place another spudger between the left and right cases directly below the clip.
-
-
-
Insert the flat edge of a metal spudger between the left and right cases where the warranty sticker used to be.
-
Pry the left case upwards to form a gap between the two cases, and slide the spudger in toward the left case.
-
Rotate the spudger upward to release the last clip.
if you make a hole right here like the link`s picture you can boot the lock
As the user above me said, please avoid doing it like shown in the guide. It just didn’t work on my Xbox (unless your goal is to destroy the plastic case). Instead, pick some small needle like object (the spudger was too short for this, I used the SIM bit of my iFixit driver kit) and find the right spot on the big sticker which is on the left in the pictures shown in the guide. That spot is just between the text and the column of logos (Dolby Digital, etc.) (https://team-xecuter.com/slim/slim_secre..., picture not mine). Poke it (don’t be too gentle, you have to apply some force) and you will hear the clip release.
Both the above links are dead, i used this YouTube video which shows you the process of getting the hidden clip
I was able to open it by pushing on the sticker to unclamp the clip while another person helped me pull open the case.
Here is a Video that shows the small hole behind the sticker, ist in german but ist good to see how to open that hidden clip easiely.
None of the above options by the other commenters worked for me, but I found a video that points out there's a little hole right in the middle of the "SEE PRINTED MANUAL" and "UL" on the sticker under the Xbox 360 warranty sticker that I stuck a sewing needle into and it unlatches the latch: https://youtu.be/7mC8ckDvKqc?si=CVyCszpF...
-
-
-
Release one clip in the front left corner of the top edge securing the left case to the faceplate.
-
-
-
Flip the console over so the bottom is facing upward.
-
Release one clip in the front left corner of the bottom edge securing the left case to the faceplate.
-
Rotate the left case away from the device to release the last two inner clips.
-
Remove the left case.
-
-
-
Release the clip near the front right corner of the top edge securing the right case to the faceplate.
There are 4 black screw that has to be removed before you can detach the other cover. Please note
Sorry, there 5screws, one in the middle and 4 at the edges
-
-
-
Release the clip in the bottom right corner of the top edge securing the right case to the front case.
-
-
-
Lift the left edge of the faceplate upward to release the last two clips securing the faceplate to the right case.
-
Detach the faceplate from the rest of the device.
There isn’t 2 clips there is 4 clips
I tore this on reassembly and it was barely held together. Be careful!
-
-
-
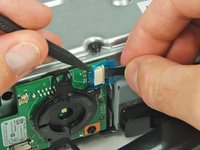
Using a spudger or fingernail, lift the clear blue tab away from the connector.
-
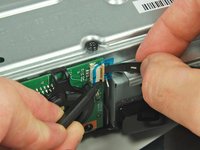
Slide the locking tab on the power switch board cable connector toward the top of the console.
-
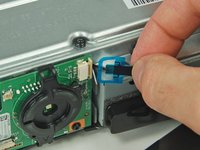
Pull the power switch cable straight out of the connector.
-
The faceplate is now free of the rest of the console.
-


To reassemble your device, follow these instructions in reverse order.
To reassemble your device, follow these instructions in reverse order.
Отменить: Я не выполнил это руководство.
48 человек успешно провели ремонт по этому руководству.

4 Комментариев
Thank you to who ever posted this! The directions are clear, you just have to read than reread, go slowly and don't force anything and most importantly do not get frustrated. My grandpa always said "if it is worth doing, do it right the first time.", and "measure twice, cut once."
so true. :) I needed this guide to replace my Xbox 1 S shell because I got frustrated when taking apart the original.
me I -
The motherboard and the disc drive's PCB (circuit board) are paired. If the drive's PCB is fine, which it most likely is, then all you need to do is swap out the PCB on the new drive with your old one before installing it. No motherboard replacement required.
Only in the unlikely case that the drive's PCB is fried will you require a full drive and motherboard replacement.
SirStephenH - Ответить