Перейти к основному содержанию
Присоединяйся к сообществу ремонтников - Создай аккаунт

ZTE ZMax Pro Display Assembly Replacement

Выберете то, что вам нужно

  1. ZTE ZMax Pro Display Assembly Replacement, Back Panel Assembly: шаг 1, изображение 1 из 1
    • Flip the phone over so that the back panel of the phone is facing up.

    • Wedge the plastic opening tool between the black outer panel and the silver side panel.

    • Push down on the plastic opening tool to separate the back panel from the rest of the phone.

    • Continue to do this around all sides of the phone until the back panel has popped all the way off.

    • Removing the back panel may make loud popping noises which is normal.

    Спросите у FixBot

    Добавить комментарий

  2. ZTE ZMax Pro Display Assembly Replacement: шаг 2, изображение 1 из 1
    • Using your fingers, slide the SIM card all the way out of the phone.

    Спросите у FixBot

    Добавить комментарий

  3. ZTE ZMax Pro Display Assembly Replacement: шаг 3, изображение 1 из 2 ZTE ZMax Pro Display Assembly Replacement: шаг 3, изображение 2 из 2
    Инструмент, используемый на этом этапе:
    Tweezers
    $4.99
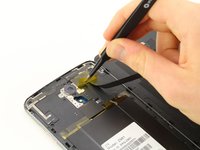
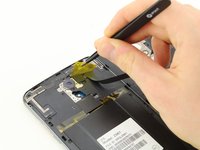
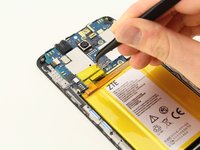
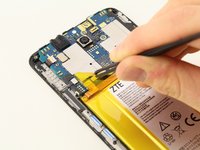
    • Remove the yellow Kapton tape by using the tweezers to peel it up and away from the device.

    Спросите у FixBot

    Добавить комментарий

  4. ZTE ZMax Pro Display Assembly Replacement: шаг 4, изображение 1 из 1
    • Using the Phillips #00 screwdriver, remove the two 3.0 mm screws located near the top of the phone, next to the rear camera.

    Спросите у FixBot

    Добавить комментарий

  5. ZTE ZMax Pro Display Assembly Replacement: шаг 5, изображение 1 из 1
    • Remove the fingerprint sensor flex cable, using the plastic opening tool to lift it out.

    Спросите у FixBot

    Добавить комментарий

  6. ZTE ZMax Pro Display Assembly Replacement: шаг 6, изображение 1 из 2 ZTE ZMax Pro Display Assembly Replacement: шаг 6, изображение 2 из 2
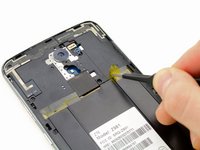
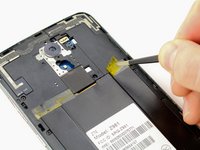
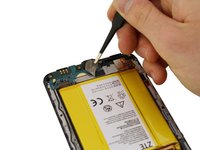
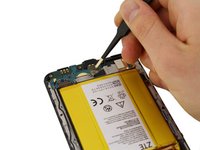
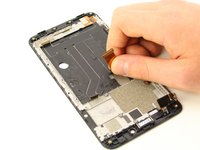
    • Using the tweezers, peel back the yellow Kapton tape located on the right side of the phone.

    Спросите у FixBot

    Добавить комментарий

  7. ZTE ZMax Pro Display Assembly Replacement: шаг 7, изображение 1 из 1
    • Using the Phillips #00 screwdriver, remove the 15, 3.0 mm rear panel screws located around the perimeter of the phone.

    Спросите у FixBot

    Добавить комментарий

  8. ZTE ZMax Pro Display Assembly Replacement: шаг 8, изображение 1 из 1
    • Flip the phone over so that the screen is facing up.

    • Wedge the plastic opening tool between the screen and the rear panel.

    • Push up on the opening tool to separate the panel from the phone.

    • Continue to do this around the entire phone until the rear panel is no longer connected to the device.

    • The rear case and screen are fastened tightly to each other. It might help to use the picks as wedges to keep the case and screen separated as you run the opening tool along the edges.

    Спросите у FixBot

    Добавить комментарий

  9. ZTE ZMax Pro Display Assembly Replacement, Motherboard: шаг 9, изображение 1 из 2 ZTE ZMax Pro Display Assembly Replacement, Motherboard: шаг 9, изображение 2 из 2
    Инструмент, используемый на этом этапе:
    Tweezers
    $4.99
    • Use the tweezers to peel off the yellow Kapton tape.

    Спросите у FixBot

    Добавить комментарий

  10. ZTE ZMax Pro Display Assembly Replacement: шаг 10, изображение 1 из 1
    • Use the plastic opening tool to remove the connectors on the motherboard.

    Спросите у FixBot

    Добавить комментарий

  11. ZTE ZMax Pro Display Assembly Replacement: шаг 11, изображение 1 из 1
    • Use tweezers to remove the antenna. The antenna comes up on the right side of the phone, by the battery, and is attached to the motherboard.

    Спросите у FixBot

    Добавить комментарий

  12. ZTE ZMax Pro Display Assembly Replacement: шаг 12, изображение 1 из 1
    • Using the #00 Phillips screwdriver, remove the 3.0 mm screw located on the right edge of the phone, above the battery.

    Спросите у FixBot

    Добавить комментарий

  13. ZTE ZMax Pro Display Assembly Replacement: шаг 13, изображение 1 из 1
    • Wedge the plastic opening tool underneath the motherboard which is located at the top of the phone.

    • Push down on the plastic opening tool, lifting the motherboard away from the phone.

    • Continue to do this around all sides of the motherboard until it is fully removed from the phone.

    Спросите у FixBot

    Добавить комментарий

  14. ZTE ZMax Pro Display Assembly Replacement, Battery: шаг 14, изображение 1 из 2 ZTE ZMax Pro Display Assembly Replacement, Battery: шаг 14, изображение 2 из 2
    Инструмент, используемый на этом этапе:
    Tweezers
    $4.99
    • Use tweezers to peel off the tape at the bottom of the phone.

    Спросите у FixBot

    Добавить комментарий

  15. ZTE ZMax Pro Display Assembly Replacement: шаг 15, изображение 1 из 1
    • Wedge the plastic opening tool under the charging port board at the bottom of the phone.

    • Push down on the plastic opening tool so the board pulls away from the phone.

    • Continue to do this around the charging port board until it comes all the way off the phone.

    • The board is glued to the case so make sure to work around all edges to ease removal. Trying to pull it away from one edge can cause damage to the board.

    Спросите у FixBot

    Добавить комментарий

  16. ZTE ZMax Pro Display Assembly Replacement: шаг 16, изображение 1 из 1
    • Use a heat gun to heat the adhesive under the battery.

    • Heat the battery for 1 minute then check if it is pliable. If needed, heat in intervals of 10 seconds until the battery can be removed.

    • Over heating the battery can cause the battery to explode. Exercise caution heating the battery.

    Спросите у FixBot

    Добавить комментарий

  17. ZTE ZMax Pro Display Assembly Replacement: шаг 17, изображение 1 из 2 ZTE ZMax Pro Display Assembly Replacement: шаг 17, изображение 2 из 2
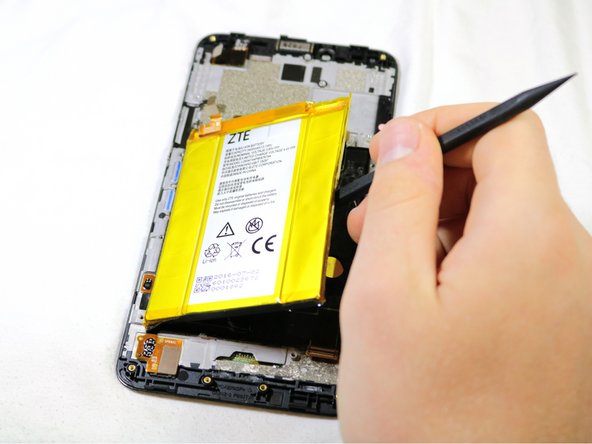
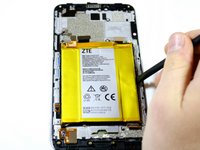
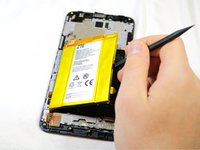
    • Use a nylon spudger to pry the battery from the phone.

    • The battery may bend a little during removal which is normal. However, make sure the battery doesn't bend too much as that can make it dangerous. If it looks like it's folding, try prying it from a different angle.

    • Avoid using metal tools to pry the battery out of the case as it can pierce the battery.

    • Contents of the battery are extremely polluting to the environment. Do not throw it away in the recycling. Instead, try finding out what your local community does to dispose of batteries.

    • After removing the battery, the adhesive will not have as strong of a hold on the new battery. This should not be an issue. However, if the adhesive strength is negligible, you can consider buying adhesive and applying it before inserting the new battery.

    Спросите у FixBot

    Добавить комментарий

  18. ZTE ZMax Pro Display Assembly Replacement, Display Assembly: шаг 18, изображение 1 из 1
    Инструмент, используемый на этом этапе:
    Tweezers
    $4.99
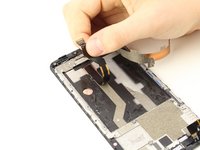
    • Disconnect the digital flex cable connector, located at the top left of the phone, using a pair of tweezers.

    Спросите у FixBot

    Добавить комментарий

  19. ZTE ZMax Pro Display Assembly Replacement: шаг 19, изображение 1 из 3 ZTE ZMax Pro Display Assembly Replacement: шаг 19, изображение 2 из 3 ZTE ZMax Pro Display Assembly Replacement: шаг 19, изображение 3 из 3
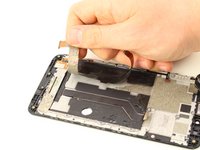
    • Using your fingers peel up the LCD flex cables. These cables are black and flat.

    Спросите у FixBot

    Добавить комментарий

  20. ZTE ZMax Pro Display Assembly Replacement: шаг 20, изображение 1 из 2 ZTE ZMax Pro Display Assembly Replacement: шаг 20, изображение 2 из 2
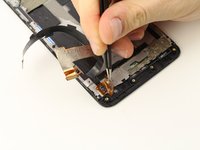
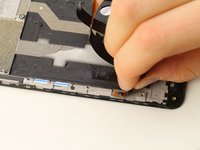
    • Peel the flex cables off where they are attached to the frame.

    Спросите у FixBot

    Добавить комментарий

  21. ZTE ZMax Pro Display Assembly Replacement: шаг 21, изображение 1 из 2 ZTE ZMax Pro Display Assembly Replacement: шаг 21, изображение 2 из 2
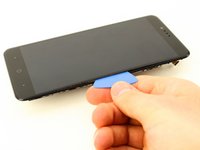
    • Insert a plastic opening tool between the screen and the rear case and separate it carefully, starting at the bottom.

    Спросите у FixBot

    Добавить комментарий

  22. ZTE ZMax Pro Display Assembly Replacement: шаг 22, изображение 1 из 2 ZTE ZMax Pro Display Assembly Replacement: шаг 22, изображение 2 из 2
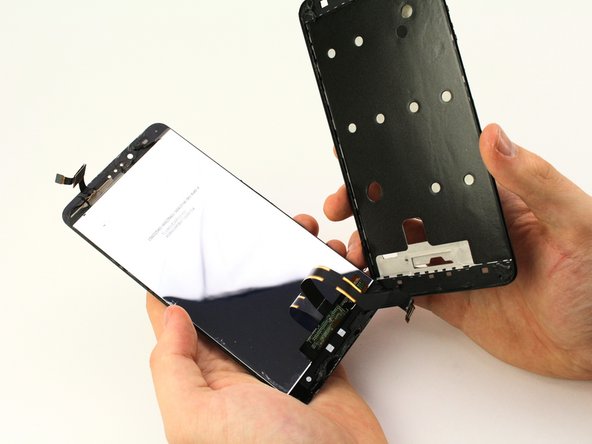
    • Push the digitizer flex cable through the hole in the frame to separate the LCD from the phone.

    Спросите у FixBot

    Добавить комментарий

Заключение

To reassemble your device, follow these instructions in reverse order.

Отменить: Я не выполнил это руководство.

13 человек успешно провели ремонт по этому руководству.

Nicholas Leacox

Участник с: 04/18/18

1 739 Репутация

Автор 7 руководств

Команда

Cal Poly, Team S17-G3, Livingston Spring 2018 Участник Cal Poly, Team S17-G3, Livingston Spring 2018

CPSU-LIVINGSTON-S18S17G3

4 членов

Автор 16 руководств

1 Комментарий к руководству

@nleacox28. Cal-Poly? As in San luis Obispo, CA.?

Monica Salviejo - Ответить Поделиться
Добавить комментарий

Статистика просмотров:

За последние 24 часов: 3

За последние 7 дней: 11

За последние 30 дней: 44

За всё время: 4,013