Введение
This guide will show you how to successfully replace the main board inside the DJI Mini 2 drone.
The main board in the DJI Mini 2 helps the drone tell the other parts of the drone what to do and connects the controller and phone connected to the drone. If the main board is damaged the drone will not function or connect to the controller and phone the user wants to connect to. For more information on what may be causing your issue, check out the Troubleshooting page for this device.
This guide requires the use of ESD-safe tools to avoid damaging the motherboard or other sensitive components.
After replacing the motherboard, you will need to calibrate your DJI Mini 2 drone. Some calibration processes can be done with the DJI Fly mobile app, but for some processes, like gimbal calibration, you will need to use additional software. How to calibrate the gimbal watch this video tutorial https://youtu.be/mu03HWXplM4
Выберете то, что вам нужно
Видеообзор
-
-
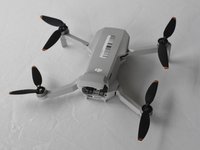
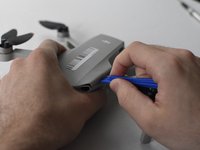
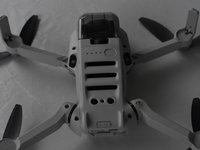
Face the DJI Mini 2 away from you so that you are looking at the charging ports.
-
Use your finger to open up the back panel.
 Спросите у FixBot
-
-
-
Pinch the locking mechanism on the battery to release the lock.
-
Pull the battery straight out of the compartment.
-
-
-
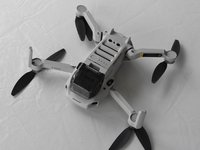
Unfold the wings of the drone.
-
Place the drone upside down on a flat surface.
-
-
-
-
Flip the drone back over.
-
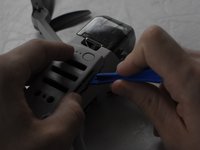
Use a combination of the opening tool and your fingers to pry open the top panel of the drone along the seams.
-
-
-
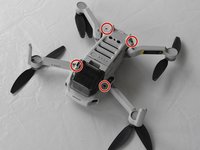
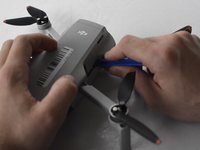
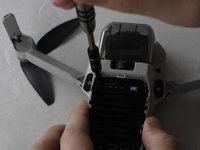
Remove the two 5 mm J000 screws located in the battery hatch and near the ports on the back of the drone.
-
-
-
Flip the drone over again.
-
Pry off the bottom panel of the drone using the opening tools and your fingers.
-
-
-
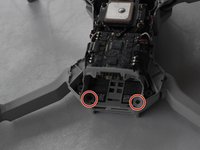
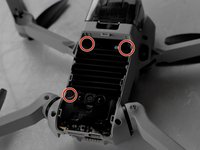
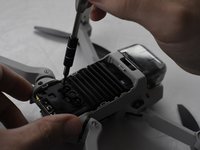
Remove the three 3mm J000 screws on the black plate.
-
-
-
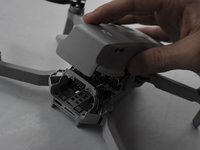
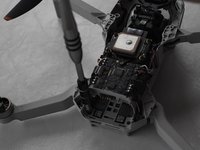
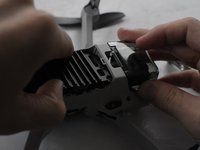
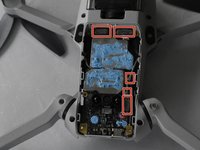
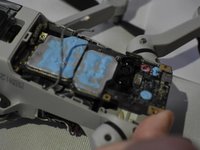
Use your fingers to pull the black plate off to reveal main board.
-
-
Инструмент, используемый на этом этапе:Tweezers$4.99
-
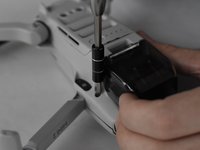
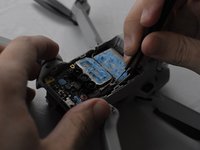
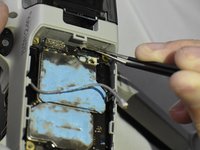
Using ESD Safe Tweezers Blunt Nose, remove the 5 cables attached to the main board.
-
-
-
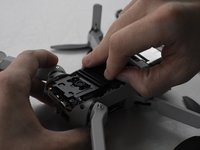
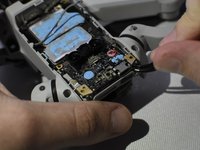
Use the ESD Safe Tweezers Blunt Nose and your fingers to pull off the main board from the drone carriage.
-


To reassemble your device, follow these instructions in reverse order.
Отменить: Я не выполнил это руководство.
4 человек успешно провели ремонт по этому руководству.

Команда

UMass Dartmouth, Team F-1, Gurgel Spring 2022 Участник UMass Dartmouth, Team F-1, Gurgel Spring 2022
UMASSD-GURGEL-S22SFG1
2 членов
Автор 20 руководств
2 Комментарии к руководству
I found this mini 2 post interesting, even if i want to do somthing
different.
my goal is to install the old motherboard in newer hardware...
gimbal. IMU board barometer/compass busted after the super
90 deg DJI off function, because of a gust... crash,'i really
LOVE DJI.....NOT!"
then I ask to buy parts from them, then they babble
about warranty.... nope bro we are not selling parts
forget it we want to repair it.... forget it, it's my drone
i rather sledge hammer it on YouTube.
so this is last resort transplanting a board with old
firmware, I don't want to use a new bird with more stupid
chiness software, that has no real bearing of local aeronautical
laws.
not using them otherwise. goodbye DJI
Do never buy a Chinese drone! From crappy company
might look here again
Great advice, thank you.