Введение
Use this guide to remove or replace a broken or defective display module in your Fairphone 3.
Выберете то, что вам нужно
-
-
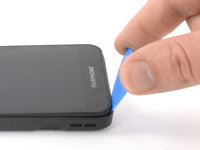
Insert a thumbnail, or a prying tool like a spudger, into the notch at the bottom right of the back cover.
-
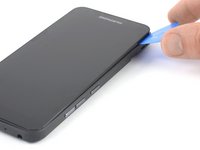
Pry the back cover up to start separating its plastic clips.
 Спросите у FixBot
-
-
-
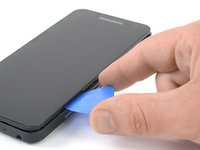
Slide around the bottom right corner of the back cover to loosen the lower plastic clips.
-
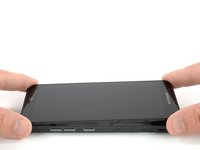
Lift the back cover to release the rest of the plastic clips and remove it.
-
-
-
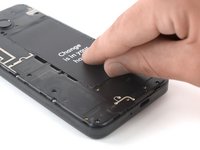
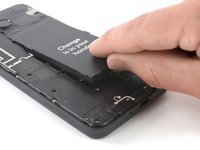
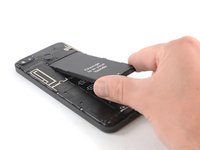
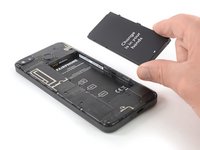
Use a fingernail or a prying tool at the marked notch to lever the battery out of its recess.
-
Lever the battery up until you can get a good grip.
-
-
-
-
Remove the thirteen Phillips #00 screws (4 mm length).
-
-
-
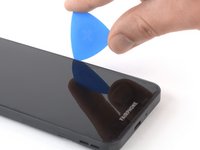
Insert an opening pick between the midframe and the display module on the right edge of the phone.
-
Slide the opening pick down to the bottom right corner to pry open the plastic clamps of the display module.
-
-
-
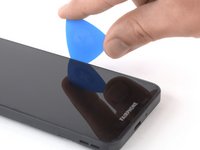
Slide the opening pick around the bottom right corner and use it to disengage the plastic clamps at the bottom of the display module.
-
-
-
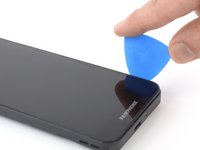
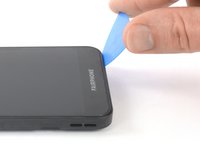
Slide the opening pick along the left side to pry the display module up.
-


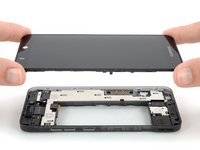
To reassemble your device, follow these instructions in reverse order.
Take your e-waste to an R2 or e-Stewards certified recycler.
Отменить: Я не выполнил это руководство.
51 человек успешно провели ремонт по этому руководству.


24 Комментарии к руководству
Pick goes in much easier on the left side. Then round the bottom and work it onto the right side.
bonjour,
Excellent tutoriel, merci!
Mon Fairphone ne se sent plus de joie!
Martine
Bonjour,
Mon écran est noir depuis une chute, mais il n’y a aucun impact.
Je voudrais bien le changer, mais comment être sure que le problème ne vient que de l’écran? A 90e la pièce, ça m’embêterait de me tromper de problème… Merci de votre aide
Bonjour,
Je suppose que depuis ce temps là vous avez trouvé une solution…
Mais, à toute fin utile dans cette page, le démontage (nettoyage des contacts) remontage a permis de refaire fonctionner l’écran d’un FAIRPHONE3 qui ne répondait plus au toucher !
La déconnexion-reconnexion de la carte mère y est aussi peut-être pour quelque chose…
Merci pour votre commentaire. J'ai eu exactement le même problème. EN tombant sur ce site, j'ai lu vos commentaires, et la réponse qu'on vous a apporté. J'ai donc démonter le module écran comme indiqué dans ce tuto (très bien fait, la partie avec le médiator m'a laissé perplexe, en faite il suffit aussi de tirer légèrement depuis le boitier de la batterie pour déclipser le module écran), et de remonter le module écran. Et la lumière fairphone réapparut, alors que je pensais devoir changer mon module écran.
Merci infiniment