Перейти к основному содержанию
Присоединяйся к сообществу ремонтников - Создай аккаунт

Framework Laptop 12 Storage Replacement

Выберете то, что вам нужно

    1. Framework Laptop 12 Storage Replacement, Power down your laptop: шаг 1, изображение 1 из 3 Framework Laptop 12 Storage Replacement, Power down your laptop: шаг 1, изображение 2 из 3 Framework Laptop 12 Storage Replacement, Power down your laptop: шаг 1, изображение 3 из 3
      • Before you begin repairs, unplug your laptop and shut it down from the operating system. This ensures that the laptop isn't in standby/suspend mode.

      • The indicator LEDs along the edges should be unlit. The laptop should be silent.

      • If you accidentally turn on the laptop during repair, hold the power button down for 10 seconds to shut it down.

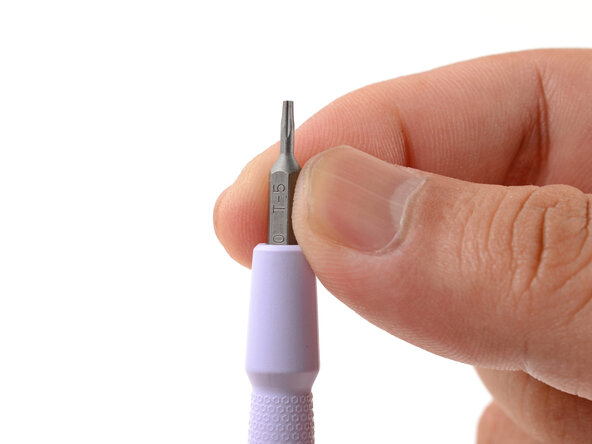
      • Make sure your Framework Screwdriver has the T5 Torx bit (labeled as T-5) facing outwards. If it's not, pull the bit out and flip it.

      Спросите у FixBot

      Добавить комментарий

    1. Framework Laptop 12 Storage Replacement, Set your laptop down: шаг 2, изображение 1 из 1
      • Set your Framework Laptop face-down on a clean work surface.

      Спросите у FixBot

      Добавить комментарий

    2. Framework Laptop 12 Storage Replacement, Loosen the bottom screws: шаг 3, изображение 1 из 2 Framework Laptop 12 Storage Replacement, Loosen the bottom screws: шаг 3, изображение 2 из 2
      • Use your Framework Screwdriver to fully loosen the eight captive T5 Torx screws on the bottom of your laptop.

      • Most screws in your Framework Laptop (including these) are captive—they're designed to stay in place after you loosen them.

      Спросите у FixBot

      Добавить комментарий

    3. Framework Laptop 12 Storage Replacement, Flip your laptop over: шаг 4, изображение 1 из 1
      • Flip your laptop over so it's face-up on your work surface.

      Спросите у FixBot

      Добавить комментарий

    4. Framework Laptop 12 Storage Replacement, Open your laptop: шаг 5, изображение 1 из 2 Framework Laptop 12 Storage Replacement, Open your laptop: шаг 5, изображение 2 из 2
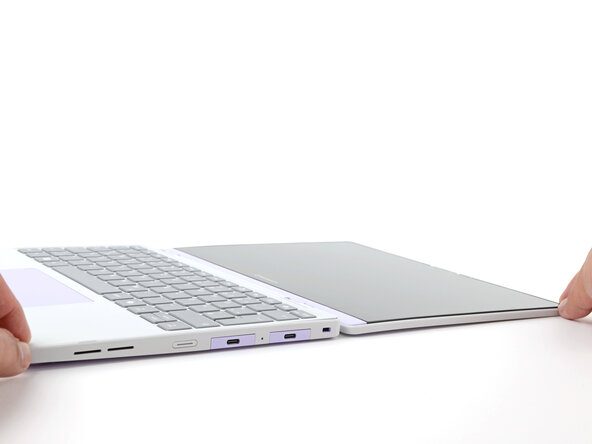
      • Open the laptop lid so that both the screen and the base lie flat on your work surface.

      Спросите у FixBot

      Добавить комментарий

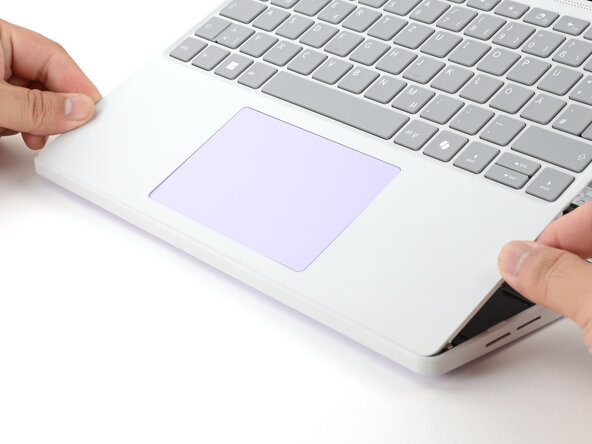
    5. Framework Laptop 12 Storage Replacement, Remove the Input Cover: шаг 6, изображение 1 из 3 Framework Laptop 12 Storage Replacement, Remove the Input Cover: шаг 6, изображение 2 из 3 Framework Laptop 12 Storage Replacement, Remove the Input Cover: шаг 6, изображение 3 из 3
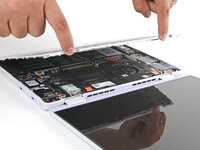
      • Use your fingers to grip the Input Cover in the hinge cutouts.

      • Lift upwards to swing the Input Cover up from the base of the laptop.

      • Magnets hold the Input Cover down, so you'll feel some resistance. If it feels stuck, check that you've fully loosened all the screws on the bottom of your laptop.

      • Remove the Input Cover.

      Спросите у FixBot

      Добавить комментарий

    1. Framework Laptop 12 Storage Replacement, Unlatch the SSD: шаг 7, изображение 1 из 2 Framework Laptop 12 Storage Replacement, Unlatch the SSD: шаг 7, изображение 2 из 2
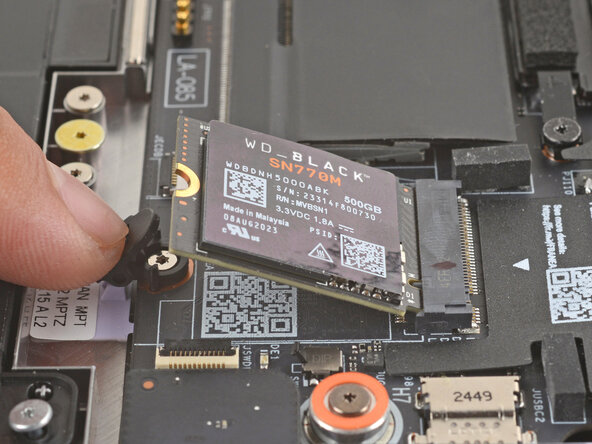
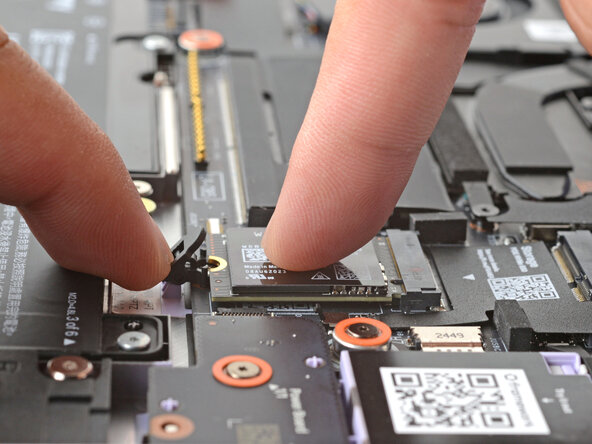
      • Use your finger to press down on the black SSD latch to unlatch the SSD.

      • The SSD will pop up to an angle when it's unlatched.

      Спросите у FixBot

      Добавить комментарий

    2. Framework Laptop 12 Storage Replacement, Remove the SSD: шаг 8, изображение 1 из 3 Framework Laptop 12 Storage Replacement, Remove the SSD: шаг 8, изображение 2 из 3 Framework Laptop 12 Storage Replacement, Remove the SSD: шаг 8, изображение 3 из 3
      • Grab the SSD by its edges and pull it out of its socket.

      • Remove the SSD.

      Спросите у FixBot

      Добавить комментарий

    1. Framework Laptop 12 Storage Replacement, Disassembly complete: шаг 9, изображение 1 из 1
      • Congratulations on completing disassembly! The remaining steps will show how to reassemble your Framework Laptop.

      Спросите у FixBot

      Добавить комментарий

    1. Framework Laptop 12 Storage Replacement, Install the SSD: шаг 10, изображение 1 из 2 Framework Laptop 12 Storage Replacement, Install the SSD: шаг 10, изображение 2 из 2
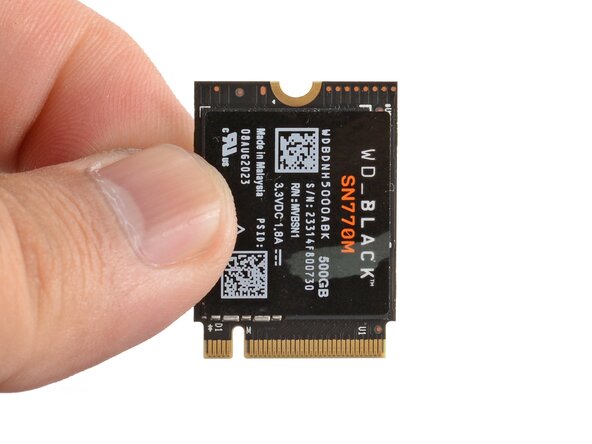
      • Hold the SSD by its edges. Don't touch the gold contacts with your fingers. If you do, wipe the contacts with a clean, lint-free cloth to remove any finger oils.

      • Align the SSD's gold contacts with its socket.

      • Insert the SSD into the socket at a shallow angle. The gold contacts should mostly be covered by the socket.

      • The SSD fits into the socket in one orientation. If it doesn't feel like it fits, try flipping the module.

      Спросите у FixBot

      Добавить комментарий

    2. Framework Laptop 12 Storage Replacement: шаг 11, изображение 1 из 3 Framework Laptop 12 Storage Replacement: шаг 11, изображение 2 из 3 Framework Laptop 12 Storage Replacement: шаг 11, изображение 3 из 3
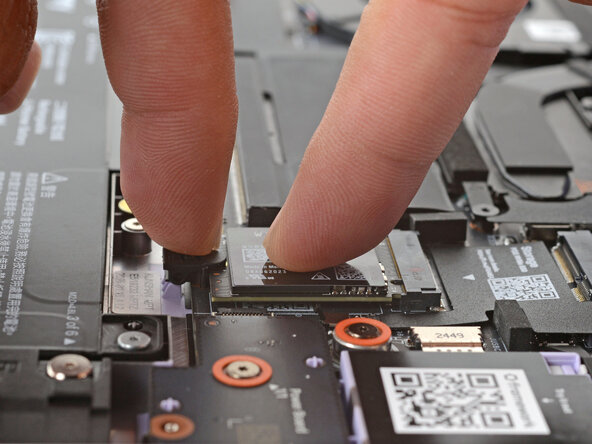
      • Use your finger to press down on the black SSD latch to keep it open.

      • Use another finger to press the SSD down until it lays flat.

      • If the SSD doesn't fit in the latch, you may need to insert the SSD further into its socket.

      • Use your finger to close the latch to secure the SSD.

      • You should hear a click, and the SSD should no longer pop up.

      Спросите у FixBot

      Добавить комментарий

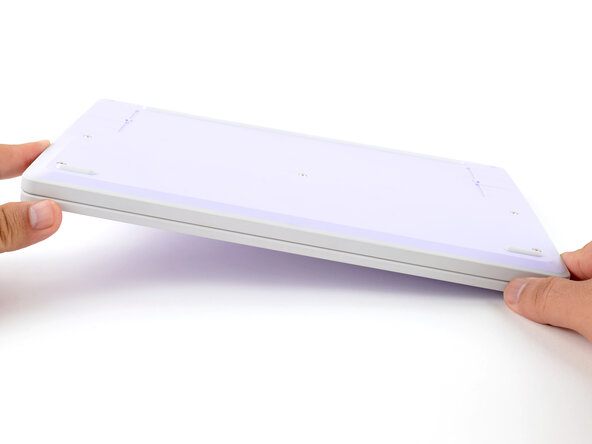
    1. Framework Laptop 12 Storage Replacement, Install the Input Cover: шаг 12, изображение 1 из 3 Framework Laptop 12 Storage Replacement, Install the Input Cover: шаг 12, изображение 2 из 3 Framework Laptop 12 Storage Replacement, Install the Input Cover: шаг 12, изображение 3 из 3
      • Angle the bottom edge of the Input Cover towards the base of the laptop.

      • Align and insert the bottom edge of the Input Cover into the base of the laptop.

      • Make sure the slots along the bottom edge of the Input Cover slide into the tabs in the base.

      • Lower the Input Cover's top edge onto the laptop until the magnets snap it in place.

      • Make sure the Input Cover sits neatly within the laptop frame and no corners are popping up.

      Спросите у FixBot

      Добавить комментарий

    2. Framework Laptop 12 Storage Replacement, Close and flip your laptop: шаг 13, изображение 1 из 2 Framework Laptop 12 Storage Replacement, Close and flip your laptop: шаг 13, изображение 2 из 2
      • Close the laptop lid.

      • Flip your laptop face-down on a clean work surface.

      Спросите у FixBot

      Добавить комментарий

    3. Framework Laptop 12 Storage Replacement, Tighten the bottom screws: шаг 14, изображение 1 из 2 Framework Laptop 12 Storage Replacement, Tighten the bottom screws: шаг 14, изображение 2 из 2
      • Use your Framework Screwdriver to tighten the eight captive T5 Torx screws on the bottom of your laptop.

      • Tighten the screws until they're snug. Don't over-tighten them, or you may strip the screws.

      Спросите у FixBot

      Добавить комментарий

Заключение

You finished fixing your Framework Laptop!

Take your e-waste to an R2 or e-Stewards certified recycler.

If you need help, contact Framework support.

Отменить: Я не выполнил это руководство.

Еще один человек закончил это руководство.

Arthur Shi

Участник с: 01/03/18

345 013 Репутация

Автор 915 руководств

Команда

Guide Team Участник Guide Team

Staff

10 членов

Автор 36 561 руководств

0 Комментарии к руководству

Добавить комментарий

Статистика просмотров:

За последние 24 часов: 2

За последние 7 дней: 10

За последние 30 дней: 55

За всё время: 868