Перейти к основному содержанию
Присоединяйся к сообществу ремонтников - Создай аккаунт

Google Stadia Controller Buttons Replacement

Выберете то, что вам нужно

    1. Google Stadia Controller Buttons Replacement, Loosen the screw cover adhesive: шаг 1, изображение 1 из 1
      • Apply a heated iOpener to the rear side of the Stadia controller where the screw cover is located to loosen the adhesive underneath. Apply the iOpener for at least two minutes.

      Спросите у FixBot

      Добавить комментарий

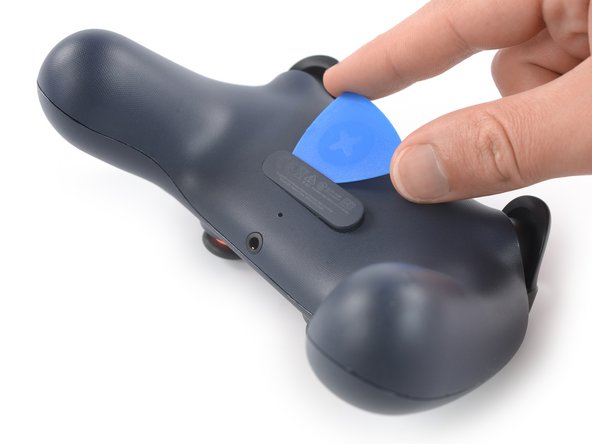
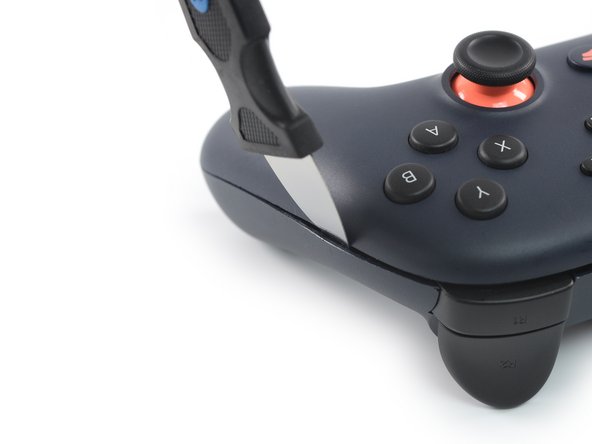
    2. Google Stadia Controller Buttons Replacement, Insert an opening pick: шаг 2, изображение 1 из 2 Google Stadia Controller Buttons Replacement, Insert an opening pick: шаг 2, изображение 2 из 2
      • Insert the tip of an opening pick into the gap between the plastic screw cover and the rear case of the controller.

      Спросите у FixBot

      Добавить комментарий

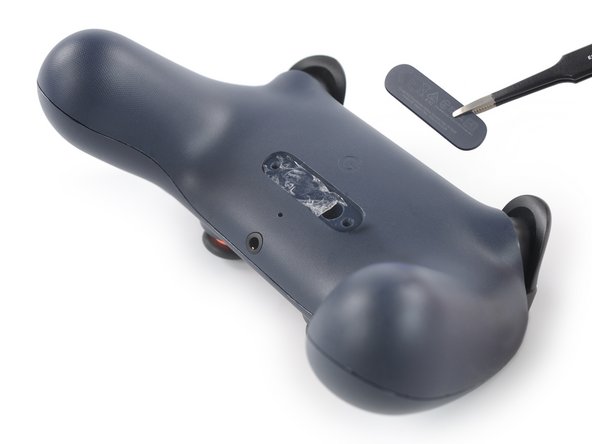
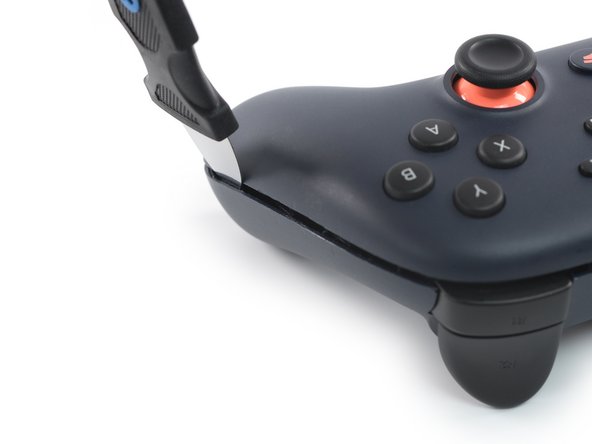
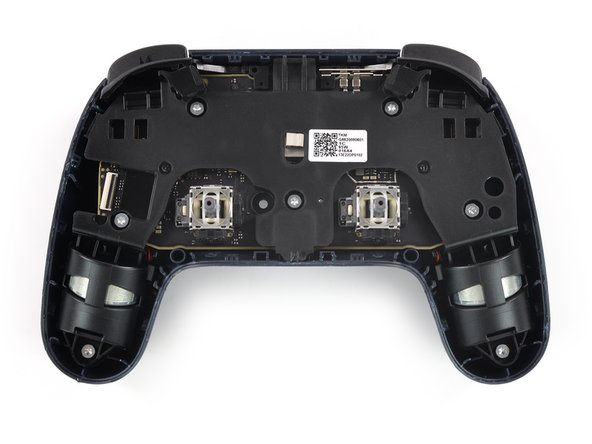
    3. Google Stadia Controller Buttons Replacement, Remove the screw cover: шаг 3, изображение 1 из 3 Google Stadia Controller Buttons Replacement, Remove the screw cover: шаг 3, изображение 2 из 3 Google Stadia Controller Buttons Replacement, Remove the screw cover: шаг 3, изображение 3 из 3
      Инструмент, используемый на этом этапе:
      Tweezers
      $4.99
      • Slide the opening pick along the screw cover to slice the adhesive.

      • Use a pair of tweezers or your fingers to remove the screw cover.

      • You might want to replace the screw cover adhesive during reassembly. Apply a bit of high-concentration isopropyl alcohol (>90%) to a Q-tip or use a cleaning pad to gently remove the leftover adhesive on the rear cover of the controller before installing new adhesive.

      Спросите у FixBot

      Добавить комментарий

    4. Google Stadia Controller Buttons Replacement, Unfasten the rear case screw: шаг 4, изображение 1 из 1
      • Use a Torx T8 screwdriver to remove the 9.6 mm-long screw securing the rear case.

      Спросите у FixBot

      Добавить комментарий

    5. Google Stadia Controller Buttons Replacement, Disassembly information: шаг 5, изображение 1 из 2 Google Stadia Controller Buttons Replacement, Disassembly information: шаг 5, изображение 2 из 2
      • The front cover assembly of the Stadia controller is held in place by various tight plastic clamps. They are very hard to open and snap back in place easily.

      • The opening procedure requires some force, however, try to avoid damaging your controller case along the way.

      Спросите у FixBot

      Добавить комментарий

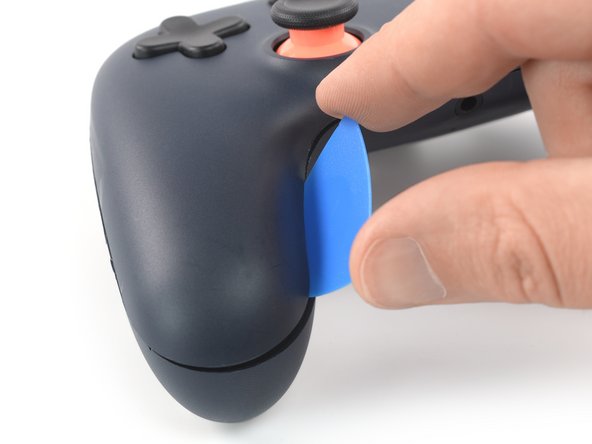
    6. Google Stadia Controller Buttons Replacement, Pry open the stadia controller: шаг 6, изображение 1 из 3 Google Stadia Controller Buttons Replacement, Pry open the stadia controller: шаг 6, изображение 2 из 3 Google Stadia Controller Buttons Replacement, Pry open the stadia controller: шаг 6, изображение 3 из 3
      • Insert a Jimmy into the gap between the front and back cover assembly at the inside of the left controller handle.

      • To make sure you insert the Jimmy at the correct position where the clamps are located, you can use this photo.

      • Tilt the Jimmy upwards and push it into the gap between the covers at the same time to pry open the plastic clamp. You should hear a clack noise once the clamp pops open.

      • Once the clamp is completely open, the gap between the two controller covers should be about 2-3 mm wide.

      Спросите у FixBot

      Добавить комментарий

    7. Google Stadia Controller Buttons Replacement, Insert an opening pick: шаг 7, изображение 1 из 2 Google Stadia Controller Buttons Replacement, Insert an opening pick: шаг 7, изображение 2 из 2
      • Insert an opening pick in a steep angle into the gap you created to prevent the first clamp from popping back into its closed position.

      Спросите у FixBot

      Добавить комментарий

    8. Google Stadia Controller Buttons Replacement, Pry open the Stadia controller: шаг 8, изображение 1 из 3 Google Stadia Controller Buttons Replacement, Pry open the Stadia controller: шаг 8, изображение 2 из 3 Google Stadia Controller Buttons Replacement, Pry open the Stadia controller: шаг 8, изображение 3 из 3
      • To make sure you insert the Jimmy at the correct position where the clamps are located, you can use this photo.

      • Insert a Jimmy into the gap between the front and back cover assembly at the outside of the left bottom end of the controller handle.

      • Repeat the previous opening procedure to open the three plastic clamps at the outside of the left controller handle.

      Спросите у FixBot

      Добавить комментарий

    9. Google Stadia Controller Buttons Replacement: шаг 9, изображение 1 из 3 Google Stadia Controller Buttons Replacement: шаг 9, изображение 2 из 3 Google Stadia Controller Buttons Replacement: шаг 9, изображение 3 из 3
      • Insert a Jimmy into the gap between the front and back cover assembly between the left shoulder button and the charging port at the top edge of the Stadia controller.

      • Tilt the Jimmy upwards and push it into the gap between the covers at the same time to pry open the plastic clamp. You should hear a clack noise once the clamp pops open.

      • Repeat the previous procedure at the clamp between the right shoulder button and the charging port.

      Спросите у FixBot

      Добавить комментарий

    10. Google Stadia Controller Buttons Replacement: шаг 10, изображение 1 из 3 Google Stadia Controller Buttons Replacement: шаг 10, изображение 2 из 3 Google Stadia Controller Buttons Replacement: шаг 10, изображение 3 из 3
      • Insert a Jimmy into the gap between the front and back cover assembly at the right edge of the right controller handle.

      • Repeat the previous opening procedure to open the three plastic clamps at the outside of the right controller handle.

      Спросите у FixBot

      Добавить комментарий

    11. Google Stadia Controller Buttons Replacement: шаг 11, изображение 1 из 2 Google Stadia Controller Buttons Replacement: шаг 11, изображение 2 из 2
      • Insert a Jimmy into the gap between the front and back cover assembly at the inside of the right controller handle.

      • Repeat the previous opening procedure to open plastic clamps at the inside of the left controller handle.

      Спросите у FixBot

      Добавить комментарий

    12. Google Stadia Controller Buttons Replacement: шаг 12, изображение 1 из 3 Google Stadia Controller Buttons Replacement: шаг 12, изображение 2 из 3 Google Stadia Controller Buttons Replacement: шаг 12, изображение 3 из 3
      • Insert a Jimmy into the gap between the front and back cover assembly at the bottom edge of the Stadia controller right to the headphone jack.

      • Tilt the Jimmy upwards and push it into the gap between the covers at the same time to pry open the plastic clamp.

      • Repeat the previous procedure at the clamp left to the headphone jack.

      • Do not try to remove the front cover assembly all the way yet. It's still connected to the rear cover assembly.

      Спросите у FixBot

      Добавить комментарий

    13. Google Stadia Controller Buttons Replacement, Unfold the front cover assembly: шаг 13, изображение 1 из 3 Google Stadia Controller Buttons Replacement, Unfold the front cover assembly: шаг 13, изображение 2 из 3 Google Stadia Controller Buttons Replacement, Unfold the front cover assembly: шаг 13, изображение 3 из 3
      • Avoid straining the front cover assembly cable during this step.

      • Carefully lift the front cover assembly and fold it to the left side of the Google Stadia controller.

      Спросите у FixBot

      Добавить комментарий

    1. Google Stadia Controller Buttons Replacement, Remove the adhesive tape: шаг 14, изображение 1 из 2 Google Stadia Controller Buttons Replacement, Remove the adhesive tape: шаг 14, изображение 2 из 2
      Инструмент, используемый на этом этапе:
      Tweezers
      $4.99
      • Use a pair of tweezers to peel the clear protective tape off the ZIF connector on the left side of the rear case.

      Спросите у FixBot

      Добавить комментарий

    2. Google Stadia Controller Buttons Replacement, Open the ZIF connector: шаг 15, изображение 1 из 2 Google Stadia Controller Buttons Replacement, Open the ZIF connector: шаг 15, изображение 2 из 2
      • Use the pointed end of a spudger to open the ZIF connector holding the button contact board cable in place.

      Спросите у FixBot

      Добавить комментарий

    3. Google Stadia Controller Buttons Replacement, Disconnect the flex cable: шаг 16, изображение 1 из 3 Google Stadia Controller Buttons Replacement, Disconnect the flex cable: шаг 16, изображение 2 из 3 Google Stadia Controller Buttons Replacement, Disconnect the flex cable: шаг 16, изображение 3 из 3
      • Use a pair of tweezers to carefully disconnect the flex cable of the button unit by pulling it out of the ZIF connector in a flat angle.

      • Separate the front from the rear assembly.

      • Remove the thumbsticks by pulling them straight upwards for an easier handling in case you want to do further disassembly.

      Спросите у FixBot

      Добавить комментарий

    1. Google Stadia Controller Buttons Replacement, Unfasten the screws: шаг 17, изображение 1 из 1
      • Use a Torx T6 screwdriver to remove the three 6.2 mm-long screws securing the front button contact board.

      Спросите у FixBot

      Добавить комментарий

    2. Google Stadia Controller Buttons Replacement, Remove the front button contact board: шаг 18, изображение 1 из 2 Google Stadia Controller Buttons Replacement, Remove the front button contact board: шаг 18, изображение 2 из 2
      Спросите у FixBot

      Добавить комментарий

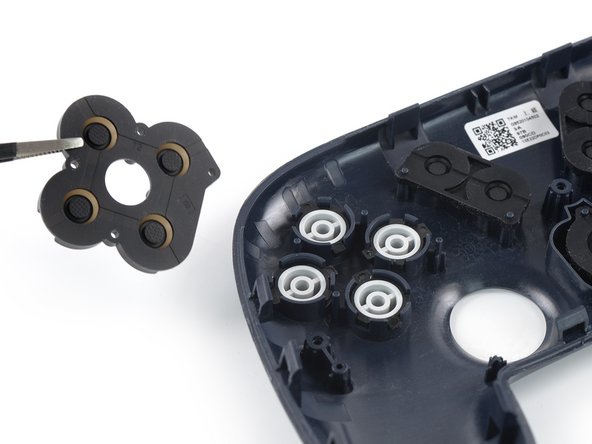
    3. Google Stadia Controller Buttons Replacement, Remove the rubber gasket: шаг 19, изображение 1 из 2 Google Stadia Controller Buttons Replacement, Remove the rubber gasket: шаг 19, изображение 2 из 2
      Инструмент, используемый на этом этапе:
      Tweezers
      $4.99
      • Use a pair of tweezers or your fingers to remove the rubber gasket on the A, B, X and Y buttons.

      Спросите у FixBot

      Добавить комментарий

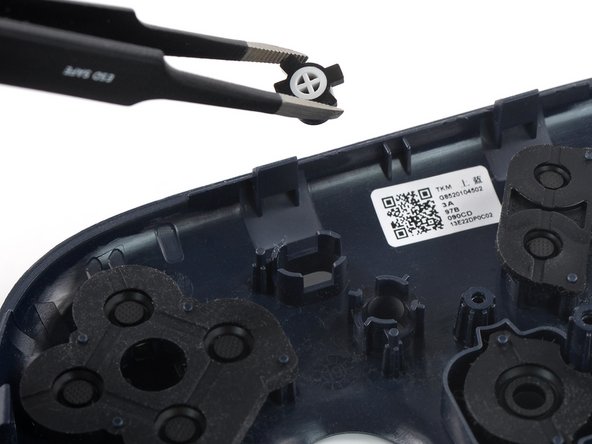
    4. Google Stadia Controller Buttons Replacement, Remove the buttons: шаг 20, изображение 1 из 3 Google Stadia Controller Buttons Replacement, Remove the buttons: шаг 20, изображение 2 из 3 Google Stadia Controller Buttons Replacement, Remove the buttons: шаг 20, изображение 3 из 3
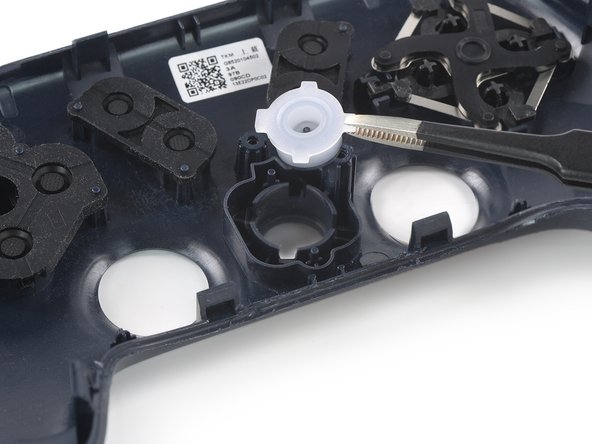
      • Use a pair of tweezers to remove the A, B, X and Y buttons.

      • Since the buttons are equipped with little plastic nibs for orientation, there isn't a risk of inserting them in the wrong position during reassembly.

      Спросите у FixBot

      Добавить комментарий

    5. Google Stadia Controller Buttons Replacement, Remove the rubber gasket: шаг 21, изображение 1 из 2 Google Stadia Controller Buttons Replacement, Remove the rubber gasket: шаг 21, изображение 2 из 2
      • Use a pair of tweezers or your fingers to remove the rubber gasket on the menu and the capture button.

      Спросите у FixBot

      Добавить комментарий

    6. Google Stadia Controller Buttons Replacement, Remove the buttons: шаг 22, изображение 1 из 3 Google Stadia Controller Buttons Replacement, Remove the buttons: шаг 22, изображение 2 из 3 Google Stadia Controller Buttons Replacement, Remove the buttons: шаг 22, изображение 3 из 3
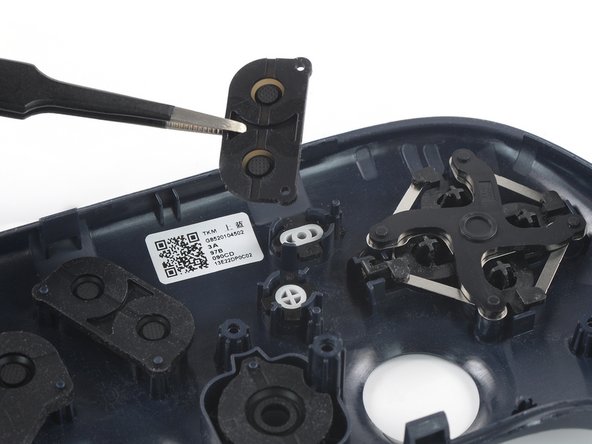
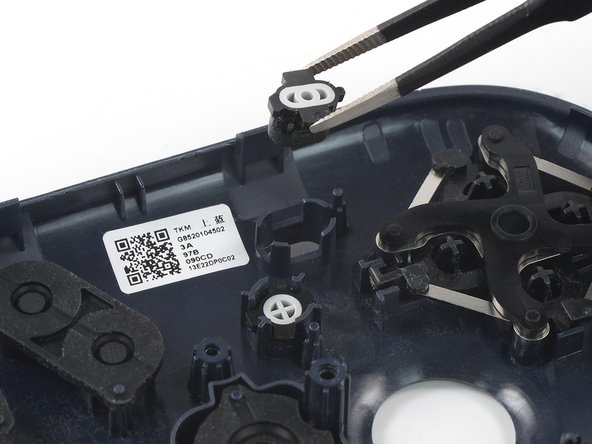
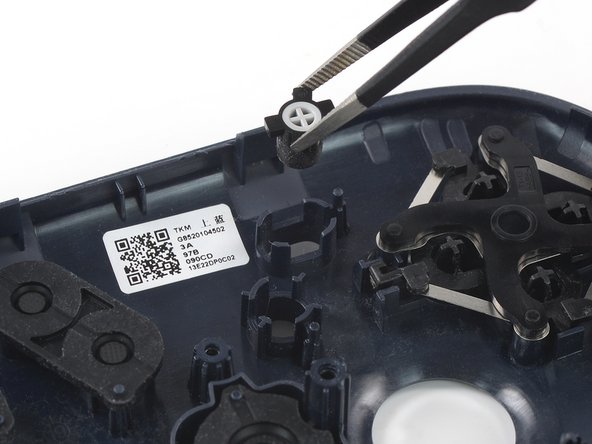
      • Use a pair of tweezers to remove the menu and capture button.

      Спросите у FixBot

      Добавить комментарий

    7. Google Stadia Controller Buttons Replacement, Remove the rubber gasket: шаг 23, изображение 1 из 2 Google Stadia Controller Buttons Replacement, Remove the rubber gasket: шаг 23, изображение 2 из 2
      • Use a pair of tweezers or your fingers to remove the rubber gasket on the Stadia button.

      Спросите у FixBot

      Добавить комментарий

    8. Google Stadia Controller Buttons Replacement, Remove the button: шаг 24, изображение 1 из 2 Google Stadia Controller Buttons Replacement, Remove the button: шаг 24, изображение 2 из 2
      • Use a pair of tweezers to remove the Stadia button.

      Спросите у FixBot

      Добавить комментарий

    9. Google Stadia Controller Buttons Replacement, Remove the rubber gasket: шаг 25, изображение 1 из 2 Google Stadia Controller Buttons Replacement, Remove the rubber gasket: шаг 25, изображение 2 из 2
      • Use a pair of tweezers or your fingers to remove the rubber gasket on the Google assistant and option button.

      Спросите у FixBot

      Добавить комментарий

    10. Google Stadia Controller Buttons Replacement, Remove the buttons: шаг 26, изображение 1 из 3 Google Stadia Controller Buttons Replacement, Remove the buttons: шаг 26, изображение 2 из 3 Google Stadia Controller Buttons Replacement, Remove the buttons: шаг 26, изображение 3 из 3
      • Use a pair of tweezers to remove the Google assistant and option button.

      Спросите у FixBot

      Добавить комментарий

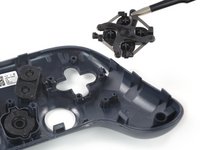
    11. Google Stadia Controller Buttons Replacement, Remove the direction pad: шаг 27, изображение 1 из 3 Google Stadia Controller Buttons Replacement, Remove the direction pad: шаг 27, изображение 2 из 3 Google Stadia Controller Buttons Replacement, Remove the direction pad: шаг 27, изображение 3 из 3
      • Use a pair of tweezers or your fingers to remove the direction pad.

      Спросите у FixBot

      Добавить комментарий

Заключение

To reassemble your device, follow these instructions in reverse order.

Take your e-waste to an R2 or e-Stewards certified recycler.

Repair didn’t go as planned? Check out our Answers community for troubleshooting help.

Отменить: Я не выполнил это руководство.

Еще один человек закончил это руководство.

Dominik Schnabelrauch

Участник с: 11/23/16

262 587 Репутация

Автор 682 руководств

Команда

iFixit Участник iFixit

Staff

123 членов

Автор 48 729 руководств

0 Комментарии к руководству

Добавить комментарий

Статистика просмотров:

За последние 24 часов: 4

За последние 7 дней: 15

За последние 30 дней: 70

За всё время: 3,087