Перейти к основному содержанию
Присоединяйся к сообществу ремонтников - Создай аккаунт

Logitech G502 Hero Motherboard Replacement

Выберете то, что вам нужно

    1. Logitech G502 Hero Motherboard Replacement, Prepare your mouse for disassembly: шаг 1, изображение 1 из 1
      • Before starting your repair, unplug the mouse.

      • Throughout your repair, it may be helpful to lay your mouse on a soft cloth to stabilize it and prevent damage while you work.

      Спросите у FixBot

      Добавить комментарий

    2. Logitech G502 Hero Motherboard Replacement, Remove the feet: шаг 2, изображение 1 из 2 Logitech G502 Hero Motherboard Replacement, Remove the feet: шаг 2, изображение 2 из 2
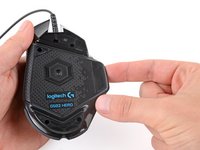
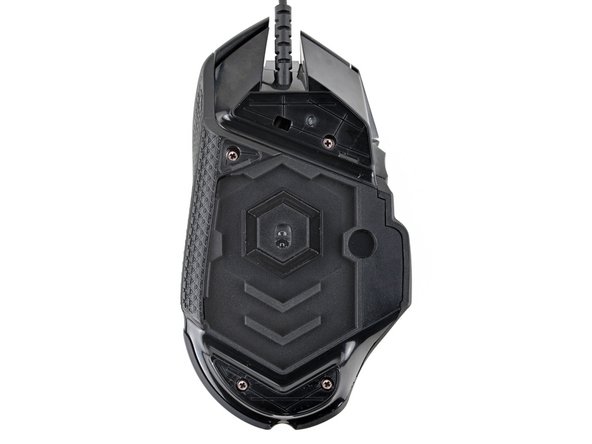
      • The feet are secured to the bottom of the mouse with adhesive. In order to cleanly remove them, the adhesive needs to be thoroughly heated.

      • Heat an iOpener and lay it on the mouse feet for one minute to heat the adhesive.

      • Alternatively, you can use a hair dryer on the Low heat setting to soften the adhesive.

      • If you're using a hair dryer, only heat the feet a few seconds at a time or you may warp the plastic shell.

      Спросите у FixBot

      Добавить комментарий

    3. Logitech G502 Hero Motherboard Replacement: шаг 3, изображение 1 из 3 Logitech G502 Hero Motherboard Replacement: шаг 3, изображение 2 из 3 Logitech G502 Hero Motherboard Replacement: шаг 3, изображение 3 из 3
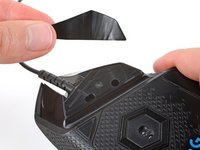
      • The feet have two layers—a rubberized one and an adhesive pad underneath.

      • If you're reusing the feet, be very careful not to separate the two layers or damage the feet.

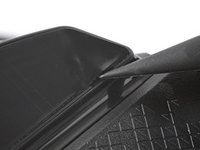
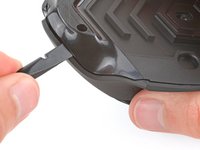
      • Carefully slide the point of a spudger under the large foot near the front of the mouse, making sure it goes under both the foot and its adhesive pad.

      • The foot recesses have a small notch that makes it easier to slide your spudger under.

      • Gently slide the spudger farther under the foot and lift until you can grip the pad with your fingers.

      Спросите у FixBot

      Добавить комментарий

    4. Logitech G502 Hero Motherboard Replacement: шаг 4, изображение 1 из 3 Logitech G502 Hero Motherboard Replacement: шаг 4, изображение 2 из 3 Logitech G502 Hero Motherboard Replacement: шаг 4, изображение 3 из 3
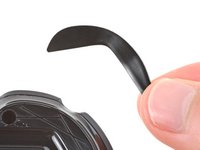
      • Peel up and remove the foot.

      • If the rubber layer separates from its adhesive pad, use the same process to remove the pad.

      Спросите у FixBot

      Добавить комментарий

    5. Logitech G502 Hero Motherboard Replacement: шаг 5, изображение 1 из 3 Logitech G502 Hero Motherboard Replacement: шаг 5, изображение 2 из 3 Logitech G502 Hero Motherboard Replacement: шаг 5, изображение 3 из 3
      Спросите у FixBot

      Добавить комментарий

    6. Logitech G502 Hero Motherboard Replacement, Reassembly information: шаг 6, изображение 1 из 3 Logitech G502 Hero Motherboard Replacement, Reassembly information: шаг 6, изображение 2 из 3 Logitech G502 Hero Motherboard Replacement, Reassembly information: шаг 6, изображение 3 из 3
      • To install a new foot:

      • If any of the feet got damaged during removal or separated from their adhesive pads, replace them.

      • Use a spudger to carefully scrape up and remove any remaining adhesive bits.

      • Use isopropyl alcohol and a microfiber cloth to thoroughly clean all adhesive residue from the foot recesses. Allow the surface to completely dry.

      • Remove the feet from their backing and firmly press them into place.

      Спросите у FixBot

      Добавить комментарий

    1. Logitech G502 Hero Motherboard Replacement, Open your mouse: шаг 7, изображение 1 из 3 Logitech G502 Hero Motherboard Replacement, Open your mouse: шаг 7, изображение 2 из 3 Logitech G502 Hero Motherboard Replacement, Open your mouse: шаг 7, изображение 3 из 3
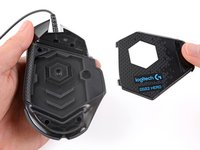
      • Lift the weight door by its tab and remove it.

      • If you have weights in the compartment, remove them.

      Спросите у FixBot

      Добавить комментарий

    2. Logitech G502 Hero Motherboard Replacement: шаг 8, изображение 1 из 2 Logitech G502 Hero Motherboard Replacement: шаг 8, изображение 2 из 2
      • Use a Phillips screwdriver to remove the four 5.5 mm‑long screws securing the bottom shell.

      Спросите у FixBot

      Добавить комментарий

    3. Logitech G502 Hero Motherboard Replacement: шаг 9, изображение 1 из 3 Logitech G502 Hero Motherboard Replacement: шаг 9, изображение 2 из 3 Logitech G502 Hero Motherboard Replacement: шаг 9, изображение 3 из 3
      • Tight plastic clips secure the top and bottom shells. During the next few steps you should feel and hear "clicks" as the clips release.

      • Insert the flat end of a spudger between the top and bottom shells, near the back of the mouse.

      • Twist the spudger to unclip the shells.

      Спросите у FixBot

      Добавить комментарий

    4. Logitech G502 Hero Motherboard Replacement: шаг 10, изображение 1 из 3 Logitech G502 Hero Motherboard Replacement: шаг 10, изображение 2 из 3 Logitech G502 Hero Motherboard Replacement: шаг 10, изображение 3 из 3
      • Insert the flat end of a spudger between the textured edge of the top and bottom shells, near the back of the mouse.

      • Slide the spudger towards the front of the mouse and intermittently twist, stopping near the screw hole.

      • Leave the spudger inserted for the next step.

      Спросите у FixBot

      Добавить комментарий

    5. Logitech G502 Hero Motherboard Replacement: шаг 11, изображение 1 из 3 Logitech G502 Hero Motherboard Replacement: шаг 11, изображение 2 из 3 Logitech G502 Hero Motherboard Replacement: шаг 11, изображение 3 из 3
      • Push the spudger into the mouse and twist to unclip the shells.

      Спросите у FixBot

      Добавить комментарий

    6. Logitech G502 Hero Motherboard Replacement: шаг 12, изображение 1 из 3 Logitech G502 Hero Motherboard Replacement: шаг 12, изображение 2 из 3 Logitech G502 Hero Motherboard Replacement: шаг 12, изображение 3 из 3
      • Insert the flat end of a spudger between the top and bottom shells, near the back of the mouse.

      • Slide the spudger towards the thumb rest and push in to unclip the shells.

      Спросите у FixBot

      Добавить комментарий

    7. Logitech G502 Hero Motherboard Replacement: шаг 13, изображение 1 из 3 Logitech G502 Hero Motherboard Replacement: шаг 13, изображение 2 из 3 Logitech G502 Hero Motherboard Replacement: шаг 13, изображение 3 из 3
      • Insert the flat end of a spudger between the top and bottom shells, near the G8 and DPI shift () buttons at the front of the mouse.

      • Pry up with the spudger and push the shells apart to unclip them.

      • Unclipping this part of the mouse is tricky and may take a few tries. Be patient and don't pry too hard, or you may break one of the clips.

      Спросите у FixBot

      Добавить комментарий

    8. Logitech G502 Hero Motherboard Replacement: шаг 14, изображение 1 из 3 Logitech G502 Hero Motherboard Replacement: шаг 14, изображение 2 из 3 Logitech G502 Hero Motherboard Replacement: шаг 14, изображение 3 из 3
      • At this point, the shells should be fully separated. If they're not, repeat the previous unclipping steps with your spudger.

      • Lift the top shell straight up and remove it, making sure the main mouse cable stays attached to the bottom shell.

      • During reassembly, put the top shell back in place and work your way around the perimeter firmly squeezing the shells together to reengage the clips.

      Спросите у FixBot

      Добавить комментарий

    1. Logitech G502 Hero Motherboard Replacement, Remove the side buttons board: шаг 15, изображение 1 из 3 Logitech G502 Hero Motherboard Replacement, Remove the side buttons board: шаг 15, изображение 2 из 3 Logitech G502 Hero Motherboard Replacement, Remove the side buttons board: шаг 15, изображение 3 из 3
      • You don't need to remove the side buttons board to access the scroll wheel, but it makes it easier.

      • Gently lift the side buttons board straight up and out of its slot.

      • Don't try to fully remove the board yet, as it's still connected by a cable.

      Спросите у FixBot

      Добавить комментарий

    2. Logitech G502 Hero Motherboard Replacement: шаг 16, изображение 1 из 3 Logitech G502 Hero Motherboard Replacement: шаг 16, изображение 2 из 3 Logitech G502 Hero Motherboard Replacement: шаг 16, изображение 3 из 3
      • Hold the button board out of the way so you can access its connector on the motherboard.

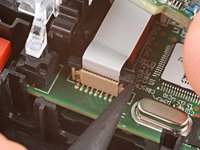
      • Use the point of a spudger to push up on alternating sides of the connector's plastic latch until it's in the unlocked position.

      • You should feel the latch pop up into the unlocked position. Don't push too far, or the latch may come completely off the connector.

      Спросите у FixBot

      Добавить комментарий

    3. Logitech G502 Hero Motherboard Replacement: шаг 17, изображение 1 из 2 Logitech G502 Hero Motherboard Replacement: шаг 17, изображение 2 из 2
      • Gently pull the board straight up so the cable comes out of its socket.

      • The cable should come out easily. If you feel any resistance, push the latch up a little more and try again.

      • During reassembly:

      • Insert the cable into its socket so the blue tab is on the same side as the connector's latch.

      • Use the flat end of a spudger to push the latch straight down into its locked position.

      Спросите у FixBot

      Добавить комментарий

    1. Logitech G502 Hero Motherboard Replacement, Remove the scroll wheel: шаг 18, изображение 1 из 3 Logitech G502 Hero Motherboard Replacement, Remove the scroll wheel: шаг 18, изображение 2 из 3 Logitech G502 Hero Motherboard Replacement, Remove the scroll wheel: шаг 18, изображение 3 из 3
      • Use the point of a spudger to push out and remove the locking pin from the plastic scroll wheel support in the center of the motherboard.

      • During reassembly, insert the locking pin so the curved end is facing down.

      Спросите у FixBot

      Добавить комментарий

    2. Logitech G502 Hero Motherboard Replacement: шаг 19, изображение 1 из 3 Logitech G502 Hero Motherboard Replacement: шаг 19, изображение 2 из 3 Logitech G502 Hero Motherboard Replacement: шаг 19, изображение 3 из 3
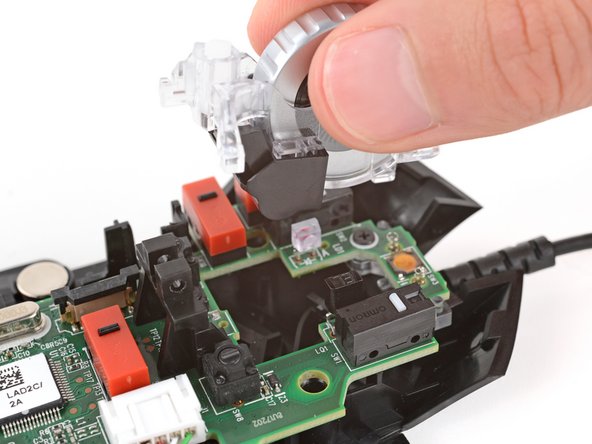
      • Gently pull the scroll wheel towards the front of the mouse and lift to remove it.

      • Be careful not to lose the two small springs near the front of the mouse.

      Спросите у FixBot

      Добавить комментарий

    1. Logitech G502 Hero Motherboard Replacement, Remove the motherboard: шаг 20, изображение 1 из 3 Logitech G502 Hero Motherboard Replacement, Remove the motherboard: шаг 20, изображение 2 из 3 Logitech G502 Hero Motherboard Replacement, Remove the motherboard: шаг 20, изображение 3 из 3
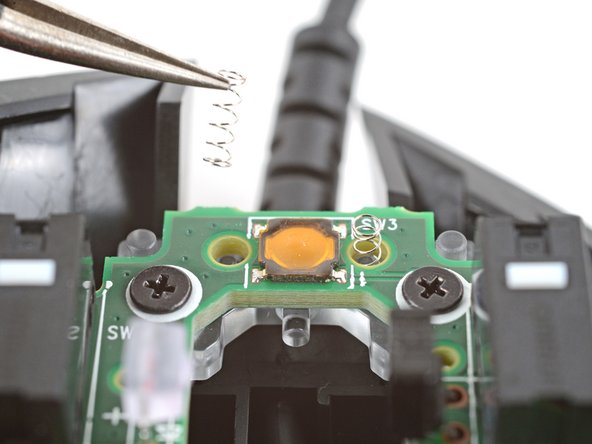
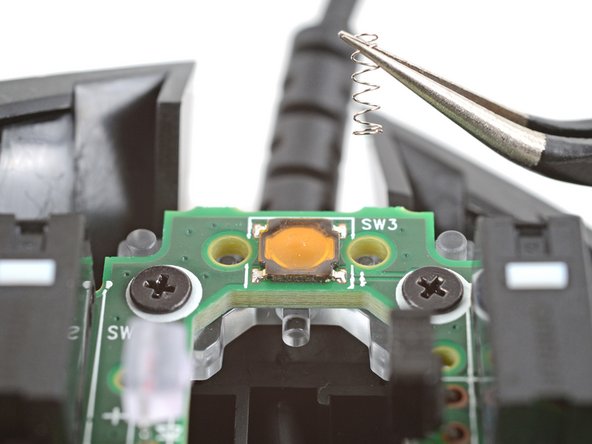
      • Use a pair of tweezers to carefully remove the two small springs near the front of the mouse.

      • Be careful, these springs can pop out very easily!

      Спросите у FixBot

      Добавить комментарий

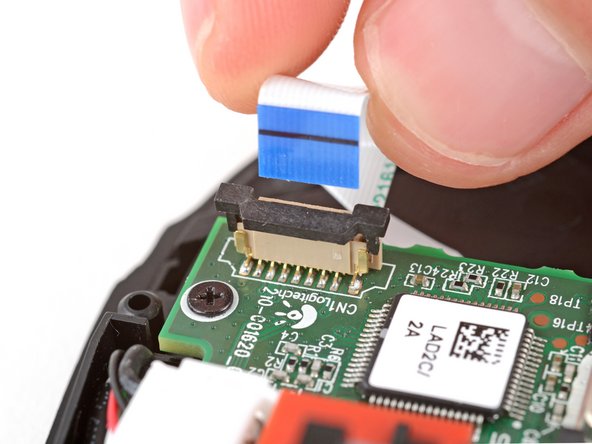
    2. Logitech G502 Hero Motherboard Replacement: шаг 21, изображение 1 из 3 Logitech G502 Hero Motherboard Replacement: шаг 21, изображение 2 из 3 Logitech G502 Hero Motherboard Replacement: шаг 21, изображение 3 из 3
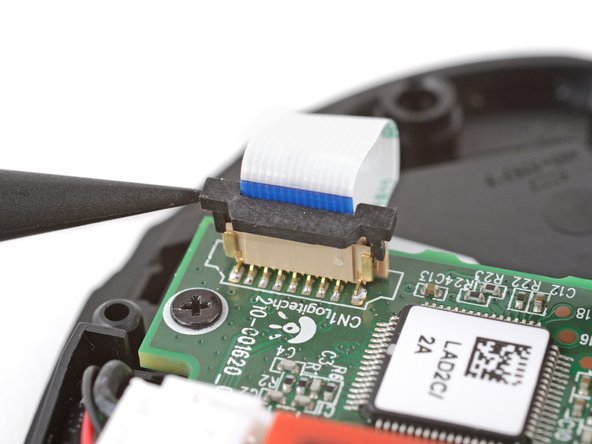
      • Use the point of a spudger to push up on alternating sides of the plastic latch on the connector near the bottom corner of the motherboard.

      • You should feel the latch pop up into the unlocked position. Don't push too far, or the latch may come completely off the connector.

      Спросите у FixBot

      Добавить комментарий

    3. Logitech G502 Hero Motherboard Replacement: шаг 22, изображение 1 из 3 Logitech G502 Hero Motherboard Replacement: шаг 22, изображение 2 из 3 Logitech G502 Hero Motherboard Replacement: шаг 22, изображение 3 из 3
      • Pull the cable straight up and out of its socket.

      • The cable should come out easily. If you feel any resistance, push the latch up a little more and try again.

      • During reassembly, insert the cable into its socket and use the flat end of a spudger to push the latch down into its locked position.

      Спросите у FixBot

      Добавить комментарий

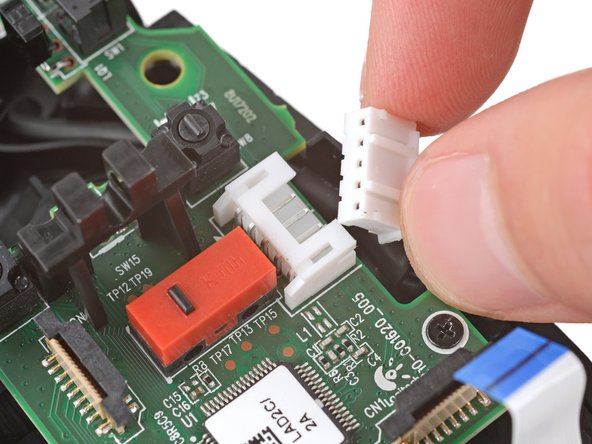
    4. Logitech G502 Hero Motherboard Replacement: шаг 23, изображение 1 из 3 Logitech G502 Hero Motherboard Replacement: шаг 23, изображение 2 из 3 Logitech G502 Hero Motherboard Replacement: шаг 23, изображение 3 из 3
      • Insert each arm of a pair of angled tweezers into the cutouts on the outer edges of the mouse cable connector, located near the edge of the motherboard.

      • Use the tweezers to gently push the connector completely out of its socket.

      • During reassembly, push on the edges of the connector with the flat end of a spudger until the connector slides fully into its socket.

      Спросите у FixBot

      Добавить комментарий

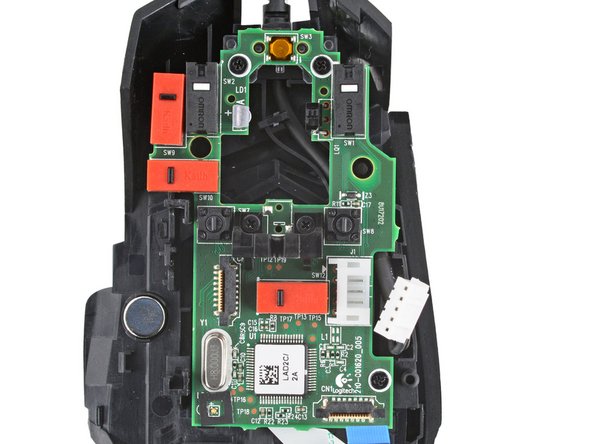
    5. Logitech G502 Hero Motherboard Replacement: шаг 24, изображение 1 из 2 Logitech G502 Hero Motherboard Replacement: шаг 24, изображение 2 из 2
      • Use a Phillips screwdriver to remove the five 5.5 mm‑long screws securing the motherboard.

      Спросите у FixBot

      Добавить комментарий

    6. Logitech G502 Hero Motherboard Replacement: шаг 25, изображение 1 из 2 Logitech G502 Hero Motherboard Replacement: шаг 25, изображение 2 из 2
      • Remove the plastic scroll wheel support from the center of the motherboard.

      Спросите у FixBot

      Добавить комментарий

    7. Logitech G502 Hero Motherboard Replacement: шаг 26, изображение 1 из 2 Logitech G502 Hero Motherboard Replacement: шаг 26, изображение 2 из 2
      • Lift the motherboard straight up and remove it.

      • During reassembly, use the screw holes and their corresponding posts to align the board.

      Спросите у FixBot

      Добавить комментарий

Заключение

To reassemble your device, follow these instructions in reverse order.

Take your e-waste to an R2 or e-Stewards certified recycler.

Repair didn’t go as planned? Try some basic troubleshooting, or ask our Answers community for help.

Отменить: Я не выполнил это руководство.

Еще один человек закончил это руководство.

Spencer Day

Участник с: 09/14/22

198 620 Репутация

Автор 1 243 руководств

Команда

iFixit Участник iFixit

Staff

123 членов

Автор 56 523 руководств

2 Комментарии к руководству

So where do we get a spare motherboard from since it seems Logitech didn't partner to make all their parts available?

Valid - Ответить Поделиться

Y donde se compra la placa para cambiarla?

fernando lopez sepulveda - Ответить Поделиться

Добавить комментарий

Статистика просмотров:

За последние 24 часов: 10

За последние 7 дней: 92

За последние 30 дней: 366

За всё время: 5,873