Перейти к основному содержанию
Присоединяйся к сообществу ремонтников - Создай аккаунт

Motorola Edge Motherboard Replacement

Выберете то, что вам нужно

  1. Motorola Edge Motherboard Replacement, Find the SIM tray: шаг 1, изображение 1 из 1
    • Find the SIM tray located at the top of the phone.

    Спросите у FixBot

    Добавить комментарий

  2. Motorola Edge Motherboard Replacement, Eject the SIM tray: шаг 2, изображение 1 из 2 Motorola Edge Motherboard Replacement, Eject the SIM tray: шаг 2, изображение 2 из 2
    • Insert a SIM eject tool or SIM eject bit into the small hole in the SIM card tray.

    • If the tool you're using doesn't fit, don't force it. Forcing a tool may cause it to get stuck or break inside the ejection port.

    • Press to eject the tray.

    Спросите у FixBot

    Добавить комментарий

  3. Motorola Edge Motherboard Replacement, Remove the SIM card tray assembly: шаг 3, изображение 1 из 3 Motorola Edge Motherboard Replacement, Remove the SIM card tray assembly: шаг 3, изображение 2 из 3 Motorola Edge Motherboard Replacement, Remove the SIM card tray assembly: шаг 3, изображение 3 из 3
    • Remove the SIM card tray from the phone.

    Спросите у FixBot

    Добавить комментарий

  4. Motorola Edge Motherboard Replacement, Heat the bottom edge: шаг 4, изображение 1 из 1
    • Completely power off your phone before you begin.

    • Heat an iOpener, then apply it along the bottom edge of the back cover for two minutes.

    • A hair dryer, heat gun, or hot plate may also be used, but be careful not to overheat the phone because the display and internal battery are both susceptible to heat damage.

    Спросите у FixBot

    Добавить комментарий

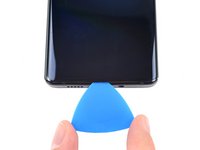
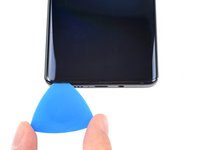
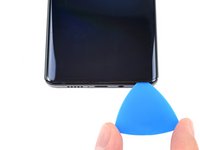
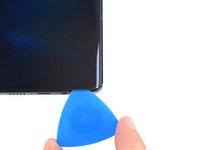
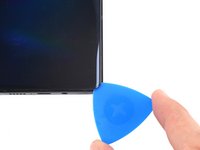
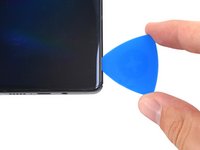
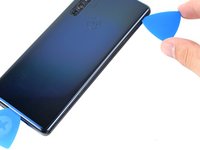
  5. Motorola Edge Motherboard Replacement, Separate the bottom adhesive: шаг 5, изображение 1 из 3 Motorola Edge Motherboard Replacement, Separate the bottom adhesive: шаг 5, изображение 2 из 3 Motorola Edge Motherboard Replacement, Separate the bottom adhesive: шаг 5, изображение 3 из 3
    • Apply a suction cup to the back of the phone, as close to the center of the bottom edge as possible.

    • Pull up on the suction cup with strong, steady force to create a gap between the back cover and the frame.

    • Depending on the age of your phone, this may be difficult. If you're having trouble, apply more heat to the edge and try again.

    • Insert an opening pick into the gap.

    Спросите у FixBot

    Добавить комментарий

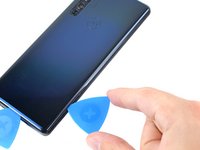
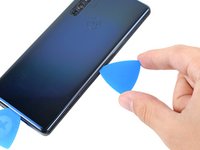
  6. Motorola Edge Motherboard Replacement, Slice the bottom adhesive: шаг 6, изображение 1 из 3 Motorola Edge Motherboard Replacement, Slice the bottom adhesive: шаг 6, изображение 2 из 3 Motorola Edge Motherboard Replacement, Slice the bottom adhesive: шаг 6, изображение 3 из 3
    • Slide the pick back and forth along the bottom edge to slice through the adhesive.

    • Leave the pick in to prevent the adhesive from resealing.

    Спросите у FixBot

    Добавить комментарий

  7. Motorola Edge Motherboard Replacement, Heat the right edge: шаг 7, изображение 1 из 1
    • Apply a heated iOpener to the back cover's right edge for two minutes.

    Спросите у FixBot

    Добавить комментарий

  8. Motorola Edge Motherboard Replacement, Separate the corner adhesive: шаг 8, изображение 1 из 3 Motorola Edge Motherboard Replacement, Separate the corner adhesive: шаг 8, изображение 2 из 3 Motorola Edge Motherboard Replacement, Separate the corner adhesive: шаг 8, изображение 3 из 3
    • Rotate the opening pick around the bottom-right corner of the phone.

    Спросите у FixBot

    Добавить комментарий

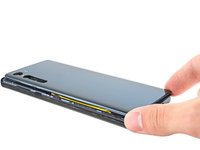
  9. Motorola Edge Motherboard Replacement, Separate the right adhesive: шаг 9, изображение 1 из 3 Motorola Edge Motherboard Replacement, Separate the right adhesive: шаг 9, изображение 2 из 3 Motorola Edge Motherboard Replacement, Separate the right adhesive: шаг 9, изображение 3 из 3
    • Insert a new opening pick into the gap you just created.

    • Slide the pick along the right edge of the phone to separate the adhesive.

    • Repeat the heating, slicing, and leaving opening picks for the remaining edges of the device.

    Спросите у FixBot

    Добавить комментарий

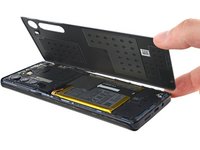
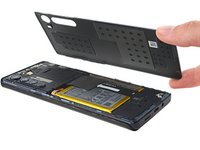
  10. Motorola Edge Motherboard Replacement, Remove the back cover: шаг 10, изображение 1 из 3 Motorola Edge Motherboard Replacement, Remove the back cover: шаг 10, изображение 2 из 3 Motorola Edge Motherboard Replacement, Remove the back cover: шаг 10, изображение 3 из 3
    • Remove the back cover, taking care not to damage the components inside the phone.

    Спросите у FixBot

    Добавить комментарий

  11. Motorola Edge Motherboard Replacement, Remove the motherboard's screws: шаг 11, изображение 1 из 1
    • Use a T5 Torx screwdriver to remove the twelve 3.4 mm-long screws securing the motherboard cover.

    Спросите у FixBot

    Добавить комментарий

  12. Motorola Edge Motherboard Replacement, Remove the motherboard cover: шаг 12, изображение 1 из 3 Motorola Edge Motherboard Replacement, Remove the motherboard cover: шаг 12, изображение 2 из 3 Motorola Edge Motherboard Replacement, Remove the motherboard cover: шаг 12, изображение 3 из 3
    Инструмент, используемый на этом этапе:
    Tweezers
    $4.99
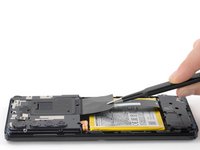
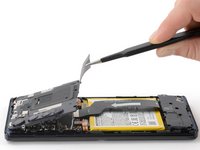
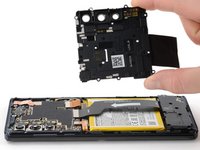
    • Use a pair of blunt tweezers or your fingers to lift up and remove the motherboard cover.

    • The motherboard cover also contains the phone's flash.

    Спросите у FixBot

    Добавить комментарий

  13. Motorola Edge Motherboard Replacement, Disconnect the interconnect cable from the motherboard: шаг 13, изображение 1 из 2 Motorola Edge Motherboard Replacement, Disconnect the interconnect cable from the motherboard: шаг 13, изображение 2 из 2
    • Use a spudger to pry up and disconnect the interconnect cable's press connector from the motherboard.

    Спросите у FixBot

    Добавить комментарий

  14. Motorola Edge Motherboard Replacement, Disconnect the battery cable's press connector: шаг 14, изображение 1 из 2 Motorola Edge Motherboard Replacement, Disconnect the battery cable's press connector: шаг 14, изображение 2 из 2
    • Use a spudger to pry up and disconnect the battery cable's press connector from the motherboard.

    • To re-attach press connectors like this one, carefully align and press down on one side until it clicks into place, then repeat on the other side. Don't press down on the middle. If the connector is misaligned, the pins can bend, causing permanent damage.

    Спросите у FixBot

    Добавить комментарий

  15. Motorola Edge Motherboard Replacement, Disconnect the screen ribbon cable's press connector: шаг 15, изображение 1 из 2 Motorola Edge Motherboard Replacement, Disconnect the screen ribbon cable's press connector: шаг 15, изображение 2 из 2
    • Use a spudger to pry up and disconnect the screen ribbon cable's press connector from the motherboard.

    Спросите у FixBot

    Добавить комментарий

  16. Motorola Edge Motherboard Replacement, Remove the copper tape: шаг 16, изображение 1 из 3 Motorola Edge Motherboard Replacement, Remove the copper tape: шаг 16, изображение 2 из 3 Motorola Edge Motherboard Replacement, Remove the copper tape: шаг 16, изображение 3 из 3
    Инструмент, используемый на этом этапе:
    Tweezers
    $4.99
    • Use a pair of blunt tweezers to peel up and remove the copper tape covering the front camera ribbon cable.

    Спросите у FixBot

    Добавить комментарий

  17. Motorola Edge Motherboard Replacement, Remove the front camera cable's press connector: шаг 17, изображение 1 из 3 Motorola Edge Motherboard Replacement, Remove the front camera cable's press connector: шаг 17, изображение 2 из 3 Motorola Edge Motherboard Replacement, Remove the front camera cable's press connector: шаг 17, изображение 3 из 3
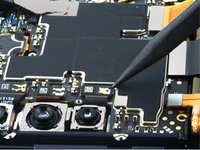
    • Use a spudger to pry up the front camera cable's press connector and disconnect it from the motherboard.

    • Remove the front camera.

    Спросите у FixBot

    Добавить комментарий

  18. Motorola Edge Motherboard Replacement, Remove the wide angle camera's press connector: шаг 18, изображение 1 из 3 Motorola Edge Motherboard Replacement, Remove the wide angle camera's press connector: шаг 18, изображение 2 из 3 Motorola Edge Motherboard Replacement, Remove the wide angle camera's press connector: шаг 18, изображение 3 из 3
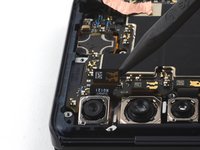
    • Use a spudger to pry up the wide angle camera cable's press connector and disconnect it from the motherboard.

    • Remove the wide angle camera.

    Спросите у FixBot

    Добавить комментарий

  19. Motorola Edge Motherboard Replacement, Remove the main camera cable's press connector: шаг 19, изображение 1 из 3 Motorola Edge Motherboard Replacement, Remove the main camera cable's press connector: шаг 19, изображение 2 из 3 Motorola Edge Motherboard Replacement, Remove the main camera cable's press connector: шаг 19, изображение 3 из 3
    • Use a spudger to pry up the main camera cable's press connector and disconnect it from the motherboard.

    • Remove the main camera.

    Спросите у FixBot

    Добавить комментарий

  20. Motorola Edge Motherboard Replacement, Remove the telephoto camera's press connector: шаг 20, изображение 1 из 3 Motorola Edge Motherboard Replacement, Remove the telephoto camera's press connector: шаг 20, изображение 2 из 3 Motorola Edge Motherboard Replacement, Remove the telephoto camera's press connector: шаг 20, изображение 3 из 3
    • Use a spudger to pry up and disconnect the telephoto camera cable's press connector from the motherboard.

    • Remove the telephoto camera.

    Спросите у FixBot

    Добавить комментарий

  21. Motorola Edge Motherboard Replacement, Disconnect the black coaxial cable: шаг 21, изображение 1 из 2 Motorola Edge Motherboard Replacement, Disconnect the black coaxial cable: шаг 21, изображение 2 из 2
    • Use a spudger to pry up the black coaxial cable and detach it from the motherboard.

    Спросите у FixBot

    Добавить комментарий

  22. Motorola Edge Motherboard Replacement, Disconnect the white coaxial cable: шаг 22, изображение 1 из 2 Motorola Edge Motherboard Replacement, Disconnect the white coaxial cable: шаг 22, изображение 2 из 2
    • Use a spudger to pry up the white coaxial cable and detach it from the motherboard.

    Спросите у FixBot

    Добавить комментарий

  23. Motorola Edge Motherboard Replacement, Remove the motherboard: шаг 23, изображение 1 из 3 Motorola Edge Motherboard Replacement, Remove the motherboard: шаг 23, изображение 2 из 3 Motorola Edge Motherboard Replacement, Remove the motherboard: шаг 23, изображение 3 из 3
    • Use a spudger to pry up and remove the motherboard.

    • Make sure no cables get trapped under the motherboard during reassembly.

    Спросите у FixBot

    Добавить комментарий

Заключение

To reassemble your device, follow these instructions in reverse order.

For optimal performance, calibrate your newly installed battery after completing this guide.

Take your e-waste to an R2 or e-Stewards certified recycler.

Repair didn’t go as planned? Try some basic troubleshooting, or ask our Answers Community for help.

Compare your new replacement part to the original part—you may need to transfer remaining components or remove adhesive backings from the new part before you install it.

Отменить: Я не выполнил это руководство.

2 человек успешно провели ремонт по этому руководству.

Jennifer Berg

Участник с: 03/21/22

2 869 Репутация

Автор 24 руководств

0 Комментарии к руководству

Добавить комментарий

Статистика просмотров:

За последние 24 часов: 2

За последние 7 дней: 17

За последние 30 дней: 59

За всё время: 1,891