Этот перевод был сделан машиной и пока не проверен человеком. Говорите на этом языке? Просмотрите его.
Введение
Устройство Moto 360 очень хрупкое. При работе с инструментами соблюдайте предельную осторожность. Вам потребуется iOpener, поэтому обязательно изучите это руководство, если вы еще не знакомы с тем, как им пользоваться.
Выберете то, что вам нужно
-
-
-
Положите часы циферблатом вниз на ровную поверхность.
-
Положите нагретый iOpener на заднюю крышку, чтобы размягчить находящийся под ней клей.
 Спросите у FixBot
-
-
-
Следуйте инструкциям здесь, чтобы снять заднюю крышку без применения силы, используя иглы в нужных местах:
-
Затем переходите к шагу 5. Либо не используйте иглы и просто продолжайте со следующих шагов.
-
-
-
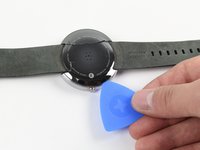
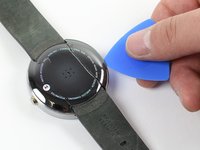
Аккуратно проведите синим медиатором между задней крышкой и металлическим корпусом.
-
Пройдитесь медиатором по всему периметру задней крышки.
-
-
-
После того как клей успешно размягчен, осторожно снимите заднюю крышку.
-
-
-
-
-
-
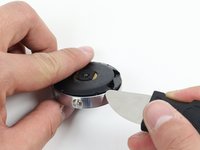
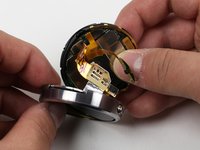
Чтобы добраться до уплотнительного кольца, аккуратно подденьте задний корпус с помощью инструмента Jimmy.
-
-
-
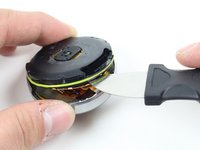
Сожмите зеленое резиновое уплотнительное кольцо (O-Ring) и снимите его с часов.
-
-
-
-
-
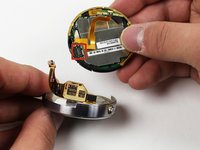
Отсоедините медный шлейф, соединяющий материнскую плату и дисплей.
-
При сборке прикрепите медный шлейф в месте, где он отмечен.
-
-
-
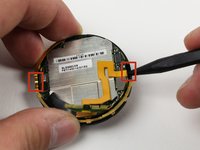
Используйте пластиковую лопатку (spudger), чтобы отделить корпус аккумулятора от задней панели.
-
Для рычага вставьте пластиковую лопатку (spudger) в любой из пазов на задней панели.
-
-
-
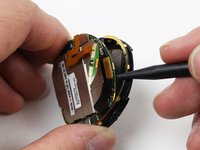
Подденьте черный пластиковый язычок и тяните его назад, пока аккумулятор не выйдет из своего отсека. Аккумулятор закреплен очень прочно, поэтому вам, возможно, придется приложить значительное усилие.
-
-
-
После того как аккумулятор отделится от задней стенки корпуса, отсоедините красный и черный провода, поддев их или потянув строго вверх от платы (перпендикулярно её поверхности).
-
-








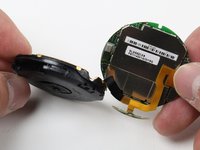


Для сборки устройства выполните эти действия в обратном порядке.
Отменить: Я не выполнил это руководство.
74 человек успешно провели ремонт по этому руководству.

Команда

Cal Poly, Team 17-32, Amido Winter 2015 Участник Cal Poly, Team 17-32, Amido Winter 2015
CPSU-AMIDO-W15S17G32
4 членов
Автор 24 руководств
41 Комментарии к руководству
Thanks for the guide. However I found several steps at least misleading, or not directly applicable to my Moto 360. I'm not sure if this is because the Moto 360 internal construction has varied over different production iterations.
The key difference is this guide implies that the inner body can simply be slid up and out of the metal shell with slow and careful prying. Actually, there are 4 curved plastic parts (call them locking pins) that fit corresponding slots in the metal shell and the plastic inner body at each side of the top and bottom clasp attachment points. Once inserted during manufacture, there is no way the body will ever slide up and out of the shell. I had to apply significant pressure to bend the shell out and pry the body out past the locking slots. However, it's possible that the locking pins could have been removed with tweezers permitting a less energetic disassembly of the watch.
Actually, there is a way to remove them. They are flat and tiny, near the watchbands' holes. To remove them, insert something (like a needle, or a toothpick) into the 4 carved out parts and their heads will pop out. Use a screwdriver or nail to gently peel it out. After that, hold the top and bottom (where the watchbands are), and pull the inner body up.
I made a video that includes removal of the retaining clips, a critical step missing from all the iFixIt Guides: https://youtu.be/r1as_h5jnBM
To answer Mike's question, the outside dimensions of the rectangular battery are 30mm x 28mm x ~2.6mm. However, that's not the full story, as the part of the battery module containing the electronics and where the wires attach is thinner than the rest, providing a space about 3mm wide along the narrow edge of the battery that sits above other components on the board.
My asseessment is that there may be space for a slightly larger battery if it was not rectangular, but this would require careful design and provide only marginal benefit.
could an ipod nano battery fit inside?
