Перейти к основному содержанию
Присоединяйся к сообществу ремонтников - Создай аккаунт

OnePlus 3 Back Cover Replacement

Выберете то, что вам нужно

    1. OnePlus 3 Back Cover Replacement, SIM Card Tray: шаг 1, изображение 1 из 3 OnePlus 3 Back Cover Replacement, SIM Card Tray: шаг 1, изображение 2 из 3 OnePlus 3 Back Cover Replacement, SIM Card Tray: шаг 1, изображение 3 из 3
      • Insert a SIM eject tool, bit, or straightened paperclip into the hole located between the SIM card slot and the power button.

      • Press firmly to eject the SIM card tray.

      • During reinstallation, make sure that the SIM card tray is properly oriented. It fits in only one direction.

      Спросите у FixBot

      Добавить комментарий

    1. OnePlus 3 Back Cover Replacement, Back Cover: шаг 2, изображение 1 из 1
      • Remove the two 2.6 mm T2 screws from the bottom edge of the phone.

      Спросите у FixBot

      Добавить комментарий

    2. OnePlus 3 Back Cover Replacement: шаг 3, изображение 1 из 3 OnePlus 3 Back Cover Replacement: шаг 3, изображение 2 из 3 OnePlus 3 Back Cover Replacement: шаг 3, изображение 3 из 3
      • There is a high risk of damaging the display panel if this opening procedure is improperly followed.

      • The following three steps show how to pry the rear case from the plastic frame. Read through the steps first before attempting the procedure.

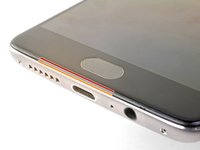
      • There are two different seams between the screen and the body of the phone:

      • Display panel seam: This seam is part of the display assembly. Do not pry at this seam, or you will separate and damage the display panel.

      • Frame seam: This is where the plastic frame meets the back cover. It is recessed into the back cover. Only pry at this seam.

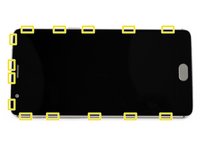
      • There are fourteen clips that hold the frame against the rear case. Be aware of their location as you pry the back cover off in the following steps.

      Спросите у FixBot

      Добавить комментарий

    3. OnePlus 3 Back Cover Replacement: шаг 4, изображение 1 из 3 OnePlus 3 Back Cover Replacement: шаг 4, изображение 2 из 3 OnePlus 3 Back Cover Replacement: шаг 4, изображение 3 из 3
      • As you work, try not to accidentally power on the phone. If you do, turn the phone off before resuming disassembly.

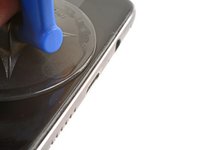
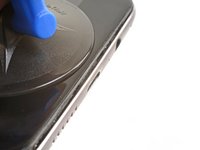
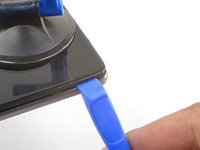
      • Place a suction cup near the bottom edge of the display.

      • Pull on the suction cup with strong steady force.

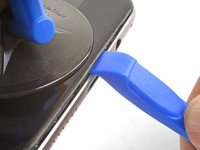
      • Press the edge of an opening tool straight into the frame seam near the suction cup until the edge wedges between the plastic frame and the back cover's lip.

      • Due to tight tolerances, this will take substantial force. Using a new opening tool with an unmarred edge will help with this step.

      • Do not use metal tools, as they will most likely crack the screen.

      Спросите у FixBot

      Добавить комментарий

    4. OnePlus 3 Back Cover Replacement: шаг 5, изображение 1 из 3 OnePlus 3 Back Cover Replacement: шаг 5, изображение 2 из 3 OnePlus 3 Back Cover Replacement: шаг 5, изображение 3 из 3
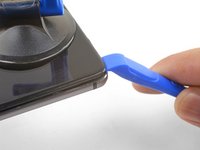
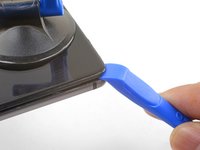
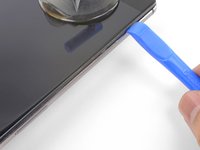
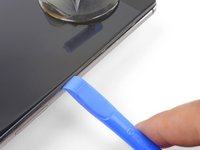
      • Once the opening tool's edge is wedged in position, carefully slide the tool along the bottom edge of the phone.

      • Carefully guide the opening tool around the left corner of the phone while keeping the tool's edge within the seam.

      Спросите у FixBot

      Добавить комментарий

    5. OnePlus 3 Back Cover Replacement: шаг 6, изображение 1 из 2 OnePlus 3 Back Cover Replacement: шаг 6, изображение 2 из 2
      • Continue sliding the opening tool along the long edge, releasing the clips along the way.

      • The last clip in the top-left corner near the alert switch is recessed and can be difficult to release. Take your time and use the flat end of a spudger or an opening pick to help.

      Спросите у FixBot

      Добавить комментарий

    6. OnePlus 3 Back Cover Replacement: шаг 7, изображение 1 из 3 OnePlus 3 Back Cover Replacement: шаг 7, изображение 2 из 3 OnePlus 3 Back Cover Replacement: шаг 7, изображение 3 из 3
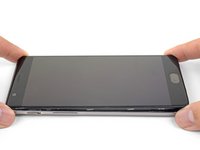
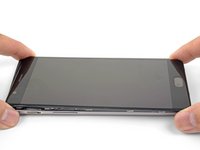
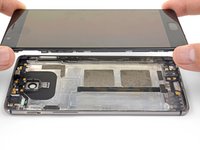
      • With the bottom and left edge of the phone freed, gently wiggle the frame to release the top and right edge clips.

      • Lift the screen up and remove it.

      • During reassembly, pause here to test your phone's functionality before securing the back cover.

      • To reinstall the back cover:

      • Align the top edge of the frame to the back cover and ensure that the top clips slip into place.

      • Squeeze along the long edges of the phone to snap the remaining clips into place.

      Спросите у FixBot

      Добавить комментарий

Заключение

To reassemble your device, follow these instructions in reverse order.

Take your e-waste to an R2 or e-Stewards certified recycler.

Repair didn’t go as planned? Check out our OnePlus 3 Answers community for troubleshooting help.

Отменить: Я не выполнил это руководство.

5 человек успешно провели ремонт по этому руководству.

Arthur Shi

Участник с: 01/03/18

344 889 Репутация

Автор 915 руководств

0 Комментарии к руководству

Добавить комментарий

Статистика просмотров:

За последние 24 часов: 2

За последние 7 дней: 11

За последние 30 дней: 51

За всё время: 23,279