Введение
Use this guide to remove the back cover on your OnePlus 5T.
Выберете то, что вам нужно
-
-
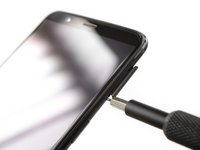
Remove the two Torx T2 screws (2.5 mm length).
-
The OnePlus 5T doesn't use a lot of adhesive to secure the backcover, however the clamps are very strong and require some force during the opening procedure.
-
-
-
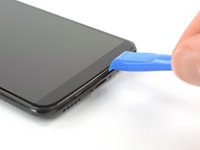
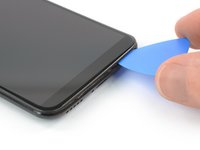
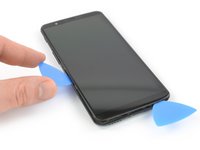
Insert an opening tool between the display and the backcover at the bottom end of the phone.
-
Use the opening tool to create a gap between back cover and display.
-
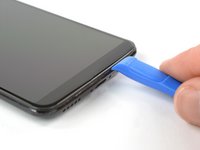
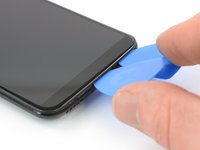
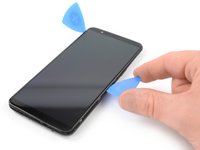
Insert an opening pick in the gap you created with the opening tool.
-
-
-
Slide the opening pick to the bottom right corner of the phone.
-
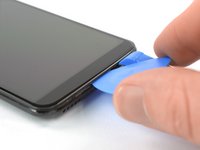
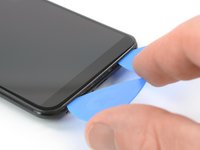
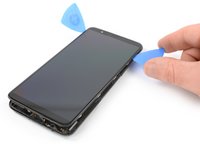
Insert a second opening pick and slide it to the bottom left corner of the phone.
-
-
-
-
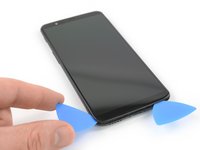
Slide the opening pick around the bottom left corner and then up along the left edge of the phone to open the plastic clamps that secure the backcover.
-
-
-
Slide the opening pick around the bottom right corner and then up along the right edge of the phone to open the plastic clamps that secure the backcover.
-
-
-
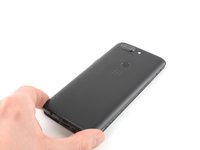
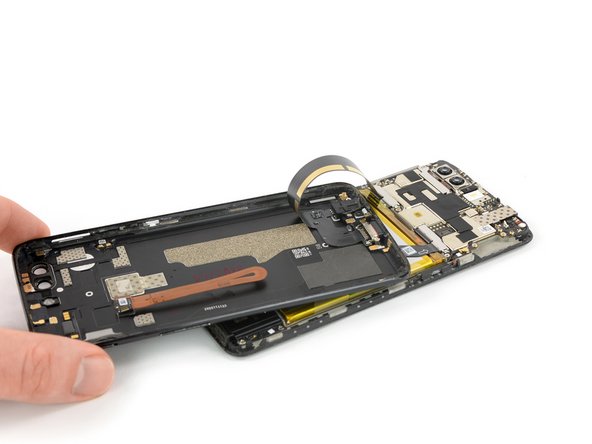
Try not to remove the backcover all the way yet. The fingerprint and the charging port and headphone flex cables are still connected to the motherboard.
-
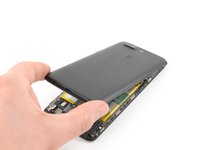
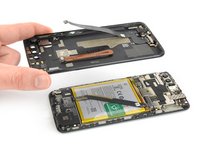
Flip your phone and carefully lift the bottom end of the backcover away from the phone assembly. Fold it to left and hold it at an 80° angle.
-
-
-
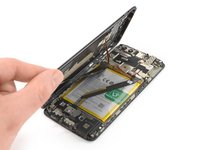
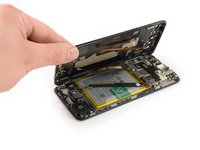
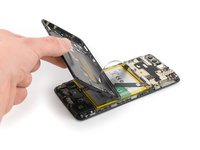
Twist the backcover around 180° and lay it down to align the bottom end of the backcover the top edge of the battery.
-
-
Инструмент, используемый на этом этапе:Tweezers$4.99
-
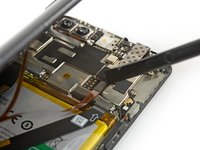
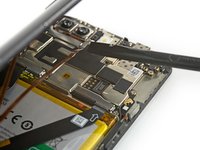
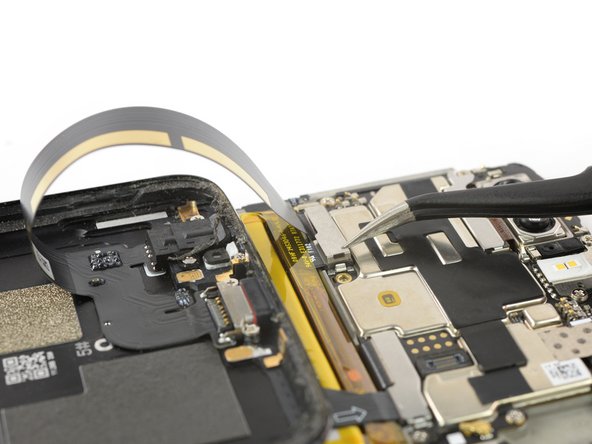
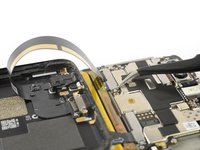
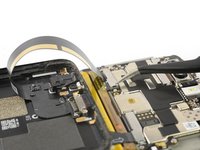
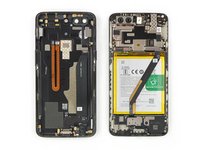
Use a pair of tweezers to remove the small metal shield which covers the battery and the charging port and headphone jack flex cable connectors.
-
-
-
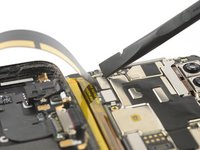
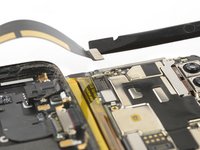
Use a spudger to pry up and disconnect the charging port and headphone jack flex cable.
-


To reassemble your device, follow these instructions in reverse order. Apply new adhesive where necessary after cleaning the relevant areas with isopropyl alcohol (>90%).
Take your e-waste to an R2 or e-Stewards certified recycler.
Repair didn’t go as planned? Check out our Answers Community for troubleshooting help.
Отменить: Я не выполнил это руководство.
6 человек успешно провели ремонт по этому руководству.

