Перейти к основному содержанию
Присоединяйся к сообществу ремонтников - Создай аккаунт

iMac Intel 21.5" Retina 4K Display Replacement

Выберете то, что вам нужно

    1. iMac Intel 21.5" Retina 4K Display Replacement, Display Assembly: шаг 1, изображение 1 из 1
      Инструмент, используемый на этом этапе:
      iMac Intel 21.5" Cardboard Service Wedge
      $4.99
      • With the hinge free to move, the iMac will be unbalanced and hard to work on. Repairs are fast and easy with an iMac service wedge, but can be completed without one.

      • If you are using the iFixit cardboard service wedge, follow these assembly directions to put it together.

      • Before beginning any work on your iMac: Unplug the computer and press and hold the power button for ten seconds to discharge the power supply's capacitors.

      • Be very careful not to touch the capacitor leads or any exposed solder joints on the back of the power supply. Only handle the board by the edges.

      Спросите у FixBot

      Добавить комментарий

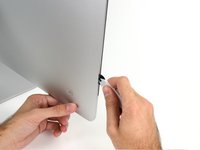
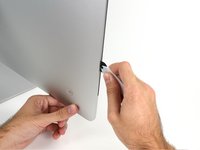
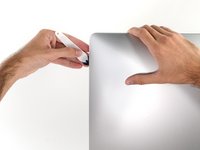
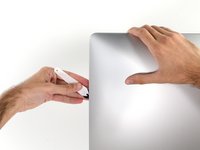
    2. iMac Intel 21.5" Retina 4K Display Replacement: шаг 2, изображение 1 из 2 iMac Intel 21.5" Retina 4K Display Replacement: шаг 2, изображение 2 из 2
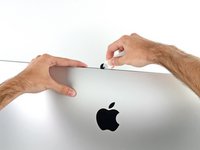
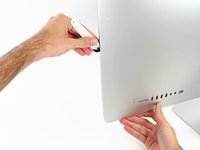
      • Starting on the left of the display, near the power button, insert the iMac Opening Tool into the gap between the glass panel and the rear enclosure.

      • The hub on the iMac Opening Tool will keep you from pushing the wheel in too far. If using a different tool, insert no more than 3/8" into the display. Otherwise, you risk severing antenna cables and causing serious damage.

      Спросите у FixBot

      Добавить комментарий

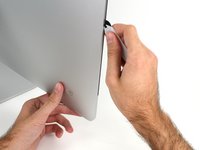
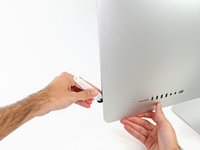
    3. iMac Intel 21.5" Retina 4K Display Replacement: шаг 3, изображение 1 из 3 iMac Intel 21.5" Retina 4K Display Replacement: шаг 3, изображение 2 из 3 iMac Intel 21.5" Retina 4K Display Replacement: шаг 3, изображение 3 из 3
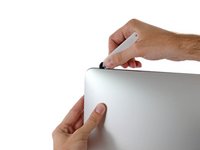
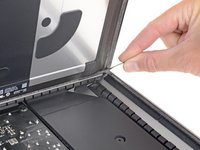
      • Use the tool like a pizza cutter—roll it along through the gap, and it will cut the foam adhesive through the center.

      • Be sure to always push with the handle behind the cutting wheel. If you pull, the wheel might get pulled out of the handle.

      • Run the tool up along the left side of the display.

      Спросите у FixBot

      Добавить комментарий

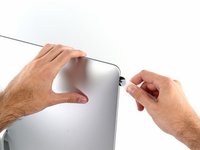
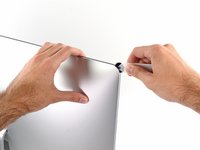
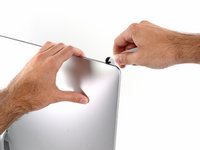
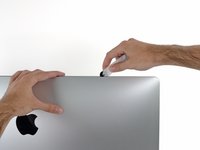
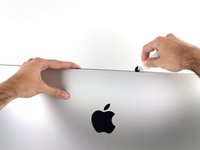
    4. iMac Intel 21.5" Retina 4K Display Replacement: шаг 4, изображение 1 из 3 iMac Intel 21.5" Retina 4K Display Replacement: шаг 4, изображение 2 из 3 iMac Intel 21.5" Retina 4K Display Replacement: шаг 4, изображение 3 из 3
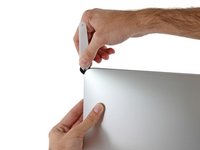
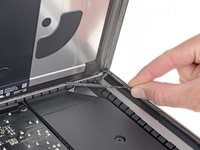
      • Continue running the tool up around the top left corner.

      Спросите у FixBot

      Добавить комментарий

    5. iMac Intel 21.5" Retina 4K Display Replacement: шаг 5, изображение 1 из 2 iMac Intel 21.5" Retina 4K Display Replacement: шаг 5, изображение 2 из 2
      • Cut the adhesive along the top left of the display.

      Спросите у FixBot

      Добавить комментарий

    6. iMac Intel 21.5" Retina 4K Display Replacement: шаг 6, изображение 1 из 2 iMac Intel 21.5" Retina 4K Display Replacement: шаг 6, изображение 2 из 2
      • Continue along the top of the display.

      • You may want to run the tool back and forth through what you've already cut a few times, to ensure you get as much of the adhesive separated as possible.

      Спросите у FixBot

      Добавить комментарий

    7. iMac Intel 21.5" Retina 4K Display Replacement: шаг 7, изображение 1 из 3 iMac Intel 21.5" Retina 4K Display Replacement: шаг 7, изображение 2 из 3 iMac Intel 21.5" Retina 4K Display Replacement: шаг 7, изображение 3 из 3
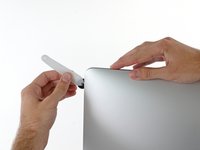
      • Push the tool around the top right corner of the display.

      Спросите у FixBot

      Добавить комментарий

    8. iMac Intel 21.5" Retina 4K Display Replacement: шаг 8, изображение 1 из 2 iMac Intel 21.5" Retina 4K Display Replacement: шаг 8, изображение 2 из 2
      • Wheel the tool down along the right side of the display.

      Спросите у FixBot

      Добавить комментарий

    9. iMac Intel 21.5" Retina 4K Display Replacement: шаг 9, изображение 1 из 2 iMac Intel 21.5" Retina 4K Display Replacement: шаг 9, изображение 2 из 2
      • Finish pushing the opening tool to the bottom of the right side of the display.

      • At this point, you'll want to run the tool back around the entire display, to ensure you cut as much adhesive as possible.

      Спросите у FixBot

      Добавить комментарий

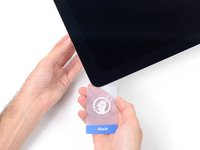
    10. iMac Intel 21.5" Retina 4K Display Replacement: шаг 10, изображение 1 из 3 iMac Intel 21.5" Retina 4K Display Replacement: шаг 10, изображение 2 из 3 iMac Intel 21.5" Retina 4K Display Replacement: шаг 10, изображение 3 из 3
      Инструмент, используемый на этом этапе:
      Plastic Cards
      $2.99
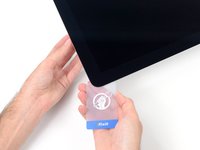
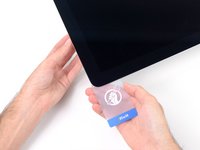
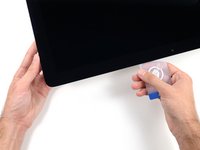
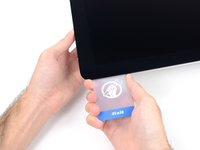
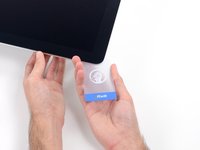
      • While the opening tool cut most of the adhesive, the display will still be slightly adhered to the case. A plastic card will be necessary to free up the last of this adhesive.

      • Set the iMac face-up on a table.

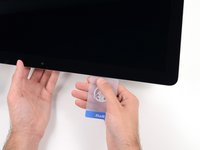
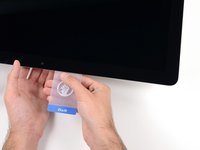
      • Starting from the top right corner of the iMac, wedge a plastic card between the display and frame.

      • Be careful not to insert the plastic card more than 3/8", or you may damage internal components.

      Спросите у FixBot

      Добавить комментарий

    11. iMac Intel 21.5" Retina 4K Display Replacement: шаг 11, изображение 1 из 2 iMac Intel 21.5" Retina 4K Display Replacement: шаг 11, изображение 2 из 2
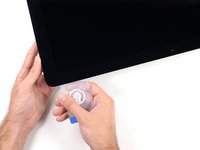
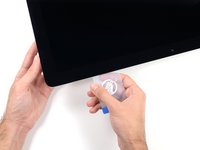
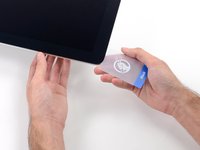
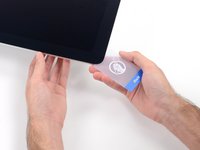
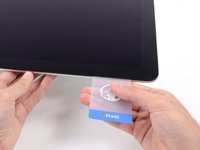
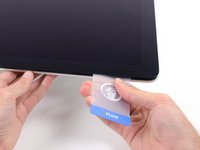
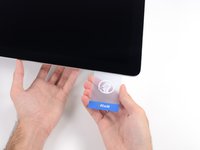
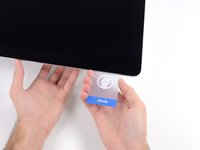
      • Gently twist the plastic card sideways to create a gap between the display and frame.

      • Move slowly and be careful not to stress the display glass too much—you only need to make a gap of about 1/4".

      Спросите у FixBot

      Добавить комментарий

    12. iMac Intel 21.5" Retina 4K Display Replacement: шаг 12, изображение 1 из 3 iMac Intel 21.5" Retina 4K Display Replacement: шаг 12, изображение 2 из 3 iMac Intel 21.5" Retina 4K Display Replacement: шаг 12, изображение 3 из 3
      • Slide the card toward the center of the display to cut any of the remaining adhesive along the top right corner of the iMac.

      • Be sure to stop before the iSight camera, or you may damage it.

      Спросите у FixBot

      Добавить комментарий

    13. iMac Intel 21.5" Retina 4K Display Replacement: шаг 13, изображение 1 из 2 iMac Intel 21.5" Retina 4K Display Replacement: шаг 13, изображение 2 из 2
      • Wedge the plastic card into the top right corner once again, and leave it there to prevent the adhesive from resticking.

      Спросите у FixBot

      Добавить комментарий

    14. iMac Intel 21.5" Retina 4K Display Replacement: шаг 14, изображение 1 из 3 iMac Intel 21.5" Retina 4K Display Replacement: шаг 14, изображение 2 из 3 iMac Intel 21.5" Retina 4K Display Replacement: шаг 14, изображение 3 из 3
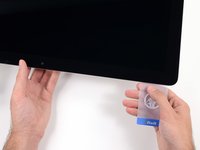
      • Insert a second plastic card into the gap between the display and frame near the top left corner of the iMac.

      Спросите у FixBot

      Добавить комментарий

    15. iMac Intel 21.5" Retina 4K Display Replacement: шаг 15, изображение 1 из 2 iMac Intel 21.5" Retina 4K Display Replacement: шаг 15, изображение 2 из 2
      • Gently twist the card upward, slightly increasing the space between the display and frame.

      • As with the other side, twist slowly to allow the adhesive time to separate, and be careful not to over-stress the display glass.

      Спросите у FixBot

      Добавить комментарий

    16. iMac Intel 21.5" Retina 4K Display Replacement: шаг 16, изображение 1 из 3 iMac Intel 21.5" Retina 4K Display Replacement: шаг 16, изображение 2 из 3 iMac Intel 21.5" Retina 4K Display Replacement: шаг 16, изображение 3 из 3
      • Slide the plastic card toward the center, again stopping just before the iSight camera.

      Спросите у FixBot

      Добавить комментарий

    17. iMac Intel 21.5" Retina 4K Display Replacement: шаг 17, изображение 1 из 2 iMac Intel 21.5" Retina 4K Display Replacement: шаг 17, изображение 2 из 2
      • Wedge the plastic card back into the top left corner.

      Спросите у FixBot

      Добавить комментарий

    18. iMac Intel 21.5" Retina 4K Display Replacement: шаг 18, изображение 1 из 3 iMac Intel 21.5" Retina 4K Display Replacement: шаг 18, изображение 2 из 3 iMac Intel 21.5" Retina 4K Display Replacement: шаг 18, изображение 3 из 3
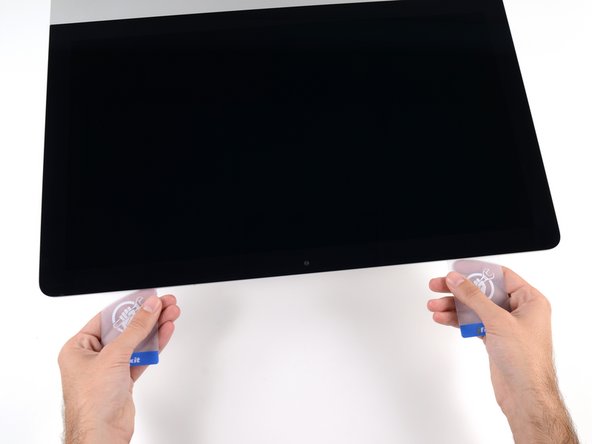
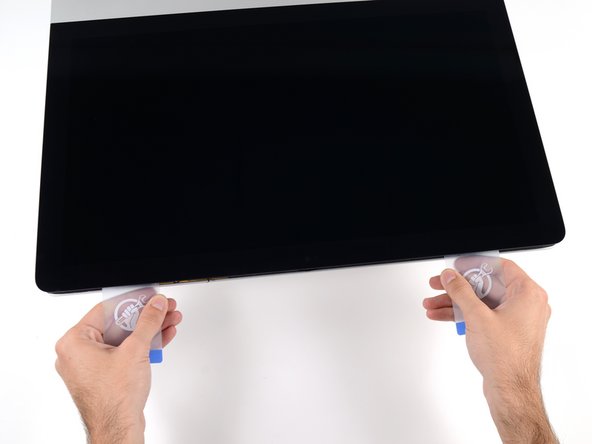
      • With both plastic cards inserted as shown near the corners, gently twist the cards sideways to increase the gap between display and case.

      • If there are any sections that seem to stick and won't separate, stop twisting and use one of the cards to cut the remaining adhesive.

      • Begin to lift the top of the display up from the frame.

      • Only lift the display a few inches—the display data and power cables are still connected to the logic board.

      Спросите у FixBot

      Добавить комментарий

    1. iMac Intel 21.5" Retina 4K Display Replacement, Display Assembly Cables: шаг 19, изображение 1 из 2 iMac Intel 21.5" Retina 4K Display Replacement, Display Assembly Cables: шаг 19, изображение 2 из 2
      • Lift the display up enough to have easy access to the connector, but not so much that you stretch the cables and stress their connections (about 8").

      • Hold the display with one hand while using your other hand to unplug the display power cable.

      Спросите у FixBot

      Добавить комментарий

    2. iMac Intel 21.5" Retina 4K Display Replacement: шаг 20, изображение 1 из 3 iMac Intel 21.5" Retina 4K Display Replacement: шаг 20, изображение 2 из 3 iMac Intel 21.5" Retina 4K Display Replacement: шаг 20, изображение 3 из 3
      • Continuing to support the display with one hand, flip up the metal retaining bracket on the display data cable.

      • Carefully pull the display data cable from its socket on the logic board.

      • Be sure to pull the display data cable connector straight out of its socket, keeping it parallel to the motherboard, to avoid damaging it.

      Спросите у FixBot

      Добавить комментарий

    1. iMac Intel 21.5" Retina 4K Display Replacement, Display Assembly Separation: шаг 21, изображение 1 из 2 iMac Intel 21.5" Retina 4K Display Replacement, Display Assembly Separation: шаг 21, изображение 2 из 2
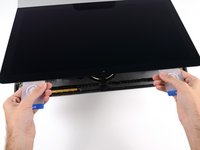
      • Lift the display up to a near-vertical position.

      • At this point there is still a strip of adhesive along the bottom of the display that will hold the display to the frame like a hinge. You can loosen this adhesive by working the display up and down a few times.

      Спросите у FixBot

      Добавить комментарий

    2. iMac Intel 21.5" Retina 4K Display Replacement: шаг 22, изображение 1 из 3 iMac Intel 21.5" Retina 4K Display Replacement: шаг 22, изображение 2 из 3 iMac Intel 21.5" Retina 4K Display Replacement: шаг 22, изображение 3 из 3
      Инструмент, используемый на этом этапе:
      Plastic Cards
      $2.99
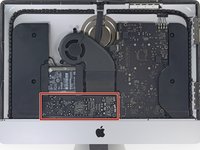
      • Be very careful not to touch the capacitor leads or any exposed solder joints on the back of the power supply (boxed in red).

      • Grasp the small tab at the end of one of the bottom edge display adhesive strips and pull the adhesive toward the top of the iMac to remove it.

      • Repeat this step with the other adhesive strip and remove it.

      • If either adhesive strip breaks before it's removed, use a plastic card to slice through the remaining adhesive.

      Спросите у FixBot

      Добавить комментарий

    3. iMac Intel 21.5" Retina 4K Display Replacement: шаг 23, изображение 1 из 3 iMac Intel 21.5" Retina 4K Display Replacement: шаг 23, изображение 2 из 3 iMac Intel 21.5" Retina 4K Display Replacement: шаг 23, изображение 3 из 3
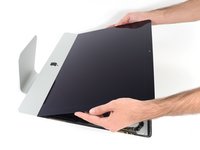
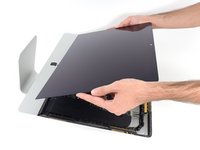
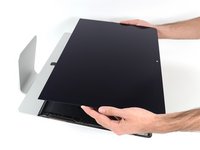
      • Lift the display up from the frame and remove it from the iMac.

      • It may be necessary to slowly lift from one side to peel against the remaining adhesive.

      • Be very careful handling the display—it's big, heavy, and made of glass.

      • After the adhesive is cut, it cannot be used to re-seal the display in place. Follow this guide to replace the adhesive strips that secure the display to the rear enclosure.

      Спросите у FixBot

      Добавить комментарий

    1. iMac Intel 21.5" Retina 4K Display Replacement, Display: шаг 24, изображение 1 из 2 iMac Intel 21.5" Retina 4K Display Replacement, Display: шаг 24, изображение 2 из 2
      • Gently set the display face-down on a sturdy, flat surface. It may be helpful to put it on a towel or cloth to protect it from dirt or debris that can scratch the front glass.

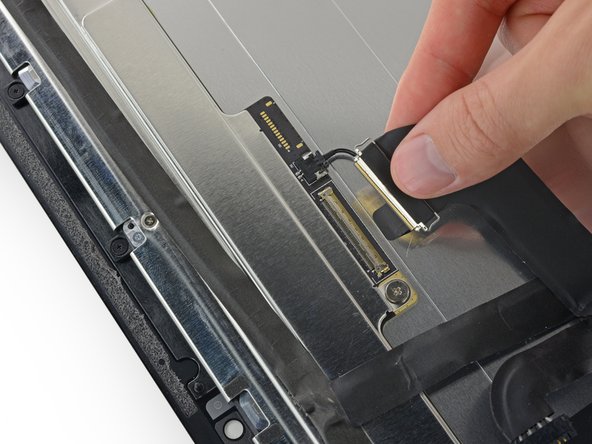
      • Use your fingernail or the pointed tip of a spudger to flip up the retaining flap on the display data connector.

      Спросите у FixBot

      Добавить комментарий

    2. iMac Intel 21.5" Retina 4K Display Replacement: шаг 25, изображение 1 из 2 iMac Intel 21.5" Retina 4K Display Replacement: шаг 25, изображение 2 из 2
      • Pull the display data cable connector straight out of its socket on the back of the display.

      Спросите у FixBot

      Добавить комментарий

    3. iMac Intel 21.5" Retina 4K Display Replacement: шаг 26, изображение 1 из 1
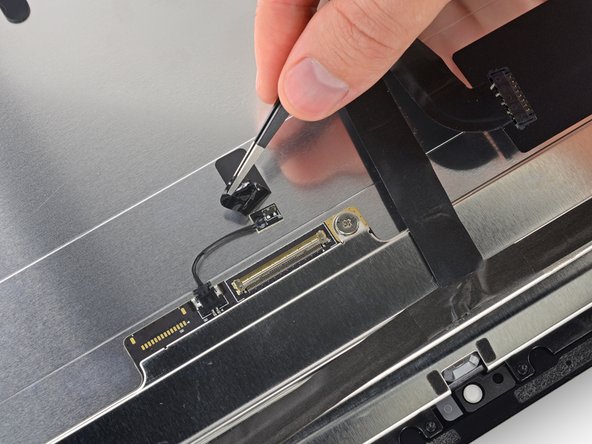
      • Use an iOpener near the top edge of the display assembly to heat and soften the adhesive on the piece of tape holding the thermal sensor in place.

      • Instructions on how to properly heat and use the iOpener can be found here.

      Спросите у FixBot

      Добавить комментарий

    4. iMac Intel 21.5" Retina 4K Display Replacement: шаг 27, изображение 1 из 2 iMac Intel 21.5" Retina 4K Display Replacement: шаг 27, изображение 2 из 2
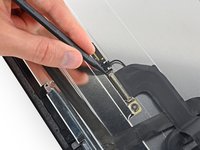
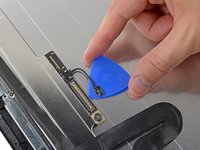
      • Peel up the piece of tape securing the thermal sensor to the back of the display assembly.

      • Depending on your iMac model, the thermal sensor may be positioned slightly differently.

      Спросите у FixBot

      Добавить комментарий

    5. iMac Intel 21.5" Retina 4K Display Replacement: шаг 28, изображение 1 из 2 iMac Intel 21.5" Retina 4K Display Replacement: шаг 28, изображение 2 из 2
      • Use an opening pick to break up the adhesive holding the thermal sensor to the back of the iMac display.

      Спросите у FixBot

      Добавить комментарий

    6. iMac Intel 21.5" Retina 4K Display Replacement: шаг 29, изображение 1 из 2 iMac Intel 21.5" Retina 4K Display Replacement: шаг 29, изображение 2 из 2
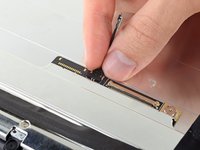
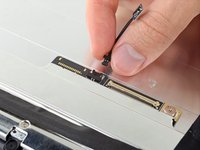
      • Disconnect the thermal sensor from its socket on the back of the display.

      • Remove the thermal sensor and transfer it to your new display assembly.

      Спросите у FixBot

      Добавить комментарий

Заключение

To reassemble your device, follow these instructions in reverse order.

Отменить: Я не выполнил это руководство.

19 человек успешно провели ремонт по этому руководству.

Evan Noronha

Участник с: 02/05/15

229 590 Репутация

Автор 168 руководств

8 Комментарии к руководству

Hello, I damages my iMac 2833 screen cable with mistake, I tried to find one compatible with this type but I didn't find one, c an you advise me how to find one or even repair the cable because the the wider end not damage but the other end... thanks in advance to your help...

M.K.Farttoos - Ответить Поделиться

Hello,

It´s possible install a 4K Display iMac 21.5 in a iMac 21.5 late 2012 Full HD?

Thank you.

Greetings

Soporte - Ответить Поделиться
Hi,

I am in need of a display data cable as shown above for the iMac 21.5” Late 2015. Anyone know where I can order one? Finding one on the interent is awfully confusing in identifying the correct cable.

Thanks.

Leslie Laplace - Ответить Поделиться

See step 20 above for the display data cable needed.

Leslie Laplace - Ответить Поделиться

Hola saludos excelente artículo los felicito. Tengo una duda. Mi IMac de. 21.5 Inch 4K sufrió un golpe en la parte superior de la pantalla. Luego del impacto la pantalla sigue funcionando normalmente, pero el glass está con grietas y astillado. Es necesario cambiarlo todo? O existe un repuesto solo del glass. Gracias por su orientacion

BORIS CASTELLANO - Ответить Поделиться

Добавить комментарий

Статистика просмотров:

За последние 24 часов: 8

За последние 7 дней: 44

За последние 30 дней: 183

За всё время: 39,462