Перейти к основному содержанию
Присоединяйся к сообществу ремонтников - Создай аккаунт
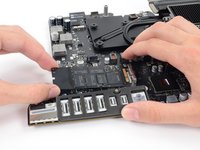
iMac Intel 27" Retina 5K Display Blade SSD Replacement

Выберете то, что вам нужно

  1. iMac Intel 27" Retina 5K Display Blade SSD Replacement, Display: шаг 1, изображение 1 из 1
    Инструмент, используемый на этом этапе:
    iMac Intel 27" Cardboard Service Wedge
    $4.99
    • With the hinge free to move, the iMac will be unbalanced and hard to work on. Repairs can be completed with the iMac laying down, but are faster and easier with an iMac service wedge.

    • If you are using the iFixit cardboard service wedge, follow these assembly directions to put it together.

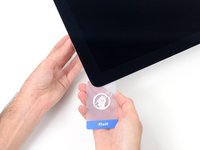
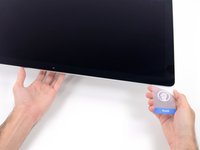
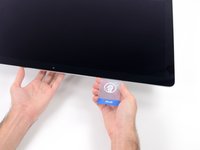
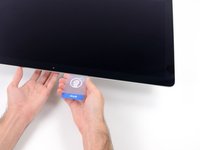
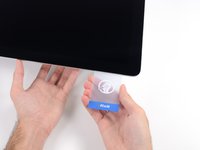
    Спросите у FixBot
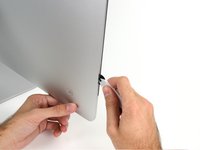
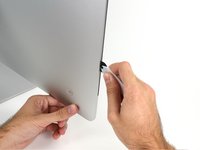
  2. iMac Intel 27" Retina 5K Display Blade SSD Replacement: шаг 2, изображение 1 из 3 iMac Intel 27" Retina 5K Display Blade SSD Replacement: шаг 2, изображение 2 из 3 iMac Intel 27" Retina 5K Display Blade SSD Replacement: шаг 2, изображение 3 из 3
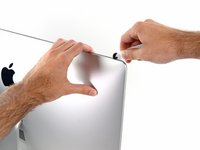
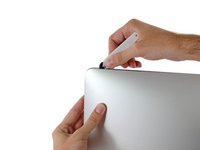
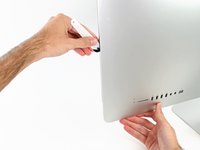
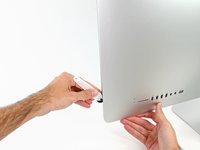
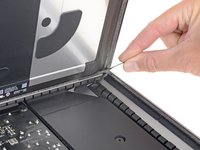
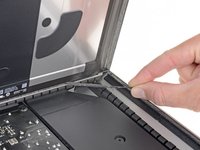
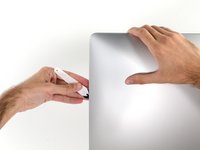
    • Starting on the left of the display, near the power button, insert the iMac Opening Tool into the gap between the glass panel and the rear case.

    • The hub on the iMac Opening Tool will keep you from pushing the wheel in too far. If using a different tool, insert no more than 3/8" (9.5 mm) into the display. You risk severing antenna cables and causing serious damage.

    Спросите у FixBot
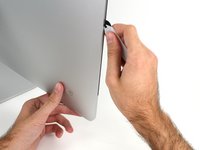
  3. iMac Intel 27" Retina 5K Display Blade SSD Replacement: шаг 3, изображение 1 из 3 iMac Intel 27" Retina 5K Display Blade SSD Replacement: шаг 3, изображение 2 из 3 iMac Intel 27" Retina 5K Display Blade SSD Replacement: шаг 3, изображение 3 из 3
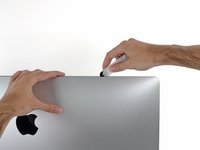
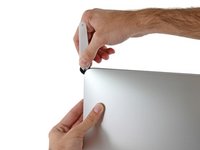
    • Use the tool like a pizza cutter—roll it along through the gap, and it will cut the foam adhesive through the center.

    • Be sure to always push with the handle behind the cutting wheel. If you pull, the wheel might get pulled out of the handle.

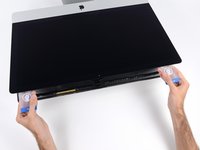
    • Run the tool up along the left side of the display.

    Спросите у FixBot
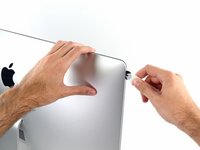
  4. iMac Intel 27" Retina 5K Display Blade SSD Replacement: шаг 4, изображение 1 из 3 iMac Intel 27" Retina 5K Display Blade SSD Replacement: шаг 4, изображение 2 из 3 iMac Intel 27" Retina 5K Display Blade SSD Replacement: шаг 4, изображение 3 из 3
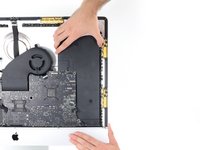
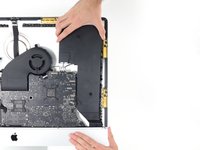
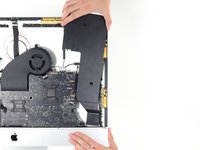
    • Continue wheeling the tool up around the top left corner.

    Спросите у FixBot
  5. iMac Intel 27" Retina 5K Display Blade SSD Replacement: шаг 5, изображение 1 из 2 iMac Intel 27" Retina 5K Display Blade SSD Replacement: шаг 5, изображение 2 из 2
    • Cut the adhesive along the top left of the display.

    Спросите у FixBot
  6. iMac Intel 27" Retina 5K Display Blade SSD Replacement: шаг 6, изображение 1 из 2 iMac Intel 27" Retina 5K Display Blade SSD Replacement: шаг 6, изображение 2 из 2
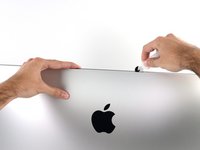
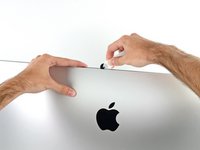
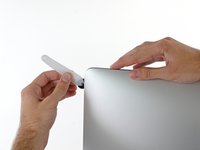
    • Continue along the top of the display.

    • You may want to run the tool back and forth through what you've already cut a few times, to ensure you get as much of the adhesive separated as possible.

    Спросите у FixBot
  7. iMac Intel 27" Retina 5K Display Blade SSD Replacement: шаг 7, изображение 1 из 3 iMac Intel 27" Retina 5K Display Blade SSD Replacement: шаг 7, изображение 2 из 3 iMac Intel 27" Retina 5K Display Blade SSD Replacement: шаг 7, изображение 3 из 3
    • Push the tool around the top right corner of the display.

    Спросите у FixBot
  8. iMac Intel 27" Retina 5K Display Blade SSD Replacement: шаг 8, изображение 1 из 2 iMac Intel 27" Retina 5K Display Blade SSD Replacement: шаг 8, изображение 2 из 2
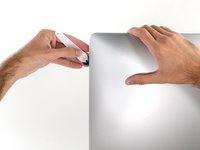
    • Wheel the tool down along the right side of the display.

    Спросите у FixBot
  9. iMac Intel 27" Retina 5K Display Blade SSD Replacement: шаг 9, изображение 1 из 2 iMac Intel 27" Retina 5K Display Blade SSD Replacement: шаг 9, изображение 2 из 2
    • Finish pushing the opening tool to the bottom of the right side of the display.

    • At this point, you'll want to run the tool back around the entire display, to ensure you cut as much adhesive as possible.

    Спросите у FixBot
  10. iMac Intel 27" Retina 5K Display Blade SSD Replacement: шаг 10, изображение 1 из 3 iMac Intel 27" Retina 5K Display Blade SSD Replacement: шаг 10, изображение 2 из 3 iMac Intel 27" Retina 5K Display Blade SSD Replacement: шаг 10, изображение 3 из 3
    Инструмент, используемый на этом этапе:
    Plastic Cards
    $2.99
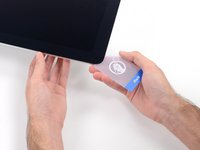
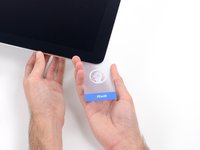
    • While the opening tool did the lion's share of the work, the display will still be slightly adhered to the case. A plastic card will be necessary to free up the last of this adhesive.

    • Set the iMac face-up on a table.

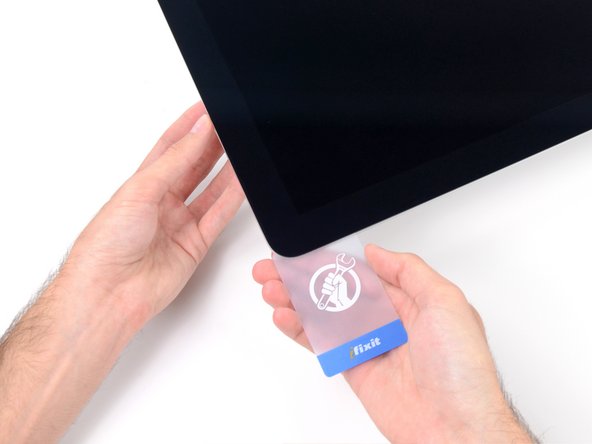
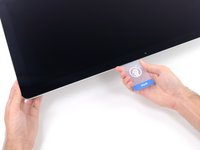
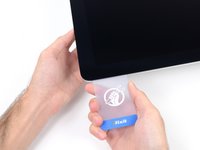
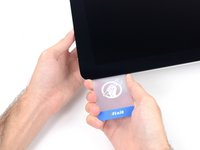
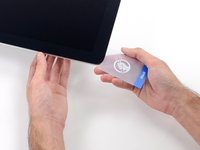
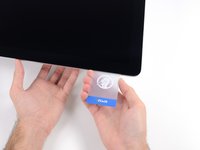
    • Starting from the top right corner of the iMac, insert a plastic card between the display and frame.

    • Be careful not to insert it more than 3/8" (9.5 mm), or you may damage internal components.

    Спросите у FixBot
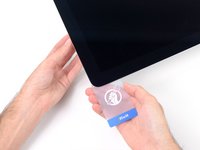
  11. iMac Intel 27" Retina 5K Display Blade SSD Replacement: шаг 11, изображение 1 из 2 iMac Intel 27" Retina 5K Display Blade SSD Replacement: шаг 11, изображение 2 из 2
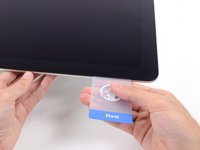
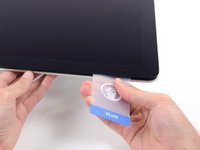
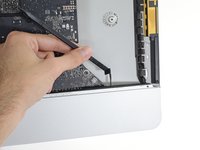
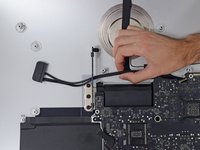
    • Gently twist the plastic card to open the space between the display and frame, and cut any remaining adhesive near the corner.

    • Using too much force will crack the glass. Work carefully, and don't try to create a gap any larger than about 1/4" (6 mm).

    Спросите у FixBot
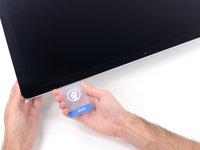
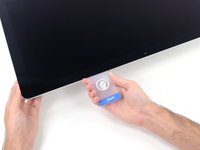
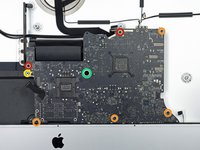
  12. iMac Intel 27" Retina 5K Display Blade SSD Replacement: шаг 12, изображение 1 из 3 iMac Intel 27" Retina 5K Display Blade SSD Replacement: шаг 12, изображение 2 из 3 iMac Intel 27" Retina 5K Display Blade SSD Replacement: шаг 12, изображение 3 из 3
    • Be sure to stop cutting before the iSight camera in this step, or you may damage it.

    • Slide the card toward the center of the display, to cut any remaining adhesive.

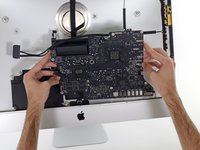
    Спросите у FixBot
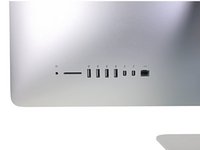
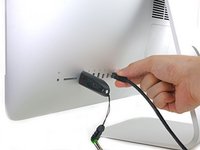
  13. iMac Intel 27" Retina 5K Display Blade SSD Replacement: шаг 13, изображение 1 из 2 iMac Intel 27" Retina 5K Display Blade SSD Replacement: шаг 13, изображение 2 из 2
    • Put the card into the corner again and let it stay there to keep the adhesive from resettling.

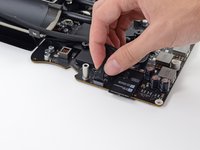
    Спросите у FixBot
  14. iMac Intel 27" Retina 5K Display Blade SSD Replacement: шаг 14, изображение 1 из 3 iMac Intel 27" Retina 5K Display Blade SSD Replacement: шаг 14, изображение 2 из 3 iMac Intel 27" Retina 5K Display Blade SSD Replacement: шаг 14, изображение 3 из 3
    • Insert a second card into the gap between the display and frame in the top left corner.

    Спросите у FixBot
  15. iMac Intel 27" Retina 5K Display Blade SSD Replacement: шаг 15, изображение 1 из 2 iMac Intel 27" Retina 5K Display Blade SSD Replacement: шаг 15, изображение 2 из 2
    • Gently twist the card, slightly increasing the space between the display and frame.

    • As with the other side, move slowly to allow the adhesive to break, and be careful not to over-stress the display glass.

    Спросите у FixBot
  16. iMac Intel 27" Retina 5K Display Blade SSD Replacement: шаг 16, изображение 1 из 3 iMac Intel 27" Retina 5K Display Blade SSD Replacement: шаг 16, изображение 2 из 3 iMac Intel 27" Retina 5K Display Blade SSD Replacement: шаг 16, изображение 3 из 3
    • Slide the plastic card toward the center, again stopping just before the iSight camera.

    Спросите у FixBot
  17. iMac Intel 27" Retina 5K Display Blade SSD Replacement: шаг 17, изображение 1 из 2 iMac Intel 27" Retina 5K Display Blade SSD Replacement: шаг 17, изображение 2 из 2
    • Insert the card back into the top left corner.

    Спросите у FixBot
  18. iMac Intel 27" Retina 5K Display Blade SSD Replacement: шаг 18, изображение 1 из 3 iMac Intel 27" Retina 5K Display Blade SSD Replacement: шаг 18, изображение 2 из 3 iMac Intel 27" Retina 5K Display Blade SSD Replacement: шаг 18, изображение 3 из 3
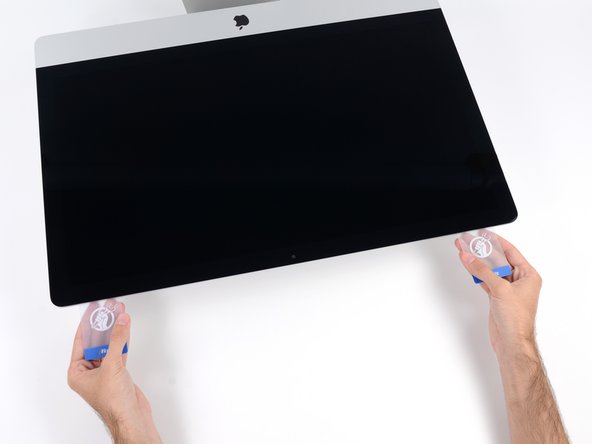
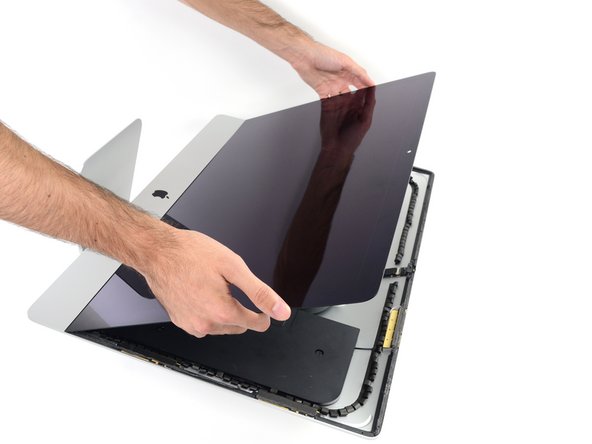
    • Only lift the display a few inches—it is still attached to the iMac by data and power cables.

    • With the cards inserted as shown near the corners, gently twist the cards to increase the gap between display and case.

    • If there are any sections that seem to stick and won't separate, stop twisting and use one of the cards to cut the adhesive in the problem area.

    • Begin to lift the top of the display up from the frame.

    Спросите у FixBot
  19. iMac Intel 27" Retina 5K Display Blade SSD Replacement: шаг 19, изображение 1 из 2 iMac Intel 27" Retina 5K Display Blade SSD Replacement: шаг 19, изображение 2 из 2
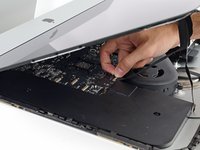
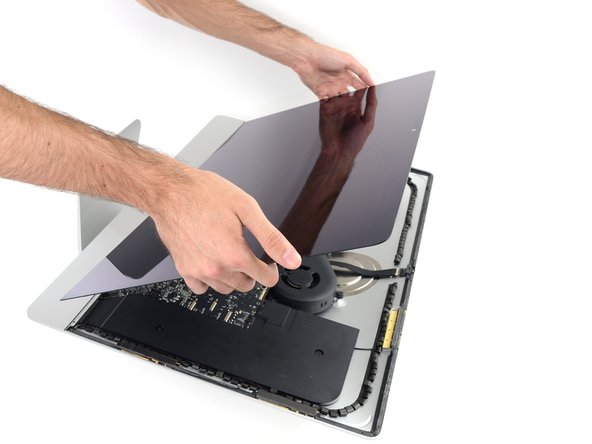
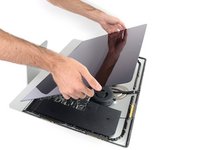
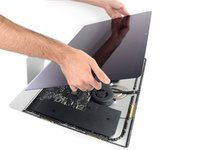
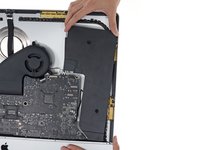
    • While holding the display up with one hand, use the other to unplug the display power cable.

    • Lift the display up enough to have easy access to the connections, but not so much that you stretch the cables and stress their connections (about 8").

    Спросите у FixBot
  20. iMac Intel 27" Retina 5K Display Blade SSD Replacement: шаг 20, изображение 1 из 3 iMac Intel 27" Retina 5K Display Blade SSD Replacement: шаг 20, изображение 2 из 3 iMac Intel 27" Retina 5K Display Blade SSD Replacement: шаг 20, изображение 3 из 3
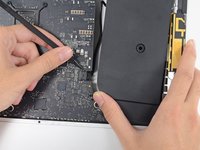
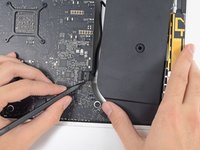
    • Flip up the metal retaining bracket on the display data cable.

    • Disconnect the display data cable.

    • This is a delicate connection that can easily be broken. Be sure to pull the display data cable connector straight out of its socket, toward the top of the iMac.

    Спросите у FixBot
  21. iMac Intel 27" Retina 5K Display Blade SSD Replacement: шаг 21, изображение 1 из 2 iMac Intel 27" Retina 5K Display Blade SSD Replacement: шаг 21, изображение 2 из 2
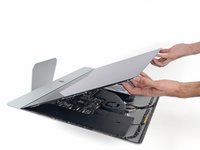
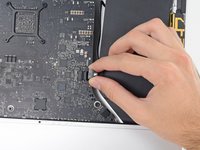
    • Lift the display up to a near-vertical position.

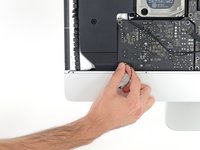
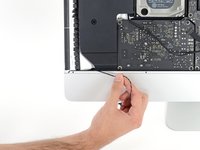
    • At this point there is still a strip of adhesive along the bottom of the display, that will hold the display to the frame like a hinge. You can loosen this adhesive by working the display up and down a few times.

    • Remove as much of the adhesive as possible by grabbing it at the outer edges, and then pulling or rolling it towards the middle.

    Спросите у FixBot
  22. iMac Intel 27" Retina 5K Display Blade SSD Replacement: шаг 22, изображение 1 из 3 iMac Intel 27" Retina 5K Display Blade SSD Replacement: шаг 22, изображение 2 из 3 iMac Intel 27" Retina 5K Display Blade SSD Replacement: шаг 22, изображение 3 из 3
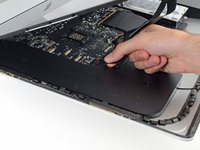
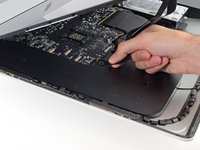
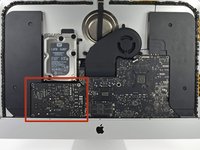
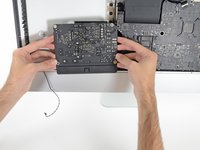
    • Be very careful not to touch the capacitor leads or any exposed solder joints on the back of the power supply (boxed in red).

    • If necessary, a plastic card can be used to cut any remaining sections of the bottom adhesive strip.

    Спросите у FixBot
  23. iMac Intel 27" Retina 5K Display Blade SSD Replacement: шаг 23, изображение 1 из 3 iMac Intel 27" Retina 5K Display Blade SSD Replacement: шаг 23, изображение 2 из 3 iMac Intel 27" Retina 5K Display Blade SSD Replacement: шаг 23, изображение 3 из 3
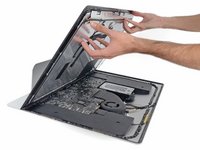
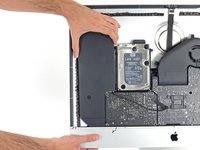
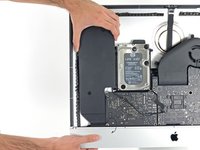
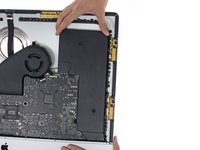
    • Be very careful handling the display—it's big, heavy, and made of glass. The display has fragile edges. Avoid lifting the display by the corners.

    • Lift the display up from the frame and remove it from the iMac. Lay the display face down on a flat, soft surface.

    • It may be necessary to slowly lift from one side, to peel against the remaining adhesive.

    • After the adhesive is cut, it cannot be used to re-seal the display in place. Follow this guide when your repair is complete to replace the adhesive strips that secure the display to the rear enclosure.

    Спросите у FixBot
  24. iMac Intel 27" Retina 5K Display Blade SSD Replacement: шаг 24, изображение 1 из 1
    • If you are replacing the display panel, you may need to transfer additional components from the old panel to the new one. Compare the back of the old display with the replacement display. Note all cables, sensors, and foam cushioning that are missing from the new display.

    • If there is a wire or cable underneath adhesive tape, always pull the tape off first.

    • If the cable is glued to the chassis, use a heated iOpener or a hair dryer to soften the adhesive first. You can then slide an opening pick underneath the cable to loosen it. Never pull directly on the delicate connectors.

    • Slide an opening pick underneath the foam cushion pieces to separate them from the display, and gently pull them off. You may need some double sided tape to re-attach them to the new display.

    Спросите у FixBot
  25. iMac Intel 27" Retina 5K Display Blade SSD Replacement, Remove the support bracket: шаг 25, изображение 1 из 2 iMac Intel 27" Retina 5K Display Blade SSD Replacement, Remove the support bracket: шаг 25, изображение 2 из 2
    • Use a Phillips screwdriver to remove the nine 3.2 mm screws securing the support bracket.

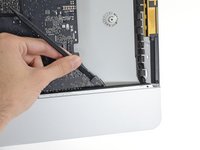
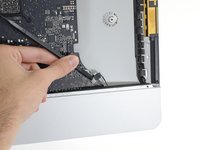
    • You may need to peel up the display adhesive lining the bottom edge of the iMac enclosure to access the screws.

    Спросите у FixBot
  26. iMac Intel 27" Retina 5K Display Blade SSD Replacement: шаг 26, изображение 1 из 1
    • Remove the lower support bracket (a.k.a. "chin strap") from the iMac enclosure.

    • How to easily reinstall this support bracket:

    • Position the bracket diagonally.

    • Secure the rightmost screw enough to hold the bracket in place; keep it loose for now so the bracket can pivot.

    • Swing the left side of the bracket down until it sits horizontally in its original position.

    • Starting with the leftmost screw, install and tighten the remaining screws.

    Спросите у FixBot
  27. iMac Intel 27" Retina 5K Display Blade SSD Replacement, Remove the left speaker: шаг 27, изображение 1 из 1
    • Remove two 10 mm T10 screws.

    Спросите у FixBot
  28. iMac Intel 27" Retina 5K Display Blade SSD Replacement: шаг 28, изображение 1 из 3 iMac Intel 27" Retina 5K Display Blade SSD Replacement: шаг 28, изображение 2 из 3 iMac Intel 27" Retina 5K Display Blade SSD Replacement: шаг 28, изображение 3 из 3
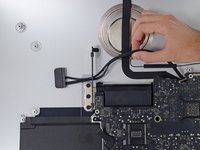
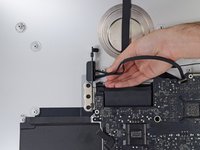
    • Unplug the left speaker cable by pulling it straight up out of its socket on the logic board.

    • De-route the cable from the gap between the hard drive and logic board.

    • If the gap between the hard drive and logic board is too narrow for the speaker cable, disconnect it and leave the cable in place.

    Спросите у FixBot
  29. iMac Intel 27" Retina 5K Display Blade SSD Replacement: шаг 29, изображение 1 из 3 iMac Intel 27" Retina 5K Display Blade SSD Replacement: шаг 29, изображение 2 из 3 iMac Intel 27" Retina 5K Display Blade SSD Replacement: шаг 29, изображение 3 из 3
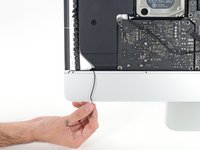
    • Be careful not to touch any solder joints on the back of the power supply. Capacitors may be charged enough to give you a dangerous shock.

    • Use a spudger to disconnect the power button connector from its socket on the logic board.

    Спросите у FixBot
  30. iMac Intel 27" Retina 5K Display Blade SSD Replacement: шаг 30, изображение 1 из 2 iMac Intel 27" Retina 5K Display Blade SSD Replacement: шаг 30, изображение 2 из 2
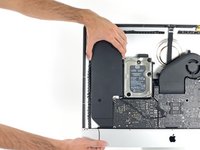
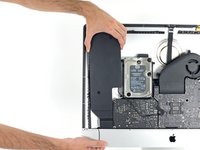
    • Lift the left speaker straight up, until the power button cable is exposed (about 0.5 inches).

    Спросите у FixBot
  31. iMac Intel 27" Retina 5K Display Blade SSD Replacement: шаг 31, изображение 1 из 3 iMac Intel 27" Retina 5K Display Blade SSD Replacement: шаг 31, изображение 2 из 3 iMac Intel 27" Retina 5K Display Blade SSD Replacement: шаг 31, изображение 3 из 3
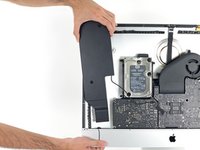
    • Gently de-route the power button cable from its groove in the left speaker.

    Спросите у FixBot
  32. iMac Intel 27" Retina 5K Display Blade SSD Replacement: шаг 32, изображение 1 из 3 iMac Intel 27" Retina 5K Display Blade SSD Replacement: шаг 32, изображение 2 из 3 iMac Intel 27" Retina 5K Display Blade SSD Replacement: шаг 32, изображение 3 из 3
    • Lift the left speaker straight up and remove it from the iMac.

    • If the gap between the hard drive and logic board was too narrow to free the speaker cable earlier, gently pull it free as you remove the speaker.

    • Push from the connector end as you pull from the speaker end to thread the cable under the hard drive's right bracket.

    Спросите у FixBot
  33. iMac Intel 27" Retina 5K Display Blade SSD Replacement, Hard Drive: шаг 33, изображение 1 из 2 iMac Intel 27" Retina 5K Display Blade SSD Replacement, Hard Drive: шаг 33, изображение 2 из 2
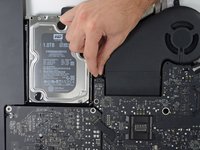
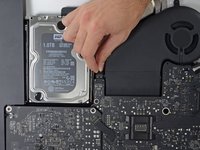
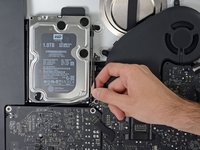
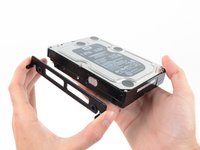
    • Pull straight up on the SATA data/power cable to disconnect it from the drive.

    Спросите у FixBot
  34. iMac Intel 27" Retina 5K Display Blade SSD Replacement: шаг 34, изображение 1 из 1
    • Remove two 7.3 mm T10 screws securing the left hard drive bracket to the rear case.

    Спросите у FixBot
  35. iMac Intel 27" Retina 5K Display Blade SSD Replacement: шаг 35, изображение 1 из 3 iMac Intel 27" Retina 5K Display Blade SSD Replacement: шаг 35, изображение 2 из 3 iMac Intel 27" Retina 5K Display Blade SSD Replacement: шаг 35, изображение 3 из 3
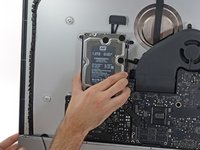
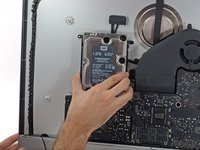
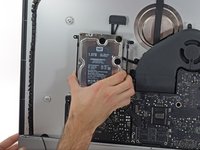
    • Grab the hard drive and left hard drive bracket together.

    • Tilt the left side up away from the rear case, and slide the assembly to the left.

    • Remove the hard drive and left hard drive bracket from the iMac.

    Спросите у FixBot
  36. iMac Intel 27" Retina 5K Display Blade SSD Replacement: шаг 36, изображение 1 из 2 iMac Intel 27" Retina 5K Display Blade SSD Replacement: шаг 36, изображение 2 из 2
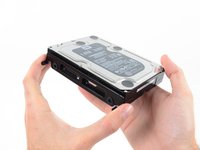
    • Remove the left hard drive bracket.

    Спросите у FixBot
  37. iMac Intel 27" Retina 5K Display Blade SSD Replacement, Remove the power supply: шаг 37, изображение 1 из 2 iMac Intel 27" Retina 5K Display Blade SSD Replacement, Remove the power supply: шаг 37, изображение 2 из 2
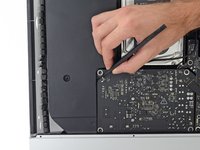
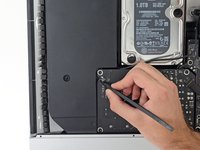
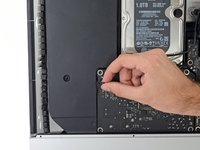
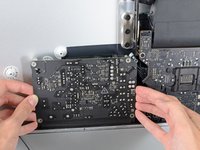
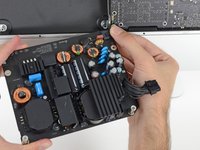
    • When working on the power supply, be very careful not to touch the capacitor leads or any exposed solder joints on the back of the power supply. Only handle the board by the edges.

    • Disconnect the power supply control cable from the power supply.

    Спросите у FixBot
  38. iMac Intel 27" Retina 5K Display Blade SSD Replacement: шаг 38, изображение 1 из 1
    • Remove the following four screws securing the power supply to the rear case (size T8 or T10 depending on the exact model):

    • Two 23.7 mm Torx screws

    • Two 7.3 mm Torx screws

    Спросите у FixBot
  39. iMac Intel 27" Retina 5K Display Blade SSD Replacement: шаг 39, изображение 1 из 3 iMac Intel 27" Retina 5K Display Blade SSD Replacement: шаг 39, изображение 2 из 3 iMac Intel 27" Retina 5K Display Blade SSD Replacement: шаг 39, изображение 3 из 3
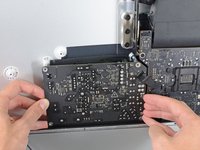
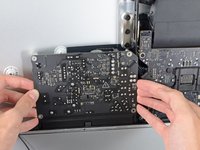
    • Do not attempt to remove the power supply from the case; it is still attached to the logic board by two cables.

    • Move the power supply board towards the left edge of the case and up to free it from the notch in the logic board.

    Спросите у FixBot
  40. iMac Intel 27" Retina 5K Display Blade SSD Replacement: шаг 40, изображение 1 из 2 iMac Intel 27" Retina 5K Display Blade SSD Replacement: шаг 40, изображение 2 из 2
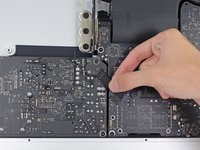
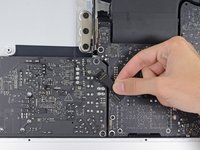
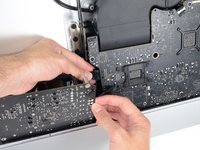
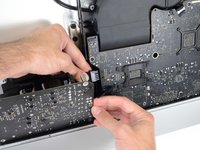
    • Depress the tab on the DC power cable connector, then pull it straight out of its socket on the back of the logic board.

    • If the cable is too difficult to disconnect, you can remove the power supply board and motherboard together.

    Спросите у FixBot
  41. iMac Intel 27" Retina 5K Display Blade SSD Replacement: шаг 41, изображение 1 из 3 iMac Intel 27" Retina 5K Display Blade SSD Replacement: шаг 41, изображение 2 из 3 iMac Intel 27" Retina 5K Display Blade SSD Replacement: шаг 41, изображение 3 из 3
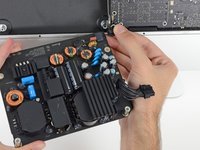
    • Be very careful not to touch the capacitor leads or any exposed solder joints on the back of the power supply. Only handle the board by the edges.

    • Flip the top of the power supply towards you, like opening a mailbox, to reveal the AC inlet cable connector.

    • Disconnect the AC inlet cable connector.

    Спросите у FixBot
  42. iMac Intel 27" Retina 5K Display Blade SSD Replacement, Right Speaker: шаг 42, изображение 1 из 1
    • Remove two 10.0 mm T10 screws.

    Спросите у FixBot
  43. iMac Intel 27" Retina 5K Display Blade SSD Replacement: шаг 43, изображение 1 из 2 iMac Intel 27" Retina 5K Display Blade SSD Replacement: шаг 43, изображение 2 из 2
    • Gently rock the right speaker slightly to the right, to allow access to its cable's connection on the logic board.

    Спросите у FixBot
  44. iMac Intel 27" Retina 5K Display Blade SSD Replacement: шаг 44, изображение 1 из 3 iMac Intel 27" Retina 5K Display Blade SSD Replacement: шаг 44, изображение 2 из 3 iMac Intel 27" Retina 5K Display Blade SSD Replacement: шаг 44, изображение 3 из 3
    • Use a spudger to loosen the right speaker cable's connector from its socket on the logic board.

    • Pull the connector to the right to remove it from its socket.

    Спросите у FixBot
  45. iMac Intel 27" Retina 5K Display Blade SSD Replacement: шаг 45, изображение 1 из 3 iMac Intel 27" Retina 5K Display Blade SSD Replacement: шаг 45, изображение 2 из 3 iMac Intel 27" Retina 5K Display Blade SSD Replacement: шаг 45, изображение 3 из 3
    • Lift the speaker straight up and remove it from the iMac.

    Спросите у FixBot
  46. iMac Intel 27" Retina 5K Display Blade SSD Replacement, Remove the fan: шаг 46, изображение 1 из 3 iMac Intel 27" Retina 5K Display Blade SSD Replacement, Remove the fan: шаг 46, изображение 2 из 3 iMac Intel 27" Retina 5K Display Blade SSD Replacement, Remove the fan: шаг 46, изображение 3 из 3
    • Use the tip of a spudger to disconnect the fan cable's connector from its socket on the logic board.

    Спросите у FixBot
  47. iMac Intel 27" Retina 5K Display Blade SSD Replacement: шаг 47, изображение 1 из 2 iMac Intel 27" Retina 5K Display Blade SSD Replacement: шаг 47, изображение 2 из 2
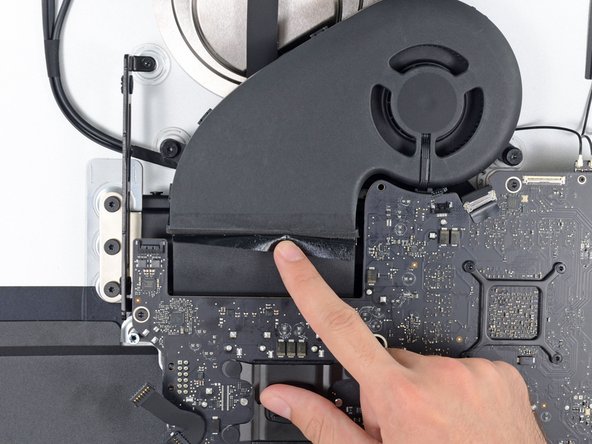
    • Peel the black tape connecting the fan to the exhaust duct back slightly.

    • Leave the tape in place on the exhaust duct—you only need to expose the joint to free the fan.

    Спросите у FixBot
  48. iMac Intel 27" Retina 5K Display Blade SSD Replacement: шаг 48, изображение 1 из 1
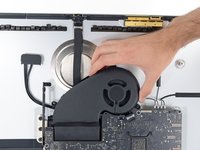
    • Remove three 12.4 mm T10 screws securing the fan to the rear case.

    Спросите у FixBot
  49. iMac Intel 27" Retina 5K Display Blade SSD Replacement: шаг 49, изображение 1 из 2 iMac Intel 27" Retina 5K Display Blade SSD Replacement: шаг 49, изображение 2 из 2
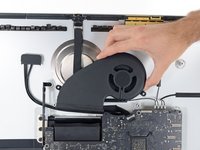
    • Remove the fan from the iMac.

    Спросите у FixBot
  50. iMac Intel 27" Retina 5K Display Blade SSD Replacement, Logic Board Assembly: шаг 50, изображение 1 из 3 iMac Intel 27" Retina 5K Display Blade SSD Replacement, Logic Board Assembly: шаг 50, изображение 2 из 3 iMac Intel 27" Retina 5K Display Blade SSD Replacement, Logic Board Assembly: шаг 50, изображение 3 из 3
    • Use the flat end of a spudger to disconnect each of the four antenna connectors from the AirPort/Bluetooth card.

    • Note the original positions for each connector when reconnecting the cables. From left to right on the card, the antennas are connected in the following order:

    • Leftmost

    • Top

    • Upper right

    • Lower right

    Спросите у FixBot
  51. iMac Intel 27" Retina 5K Display Blade SSD Replacement: шаг 51, изображение 1 из 3 iMac Intel 27" Retina 5K Display Blade SSD Replacement: шаг 51, изображение 2 из 3 iMac Intel 27" Retina 5K Display Blade SSD Replacement: шаг 51, изображение 3 из 3
    • This is a delicate connection that can be easily broken.

    • Flip up the metal retaining bracket on the iSight camera cable.

    • Pull the camera cable connector straight out of its socket, toward the top of the iMac.

    Спросите у FixBot
  52. iMac Intel 27" Retina 5K Display Blade SSD Replacement: шаг 52, изображение 1 из 3 iMac Intel 27" Retina 5K Display Blade SSD Replacement: шаг 52, изображение 2 из 3 iMac Intel 27" Retina 5K Display Blade SSD Replacement: шаг 52, изображение 3 из 3
    • Use the flat end of a spudger to disconnect the headphone jack cable connector from its socket on the logic board.

    • Gently push the cable out of the way.

    Спросите у FixBot
  53. iMac Intel 27" Retina 5K Display Blade SSD Replacement: шаг 53, изображение 1 из 2 iMac Intel 27" Retina 5K Display Blade SSD Replacement: шаг 53, изображение 2 из 2
    • Remove the following screws from the front of the logic board:

    • Two 23.7 mm T10 screws

    • Four 7.4 mm T10 screws

    • One 20.8 mm T25 spacer screw

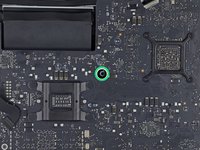
    • One captive T10 screw

    • This screw is beneath a hole in the logic board. You'll need a fixed screwdriver or the 60 mm extension from an iFixit driver kit to reach it.

    Спросите у FixBot
  54. iMac Intel 27" Retina 5K Display Blade SSD Replacement: шаг 54, изображение 1 из 3 iMac Intel 27" Retina 5K Display Blade SSD Replacement: шаг 54, изображение 2 из 3 iMac Intel 27" Retina 5K Display Blade SSD Replacement: шаг 54, изображение 3 из 3
    • The hard drive SATA cable can't be removed just yet, but will get in the way of removing the logic board.

    • Pull the cable and connector through the right hard drive bracket. Move the cable to the right side of the iMac, out of the way of the exhaust port.

    Спросите у FixBot
  55. iMac Intel 27" Retina 5K Display Blade SSD Replacement: шаг 55, изображение 1 из 1
    • Remove two 5.7 mm T10 screws from the top of the heat sink exhaust duct.

    Спросите у FixBot
  56. iMac Intel 27" Retina 5K Display Blade SSD Replacement: шаг 56, изображение 1 из 3 iMac Intel 27" Retina 5K Display Blade SSD Replacement: шаг 56, изображение 2 из 3 iMac Intel 27" Retina 5K Display Blade SSD Replacement: шаг 56, изображение 3 из 3
    • Tilt the logic board slightly forward.

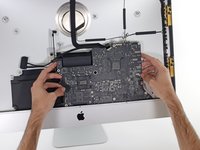
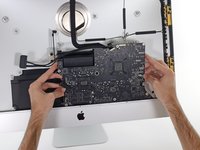
    • Lift the logic board straight up and out of the iMac. Be careful not to snag on any of the screw posts attached to the inside of the rear case.

    Спросите у FixBot
  57. iMac Intel 27" Retina 5K Display Blade SSD Replacement: шаг 57, изображение 1 из 2 iMac Intel 27" Retina 5K Display Blade SSD Replacement: шаг 57, изображение 2 из 2
    • When reassembling your iMac, be very careful to align the exterior I/O ports correctly. The logic board can sit crooked even when secured with all its screws.

    • You can use a USB flashdrive or ethernet cable to ensure the logic board is seated correctly while you screw it in.

    Спросите у FixBot
  58. iMac Intel 27" Retina 5K Display Blade SSD Replacement, SATA Cable: шаг 58, изображение 1 из 3 iMac Intel 27" Retina 5K Display Blade SSD Replacement, SATA Cable: шаг 58, изображение 2 из 3 iMac Intel 27" Retina 5K Display Blade SSD Replacement, SATA Cable: шаг 58, изображение 3 из 3
    • Pull up on the SATA power cable connector to disconnect it.

    • Unplug the SATA data cable connector by depressing its locking tab and pulling straight up on the connector.

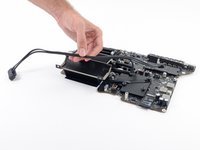
    • Remove the SATA cable from the logic board assembly to get it out of the way and prevent it from being damaged.

    Спросите у FixBot
  59. iMac Intel 27" Retina 5K Display Blade SSD Replacement, Blade SSD: шаг 59, изображение 1 из 1
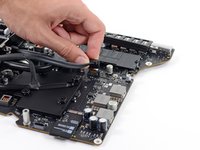
    • Remove the single 5.3 mm T8 screw securing the SSD to the logic board.

    Спросите у FixBot
  60. iMac Intel 27" Retina 5K Display Blade SSD Replacement: шаг 60, изображение 1 из 3 iMac Intel 27" Retina 5K Display Blade SSD Replacement: шаг 60, изображение 2 из 3 iMac Intel 27" Retina 5K Display Blade SSD Replacement: шаг 60, изображение 3 из 3
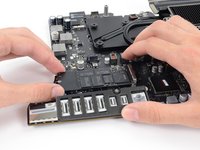
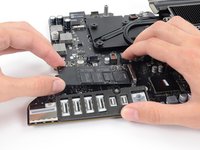
    • To avoid damaging its socket, do not lift the end of the SSD above about 15˚.

    • Lift the end of the SSD up slightly and pull it straight out of its socket on the logic board.

    • When reinstalling the SSD, be sure it is properly seated before reinstalling its retaining screw.

    Спросите у FixBot
Заключение

To reassemble your device, follow these instructions in reverse and use our Adhesive Strips Guide to reattach the display glass.

Take your e-waste to an R2 or e-Stewards certified recycler.

Repair didn’t go as planned? Try some basic troubleshooting, or ask our Answers community for help.

255 человек успешно провели ремонт по этому руководству.

Sam Goldheart

Участник с: 10/18/12

477 245 Репутация

Автор 538 руководств

Команда

iFixit Участник iFixit

Staff

123 членов

Автор 25 699 руководств

130 Комментарии к руководству

Does it mean that I can install Mavericks to the new hard drive rather than Yosemite for imac retina new model. I really dont like Yosemite.

ulas sunar - Ответить Поделиться

Hello,

So i have maxed out version of 2014 iMac 5k with 3TB fusion drive. I am looking to replace above described SSD with crucial 920 gb ssd. Is there other brands of compatible ssd's you would recommend? Will this new ssd still act as fusion drive or can I install OS X separately on it?

Thanks

romanvm - Ответить Поделиться
If I want to swap the fusion drive with a SSD, do I need to remove the SSD-part of the fusion drive as well or can it be left behind?

mhjvdven - Ответить Поделиться
Yes - you can leave it behind but at some point you will need to reformat and break the fusion into the 2 separate drives that actually there. Please backup first as this is a data destructive operation.

Chip T - Ответить Поделиться

Does anybody know if 5K Retina iMacs purchased *without* Fusion Drives come with SSD connectors inside?

loccie - Ответить Поделиться

Добавить комментарий

Статистика просмотров:

За последние 24 часов: 19

За последние 7 дней: 173

За последние 30 дней: 879

За всё время: 539,679