Введение
For an easier repair, use our fix kit and follow this shorter guide to replace your iPhone’s entire screen.
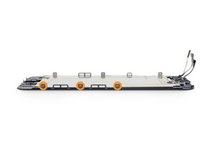
For more advanced fixers, this guide will help you replace only the iPhone’s LCD and digitizer assembly (a.k.a. the bare “front panel”). This requires you to transfer several components from your original screen to the new one before installing it—including the front-facing camera, earpiece speaker, LCD shield plate, and home button assembly.
For all screen/display repairs, it's important to transfer the original home button onto the new display in order for Touch ID (fingerprint scanning) to function.
You can also use this guide to replace the following parts:
Выберете то, что вам нужно
-
-
Power off your iPhone before beginning disassembly.
-
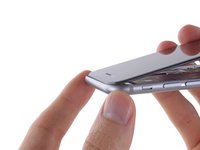
Remove the two 3.6 mm-long P2 Pentalobe screws next to the Lightning connector.
-
-
-
If your display glass is cracked, keep further breakage contained and prevent bodily harm during your repair by taping over the glass.
-
Lay overlapping strips of clear packing tape over the iPhone's display until the whole face is covered.
-
If the broken glass makes it difficult to get a suction cup to stick in the next few steps, try folding a strong piece of tape (such as duct tape) into a handle and lifting the display with that instead.
-
-
Инструмент, используемый на этом этапе:Clampy - Anti-Clamp$24.95
-
Pull the blue handle backwards to unlock the Anti-Clamp's arms.
-
Slide the arms over either the left or right edge of your iPhone.
-
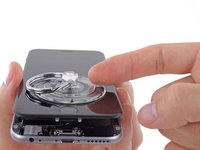
Position the suction cups near the bottom edge of the iPhone just above the home button—one on the front, and one on the back.
-
Squeeze the cups together to apply suction to the desired area.
-
-
-
Pull the blue handle forwards to lock the arms.
-
Turn the handle clockwise 360 degrees or until the cups start to stretch.
-
Insert an opening pick under the screen when the Anti-Clamp creates a large enough gap.
-
Skip the next three steps.
-
-
Инструмент, используемый на этом этапе:Clampy - Anti-Clamp$24.95
-
If you don't have an Anti-Clamp, use a single suction cup to lift the front panel:
-
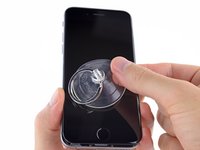
Press a suction cup onto the screen, just above the home button.
-
-
-
While holding the iPhone down with one hand, pull up on the suction cup to slightly separate the front panel assembly from the rear case.
-
Using a plastic opening tool, begin to gently pry the rear case down, away from the display assembly, while continuing to pull up with the suction cup.
-
-
-
Pull the plastic nub to release the vacuum seal on the suction cup.
-
Remove the suction cup from the display assembly.
-
-
-
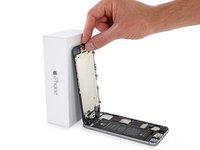
Open the iPhone by swinging the home button end of the front panel assembly away from the rear case, using the top of the phone as a hinge.
-
-
-
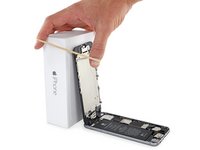
Open the display to about a 90º angle, and lean it against something to keep it propped up while you're working on the phone.
-
Add a rubber band to keep the display securely in place while you work. This prevents undue strain on the display cables.
-
-
Инструмент, используемый на этом этапе:Magnetic Project Mat$19.95
-
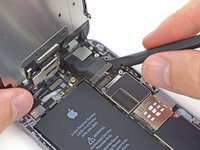
Remove the following Phillips screws from the battery connector bracket:
-
One 2.2 mm screw
-
One 3.2 mm screw
-
-
-
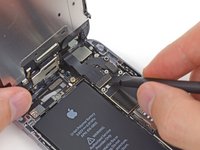
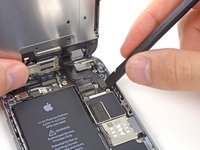
Use a plastic opening tool to gently pry the battery connector up from its socket on the logic board.
-
-
-
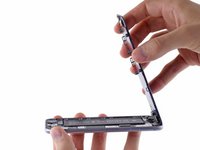
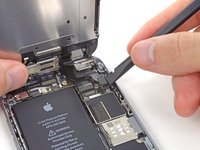
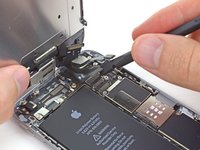
Remove the following five Phillips screws securing the front panel assembly cable bracket:
-
Three 1.2 mm screws
-
One 1.7 mm screw
-
One 3.1 mm screw
-
-
-
-
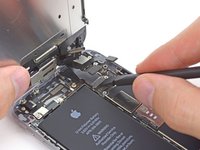
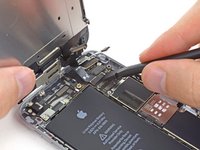
Use a spudger or a fingernail to disconnect the front-facing camera and sensor cable connector.
-
-
-
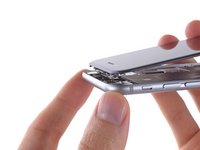
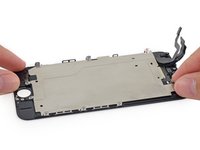
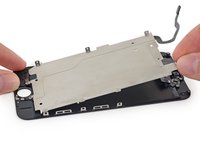
Remove the front panel assembly from the rear case.
-
-
-
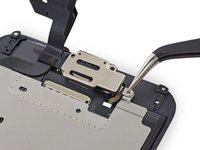
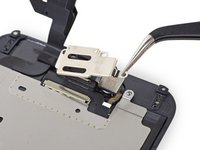
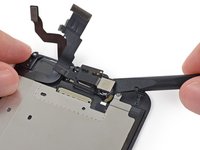
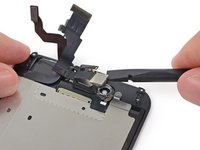
Remove the following Phillips screws from the earpiece speaker/front-facing camera bracket:
-
One 2.3 mm screw
-
One 3.0 mm screw
-
One 2.2 mm screw
-
-
-
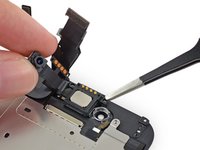
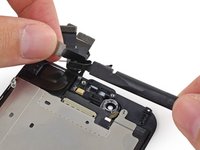
Holding the front-facing camera out of the way, remove the earpiece speaker from the front panel.
-
-
-
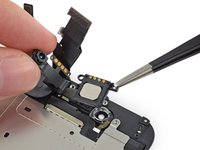
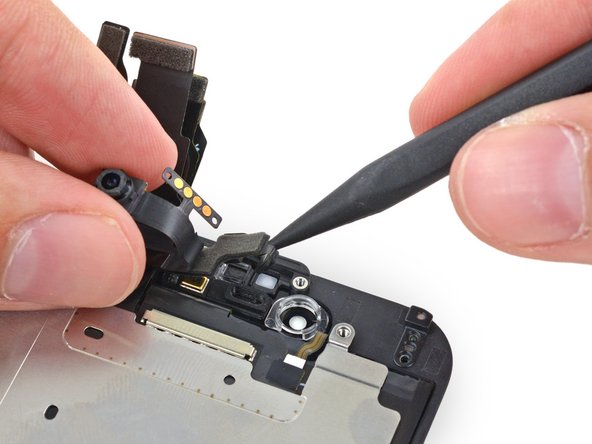
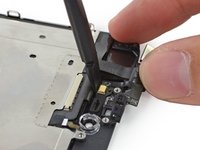
Keeping the front-facing camera out of the way, use the point of a spudger to push the ambient-light sensor up out of its recess in the front panel.
-
-
-
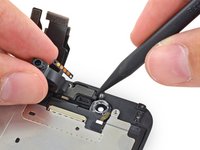
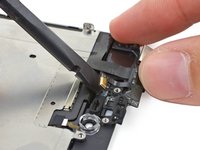
Fold the front-facing camera and sensor cable up to allow access to the microphone.
-
-
-
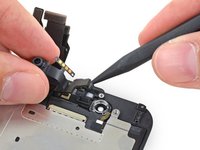
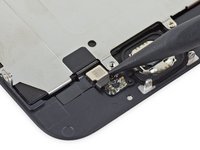
Carefully pry the microphone end of the sensor cable off of the adhesive holding it to the front panel.
-
-
-
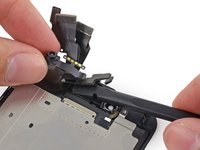
Remove the two 1.9 mm Phillips screws securing the home button bracket.
-
-
-
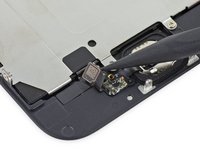
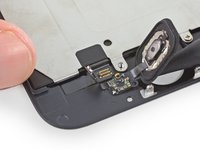
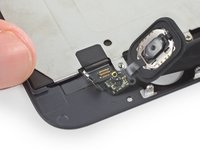
Use the point of a spudger to disconnect the home button cable connector by pushing it up and away from the home button.
-
-
Инструмент, используемый на этом этапе:iOpener$17.99
-
Apply mild heat (with an iOpener, heat gun, or hair dryer) to soften the adhesive securing the home button membrane.
-
Using your fingertip, apply firm, constant pressure on the home button from the front side of the display assembly, until the membrane starts to separate from the front panel.
-
-
-
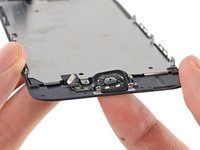
Peel the home button the rest of the way off of the display by prying gently with a spudger.
-
-
Инструмент, используемый на этом этапе:iOpener$12.99
-
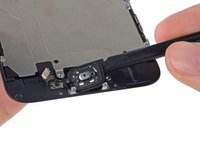
Use the point of a spudger to carefully separate the home button cable from the adhesive securing it to the front panel.
-
-
-
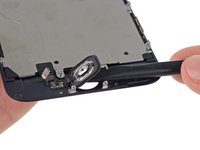
Once all the adhesive has been separated, remove the home button from the front panel.
-
-
-
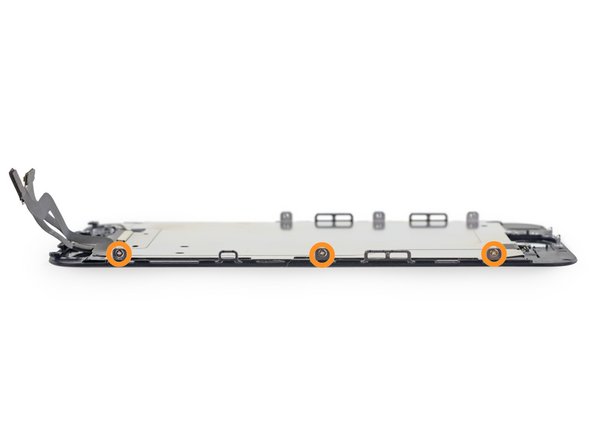
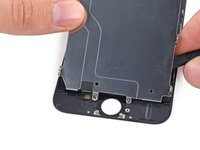
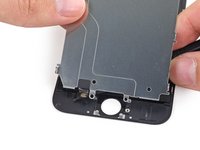
Remove the following Phillips #00 screws securing the LCD shield plate to the front panel:
-
One 1.7 mm screw
-
Six 1.6 mm screws (three on each side)
-
-
-
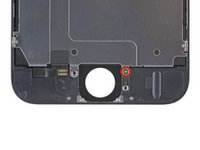
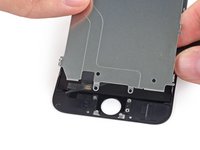
Slide the point of a spudger behind the shield plate to gently peel the home button cable up off of the front panel.
-
Remove the LCD shield plate.
-


To reassemble your device, follow these instructions in reverse order.
To reassemble your device, follow these instructions in reverse order.
Отменить: Я не выполнил это руководство.
1220 человек успешно провели ремонт по этому руководству.


123 Комментариев
Did this replacement and the finger scaner stop working. I didnt damge anything im a experienced technician the button still worked but the finger print doest work. I thought the firmware was corrupted and I updated the phone. It now shows an error and can not be restore to normal functionality, its stuck in restore mode . I had to reassemble the phone and set it to pay and paid a fee for a new one.
Wow man, i'm sorry to hear that.. Hate that kinda things.
I have same issue , i tried many time to restore the phone after Touch ID failed , but restore cant be completed because of error #53 ,
Same problem! Same backround! Need help :/
mmummler -
Is there any more reason to disconnect the battery on the 6 than any previous iPhone? I've repaired countless 5,5c and 5S without disconnecting the battery. Never a problem.