Введение
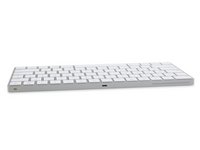
Apple just released their new Magic Keyboard amidst a slew of new accessories and some shiny new iMacs. This "magical" new Apple accessory has garnered some buzz for its rechargeable battery, instant pairing, and new key mechanism, but how will it fare in terms of repairability? We're eager to find out, so it's time to join the fun with the best magic trick we know. Alohomora! It's teardown time!
Looking for the rest of the 2015 Maccessory lineup? Check out the Magic Mouse 2 and Magic Trackpad 2 teardowns!
Do you want to be part of the magic? Find us on Twitter, Instagram, or Facebook for more tech news.
Выберете то, что вам нужно
Видеообзор
-
-
Before the plastic bits start flying, lets take a peek at the spec sheet:
-
Dimensions: 0.43" × 10.89" × 4.52"
-
Bluetooth wireless connectivity
-
Internal lithium-ion battery
-
Lightning port (for charging and pairing)
-
-
-
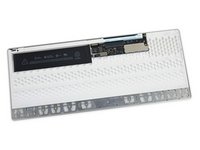
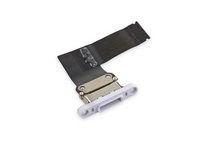
Flipping over the new keyboard, we find a magical, new model number: A1644.
-
And a Lightning port! If you just felt a soft breeze, it may have been from millions of television remotes sighing in relief; no more stealing batteries for your keyboard!
-
-
-
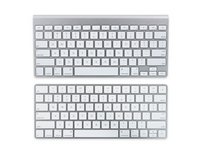
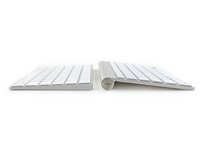
Comparison time! Let's take a look at how the Magic Keyboard stacks up against the 3rd generation Wireless Keyboard.
-
The new keyboard adopts the slightly revised layout of the 2015 MacBook keyboard—including " full-size" left and right arrow keys, and function keys.
-
Switching to an internal battery means Apple engineers got to ditch the battery tube, giving the keyboard a lower profile. This should be good practice for typing on our new iPad Pro Smart Keyboard!
-
-
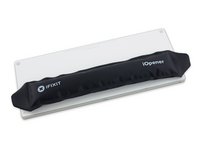
Инструмент, используемый на этом этапе:iOpener$14.95
-
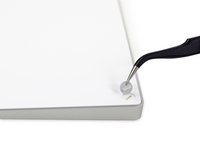
This looks like a good place to start. Manufacturers often hide screws under rubber feet to get that clean unbroken underbody look.
-
Tweezing out a rubber foot reveals a slot that holds the foot in place. Almost a screw! But not. This is just some molded plastic.
-
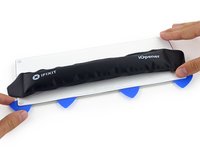
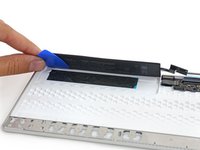
Thanks to a complete lack of fastener or seam, it's time to open some eyes with an iOpener.
-
-
-
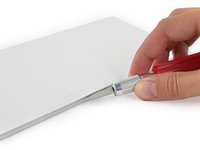
Инструмент, используемый на этом этапе:Curved Razor Blade$9.99
-
The gap between the plastic bottom and aluminum frame is too thin even for our opening picks—so instead we put our Apple Watch Opening tool to work, hoping for some prying purchase.
-
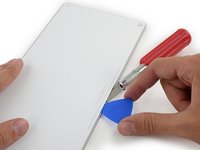
Once we get enough of a gap opened up, we sheath our knife and switch to plastic. Plastic Opening Picks, that is.
-
-
-
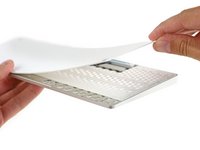
With enough of the rear panel pried up to get a handle on it, we can peel it right off the back, after some struggles.
-
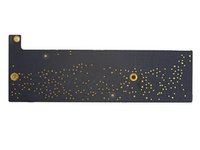
Underneath we find our first components—the logic board and rechargeable battery. And another layer of adhesive laden plastic.
-
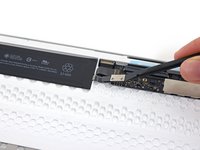
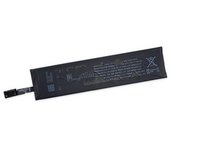
The battery is a snap to disconnect—no solder here, so Apple intends for it to be at least somewhat replaceable.
-
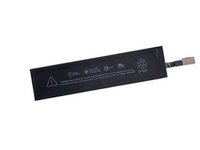
Did someone glue an iPhone battery in here?
-
Okay, not really. This battery has different dimensions than an iPhone battery, but it shares some similar design concepts. Unfortunately, those nifty adhesive strips are not one of them.
-
-
-
Without those peel-out adhesive strips, more vigorous prying and picking are required to free the battery.
-
The 2.98 Wh battery has less than half the capacity of the 6.55 Wh battery in the iPhone 6s. But with less to do the battery should last for months on a single charge.
-
That may be true, but it's important to note that all non-replaceable batteries limit device lifespans, eliminate users' options to use removable and rechargeable batteries, and greatly hinder end of life recycling.
-
-
-
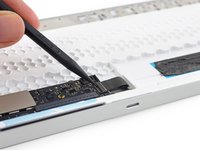
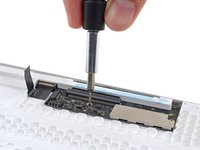
We disconnect a promising Lightning connector cable, and although it's not a soldered tangle, the port refuses to budge.
-
All that stands in our way are a couple T3 screws, and then the (tiny!) logic board is free!
-
-
-
A quick peek at the logic board reveals a dusting of silicon we can't wait to get a closer look at. Notable hardware includes:
-
Broadcom BCM20733 Enhanced Data Rate Bluetooth 3.0 Single-Chip Solution
-
ST Microelectronics STM32F103VB 72 MHz 32-bit RISC ARM Cortex-M3
-
NXP 1608A1 Charging IC
-
Texas Instruments BQ24250C Single Input I2C/Standalone Switch-Mode Li-Ion Battery Charger
-
-
-
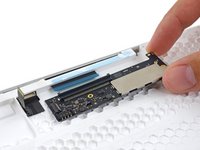
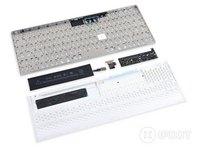
Another layer bites the dust!
-
This honeycombed spacer layer is sandwiched in glue, giving the keyboard strength to stand up against even the most... enthusiastic typists.
-
The Lightning port is finally, after a couple screws, free.
-
-
-
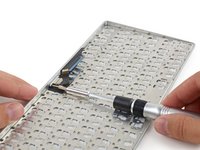
HatsKeycaps off to this teardown! -
Spoiler alert: no butterfly keys in this net, just Apple's fancy new scissor mechanism.
-
However, according to Apple, they've actually reengineered the scissor mechanism to increase stability and improve key travel. By our best measurements, the new design offers a whopping 1 mm travel distance and totally flat keypresses—or something.
-
-
-
The Magic Keyboard Repairability Score: 3 out of 10 (10 is easiest to repair)
-
The Lightning port and battery can be replaced independently of the logic board—if you can get the device open.
-
While fragile, the keycaps are removable and replaceable.
-
Excessive use of strong adhesive makes it very difficult to remove the rear panel, hindering access to every internal component.
-
Without a service manual, it is difficult to open the keyboard without damaging internal components.
-


38 Комментарии к руководству
I have removed my spacebar and can't put it back properly. It just stays pushed down as if it was pressed. Can't find any help online with that. People, please help!
same over here. It does work but stays down. Did you find a solution?
I had the same issue, and I went to Apple Store today, they said they have no way to fix. They can take my keyboard back and give me $10 discount on the replacement. Which I refused.
And I found this video, it saved me. Please follow the way how he slide in and bush back into the keyboard from the 12 second of this youtube video.
The YouTube video helped me immensely (thanks Ian), for other people with a similar issue where replacing the key doesn’t work…
My ‘Control’ key was stuck flat. It seems the issue was the key itself where the ‘slot’s on the top underside of the key where the mechanism slots into were bent from trying to put it back (I used an otoscope to find this out!). I used the thinnest iFixit screwdriver bit (#1) to lever the ‘slot’ on the key back into shape so the mechanism could fit into it rather than be forced to the side.
Then inserting the key as per the video worked first time. Thanks!
I spilled milk on my magic keyboard :S and now the f1,2,3 'til f10 and the right shift key don't work. and I made the stupidity to take off the f1 and f2 to see if I was capable to clean and make it work... not... now I have two keys that I can´t attach again and I think I broke a little part of the mechanism... big $@$*. today I went to the official apple store here in aveiro and they told that can´t help me, that don't have any mechanism parts to attach again the keys and that I have to buy a new keyboard if I want all the keys working, what?? anyone know any website that sells just the new scissor mechanism for the magic keyboard? many thanks.