Перейти к основному содержанию
/
Мой рабочий стол для верстки руководств

Получите быстрый доступ к руководствам, запчастям и ответам касательно ваших устройств

ASUS MeMO Pad 7 (ME572C) Rear Camera Replacement

ASUS MeMO Pad 7 (ME572C) Rear Camera Replacement

Efe Guldogan

Efe Guldogan и 2 другие участники

Последнее обновление May 7, 2024

10 - 15 минут
Средне

This guide will show you how to replace the rear camera for a Asus MeMO Pad 7. If you try to take a picture from the rear camera and it is not working at all, this guide will help to replace your rear camera and make it work.

Выберете то, что вам нужно

Инструменты

Показать больше…

  1. ASUS MeMO Pad 7 (ME572C) Rear Camera Replacement, Rear Panel: шаг 1, изображение 1 из 2 ASUS MeMO Pad 7 (ME572C) Rear Camera Replacement, Rear Panel: шаг 1, изображение 2 из 2
    • Make sure your device is turned off. Then with a plastic opening tool, carefully remove the back panel by carefully working your way around the perimeter.

    • The panel will be glued on and requires pressure to open.

  2. ASUS MeMO Pad 7 (ME572C) Rear Camera Replacement: шаг 2, изображение 1 из 3 ASUS MeMO Pad 7 (ME572C) Rear Camera Replacement: шаг 2, изображение 2 из 3 ASUS MeMO Pad 7 (ME572C) Rear Camera Replacement: шаг 2, изображение 3 из 3
    • After removing the rear panel, use a plastic openning tool to remove the frame of the tablet.

    • Start in the middle of the top side and insert a plastic opening tool between the screen and the frame.

    • Carefully run the plastic opening tool along all the edges of the tablet.

  3. ASUS MeMO Pad 7 (ME572C) Rear Camera Replacement: шаг 3, изображение 1 из 1
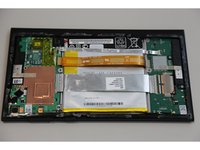
    • When you take the rear panel and the frame out, place the rear panel and the frame away from the device.

  4. ASUS MeMO Pad 7 (ME572C) Rear Camera Replacement, Battery: шаг 4, изображение 1 из 3 ASUS MeMO Pad 7 (ME572C) Rear Camera Replacement, Battery: шаг 4, изображение 2 из 3 ASUS MeMO Pad 7 (ME572C) Rear Camera Replacement, Battery: шаг 4, изображение 3 из 3
    Инструмент, используемый на этом этапе:
    Tweezers
    $4.99
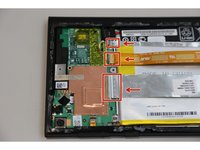
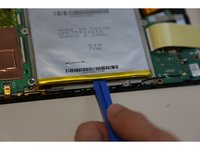
    • Disconnect the ZIF connectors to release the data cables holding the battery in. Use tweezers to do this.

    • You can also use your hand to remove ZIF connectors.

    • ZIF connectors are delicate so be careful when you are removing them.

  5. ASUS MeMO Pad 7 (ME572C) Rear Camera Replacement: шаг 5, изображение 1 из 1
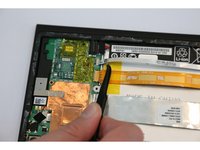
    • Find the place where the battery connector is. Disconnect the battery connectors by carefully pulling up on them using a spudger or plastic opening tool.

  6. ASUS MeMO Pad 7 (ME572C) Rear Camera Replacement: шаг 6, изображение 1 из 3 ASUS MeMO Pad 7 (ME572C) Rear Camera Replacement: шаг 6, изображение 2 из 3 ASUS MeMO Pad 7 (ME572C) Rear Camera Replacement: шаг 6, изображение 3 из 3
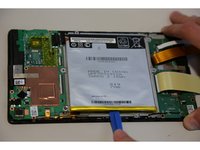
    • Using a plastic opening tool carefully pry the battery loose. The battery is glued to the pad; slight pressure will be needed to remove the battery.

    • The casing of the battery is soft and can easily tear. Tearing can lead to the chemicals in the battery to leak out.

  7. ASUS MeMO Pad 7 (ME572C) Rear Camera Replacement, Motherboard: шаг 7, изображение 1 из 2 ASUS MeMO Pad 7 (ME572C) Rear Camera Replacement, Motherboard: шаг 7, изображение 2 из 2
    Инструмент, используемый на этом этапе:
    Tweezers
    $4.99
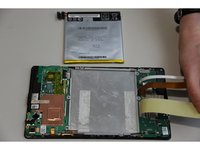
    • After removing the battery from the device, locate the volume connectors on the side of the device.

    • Using tweezers, carefully remove the volume connectors and place it to the side.

  8. ASUS MeMO Pad 7 (ME572C) Rear Camera Replacement: шаг 8, изображение 1 из 2 ASUS MeMO Pad 7 (ME572C) Rear Camera Replacement: шаг 8, изображение 2 из 2
    • Locate the GPS antenna. Pry off the GPS antenna cable with a spudger.

  9. ASUS MeMO Pad 7 (ME572C) Rear Camera Replacement: шаг 9, изображение 1 из 2 ASUS MeMO Pad 7 (ME572C) Rear Camera Replacement: шаг 9, изображение 2 из 2
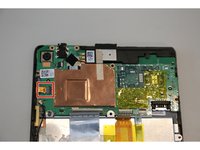
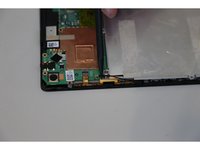
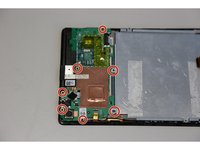
    • Locate seven 2mm Phillips #0 screws attaching the motherboard to the pad. Remove the screws with a Phillips #000 screwdriver.

    • Place your screws somewhere you will remember they are at.

  10. ASUS MeMO Pad 7 (ME572C) Rear Camera Replacement: шаг 10, изображение 1 из 1
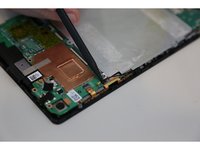
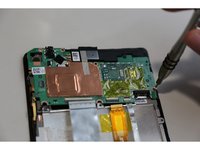
    • Once all the screws are taken out, you can remove the motherboard. Carefully, take the motherboard out with a plastic opening tool.

  11. ASUS MeMO Pad 7 (ME572C) Rear Camera Replacement, Rear Camera: шаг 11, изображение 1 из 1
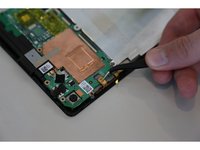
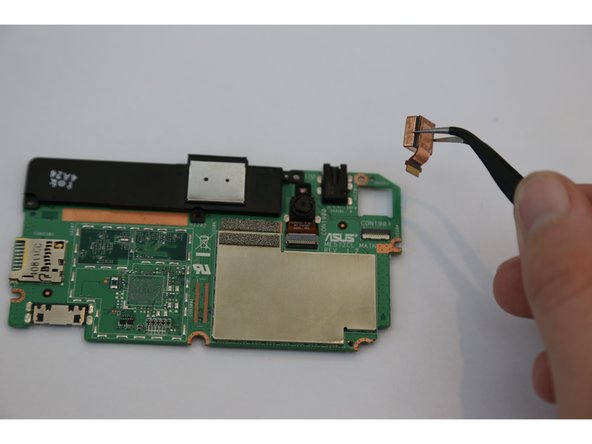
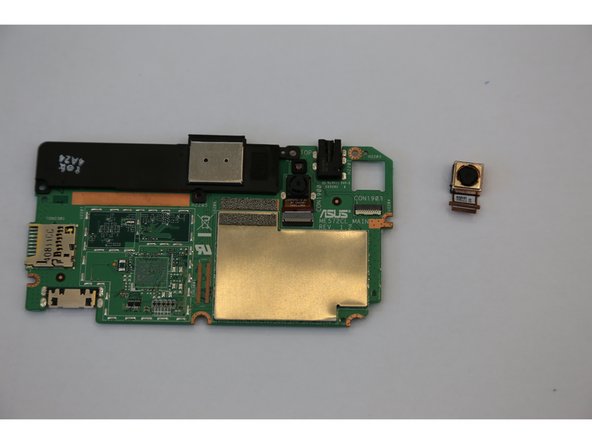
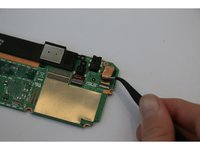
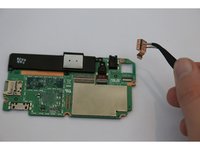
    • Flip the motherboard and find the place where the rear camera connector is.

  12. ASUS MeMO Pad 7 (ME572C) Rear Camera Replacement: шаг 12, изображение 1 из 3 ASUS MeMO Pad 7 (ME572C) Rear Camera Replacement: шаг 12, изображение 2 из 3 ASUS MeMO Pad 7 (ME572C) Rear Camera Replacement: шаг 12, изображение 3 из 3
    Инструмент, используемый на этом этапе:
    Tweezers
    $4.99
    • Using tweezers, carefully remove the rear camera connectors and place it to the side.

Заключение

To reassemble your device, follow these instructions in reverse order.

2 человек успешно провели ремонт по этому руководству.

Efe Guldogan

Участник с: 08/26/15

860 Репутация

Автор 4 руководств

Команду

USF Tampa, Team 14-23, Meier Fall 2015 Участник USF Tampa, Team 14-23, Meier Fall 2015

USFT-MEIER-F15S14G23

4 членов

Автор 14 руководств

0Комментарии к руководству

Добавить комментарий

Статистика просмотров:

За последние 24 час(ов): 1

За последние 7 дней: 1

За последние 30 дней: 3

За всё время: 751