Перейти к основному содержанию

Alcatel One Touch Idol 3 Battery Replacement

Выберете то, что вам нужно

  1. Alcatel One Touch Idol 3 Battery Replacement, Battery: шаг 1, изображение 1 из 3 Alcatel One Touch Idol 3 Battery Replacement, Battery: шаг 1, изображение 2 из 3 Alcatel One Touch Idol 3 Battery Replacement, Battery: шаг 1, изображение 3 из 3
    • Remove the sim tray by inserting a sim removal tool and then pulling it out.

  2. Alcatel One Touch Idol 3 Battery Replacement: шаг 2, изображение 1 из 3 Alcatel One Touch Idol 3 Battery Replacement: шаг 2, изображение 2 из 3 Alcatel One Touch Idol 3 Battery Replacement: шаг 2, изображение 3 из 3
    • Remove the back cover by moving around its perimeter with a thin object that can fit.

    • Eventually you will be able to pry open the back cover.

    • Although a razor is depicted, we recommend using ESD-safe pry tools instead.

  3. Alcatel One Touch Idol 3 Battery Replacement: шаг 3, изображение 1 из 2 Alcatel One Touch Idol 3 Battery Replacement: шаг 3, изображение 2 из 2
    • Remove the protective sticker from the battery connection.

  4. Alcatel One Touch Idol 3 Battery Replacement: шаг 4, изображение 1 из 2 Alcatel One Touch Idol 3 Battery Replacement: шаг 4, изображение 2 из 2
    • Disconnect the battery's connection to the motherboard by lifting it upwards.

    • Although a razor is depicted, we recommend using ESD-safe pry tools instead.

  5. Alcatel One Touch Idol 3 Battery Replacement: шаг 5, изображение 1 из 2 Alcatel One Touch Idol 3 Battery Replacement: шаг 5, изображение 2 из 2
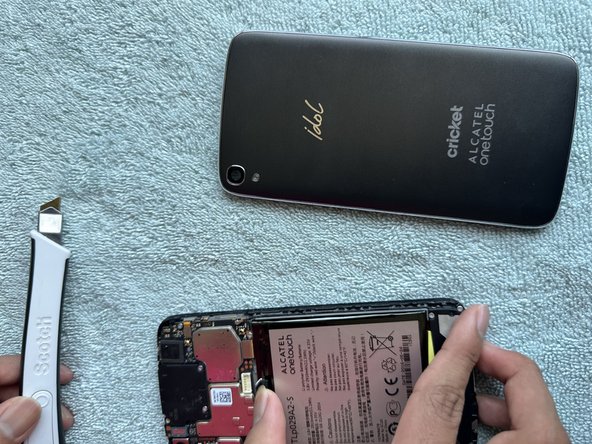
    • Add a small amount of isopropyl alcohol around the sides of the battery to soften the adhesive.

    • Take care to not get isopropyl alcohol on any other parts of the phone.

  6. Alcatel One Touch Idol 3 Battery Replacement: шаг 6, изображение 1 из 3 Alcatel One Touch Idol 3 Battery Replacement: шаг 6, изображение 2 из 3 Alcatel One Touch Idol 3 Battery Replacement: шаг 6, изображение 3 из 3
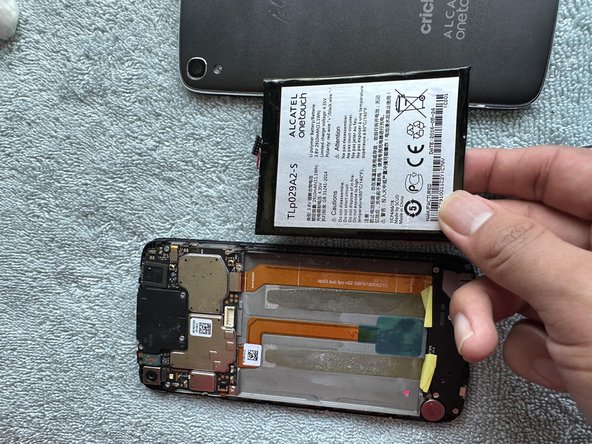
    • Pry out the battery by leveraging an object under the battery and lifting it upwards.

    • Although a razor is depicted, we recommend using ESD-safe pry tools instead. A razor could easily puncture the battery and create a hazard.

Заключение

To reassemble your device, follow these instructions in reverse order.

Eric Lopez

Участник с: 10/31/23

133 Репутация

1 руководство автора

Команда

CSU Los Angeles, Team 2-87, Briggs Fall 2023 Участник CSU Los Angeles, Team 2-87, Briggs Fall 2023

CSULA-BRIGGS-F23S2G87

1 член

Автор 1 руководств

0 Комментариев

Добавить комментарий

Просмотр статистики:

За последние 24часов: 1

За последние 7 дней: 5

За последние 30 дней: 12

За всё время: 74