Перейти к основному содержанию
/
Мой рабочий стол для верстки руководств

Получите быстрый доступ к руководствам, запчастям и ответам касательно ваших устройств

Asus Chromebook C523N Touchpad Replacement

Asus Chromebook C523N Touchpad Replacement

Charlotte Arkwright

Charlotte Arkwright и 2 другие участники

Последнее обновление January 3, 2020

15 мин.
Легко
Нужны более качественные фото

If your Asus Chromebook C523N’s touchpad is not responding, use this guide to replace it.

Before beginning this guide, make sure the power is off and the laptop is disconnected from any power source.

Выберете то, что вам нужно

Инструменты

Показать больше…

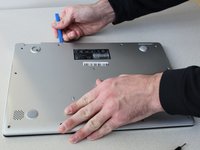
  1. Asus Chromebook C523N Touchpad Replacement, Back Cover: шаг 1, изображение 1 из 2 Asus Chromebook C523N Touchpad Replacement, Back Cover: шаг 1, изображение 2 из 2
    • Remove the four 0.5mm JIS #00 screws from the bottom edge of the Chromebook and one in the center.

    • Remove the six 1.7mm JIS #00 screws from the sides and top edge of the Chromebook.

  2. Asus Chromebook C523N Touchpad Replacement: шаг 2, изображение 1 из 2 Asus Chromebook C523N Touchpad Replacement: шаг 2, изображение 2 из 2
    • Using a spudger, lift the top left base pad and remove it to reveal a final screw underneath.

    • Remove the one 0.5mm JIS #00 screw underneath the base pad.

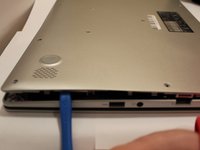
  3. Asus Chromebook C523N Touchpad Replacement: шаг 3, изображение 1 из 2 Asus Chromebook C523N Touchpad Replacement: шаг 3, изображение 2 из 2
    • Use an opening tool to gently pry the base enclosure up and remove from the laptop.

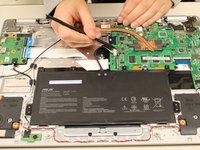
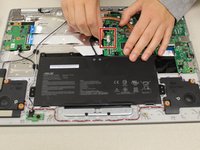
  4. Asus Chromebook C523N Touchpad Replacement, Battery: шаг 4, изображение 1 из 3 Asus Chromebook C523N Touchpad Replacement, Battery: шаг 4, изображение 2 из 3 Asus Chromebook C523N Touchpad Replacement, Battery: шаг 4, изображение 3 из 3
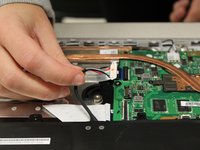
    • To disconnect the cable, use the tip of a spudger or your fingernail to flip up the small locking flap.

    • Gently disconnect the battery cable from the motherboard.

  5. Asus Chromebook C523N Touchpad Replacement: шаг 5, изображение 1 из 2 Asus Chromebook C523N Touchpad Replacement: шаг 5, изображение 2 из 2
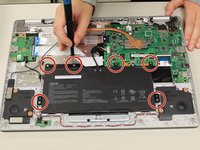
    • Remove six 1.4 mm JIS #00 screws from the battery.

  6. Asus Chromebook C523N Touchpad Replacement: шаг 6, изображение 1 из 1
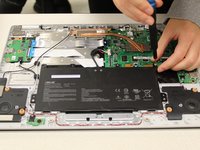
    • Remove the battery from the laptop.

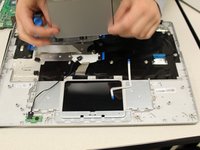
  7. Asus Chromebook C523N Touchpad Replacement, Touchpad: шаг 7, изображение 1 из 1
    • Pull gently on the touchpad cable connector to disconnect.

  8. Asus Chromebook C523N Touchpad Replacement: шаг 8, изображение 1 из 1
    • Carefully, remove the tape from the touch pad only.

  9. Asus Chromebook C523N Touchpad Replacement: шаг 9, изображение 1 из 1
    • Remove the three 1.4 mm JIS #00 screws.

  10. Asus Chromebook C523N Touchpad Replacement: шаг 10, изображение 1 из 2 Asus Chromebook C523N Touchpad Replacement: шаг 10, изображение 2 из 2
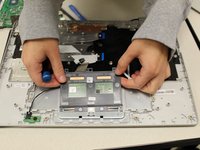
    • Lift at the far edge of the touchpad to remove it.

Заключение

To reassemble your device, follow these instructions in reverse order.

2 человек успешно провели ремонт по этому руководству.

Charlotte Arkwright

Участник с: 10/17/19

169 Репутация

1 руководство автора

Команду

Grand Valley State University, Team S4-G2, DeVasto Fall 2019 Участник Grand Valley State University, Team S4-G2, DeVasto Fall 2019

GVSU-DEVASTO-F19S4G2

4 членов

Автор 6 руководств

3 Комментариев

Where do i buy the replacement touch pad

Anthony hughs - Ответить

Very precise and clear. Thank you.

Raymond Trail - Ответить

very clear instructions and photos. It was Easy, as described! One repairer had advised I buy a new Chromebook, bought an unused touchpad for £11. It took me a bit longer than the estimated 15 minutes, but this was the first time I’ve ever had the back off a laptop and attempted a repair/replacement, so took loads of photo’s on the way and took my time. I’ll definitely consider another DIY repair in the future.

John Outhwaite - Ответить

Добавить комментарий

Статистика просмотров:

За последние 24 час(ов): 1

За последние 7 дней: 9

За последние 30 дней: 25

За всё время: 955