
Asus MeMO Pad HD 7 Speaker Assembly Replacement
Введение
Перейти к шагу 1This guide will direct you in replacing the entire speaker assembly for the tablet. The guide will require a few simple steps and removing a few small screws form the device.
Выберете то, что вам нужно
Запчасти
Инструменты


Показать больше…
-
-
Carefully remove the back panel by using a plastic opening tool to remove the panel off the device.
-
Pull the back panel away from the device.
-
-
-
Unlock the ZIF connectors on the data cables.
-
Remove the cable from its slot by gently pulling downward on the tabs.
-
-
-
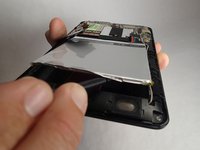
Locate the battery connector by following the wires that come from the top right of the battery. To disconnect the battery just lift up gently on the wires. Use a spudger or blue plastic opening tool to gently lift the wires if it is hard to get a grip.
-
-
-
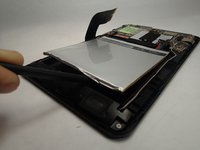
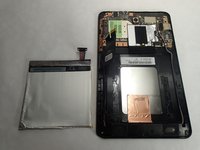
Using a spudger carefully pry the battery up. It is glued down so slight pressure may be needed.
-
-
-
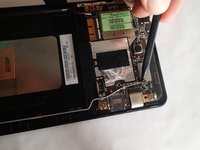
Unscrew two Philip's #000 2 mm screws located on the left and right side of the speaker housing.
-
-
-
Locate the speaker wires to the left side of the battery. Remove the connector by pulling up gently or prying with a tool if you can not get a good grip.
-
-
-
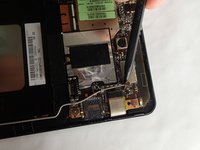
Pry the GPS Antenna cable straight up using a spudger or similar prying tool. It will be the grey wire that runs up the right side of the device coming from the speaker housing up to the logic board.
-
-
-
Using a spudger, carefully pry the GPS antenna from the bottom of the speaker housing.
-
With the GPS antenna removed from the bottom of the speaker housing it can be removed from the device.
-


To reassemble your device, follow these instructions in reverse order.
To reassemble your device, follow these instructions in reverse order.
Отменить: Я не выполнил это руководство.
3 человек успешно провели ремонт по этому руководству.
Команду

USF Tampa, Team 11-3, Blackwell Winter 2015 Участник USF Tampa, Team 11-3, Blackwell Winter 2015
USFT-BLACKWELL-W15S11G3
4 членов
Автор 5 руководств