Перейти к основному содержанию
/
Мой рабочий стол для верстки руководств

Получите быстрый доступ к руководствам, запчастям и ответам касательно ваших устройств

Asus MeMO Pad HD 8 ME180A Motherboard Replacement

Asus MeMO Pad HD 8 ME180A Motherboard Replacement

Rebecca Ellerhorst

Rebecca Ellerhorst и 2 другие участники

Последнее обновление September 4, 2018

20 мин.
Средне

You will learn how to replace the motherboard. Review this guide if you are having difficulties with the motherboard. In order to replace the motherboard, you have to remove the battery. Please use our Asus MeMO Pad HD 8 ME180A Battery Replacement Guide to do so prior to starting.

Выберете то, что вам нужно

Инструменты

Показать больше…

  1. Asus MeMO Pad HD 8 ME180A Motherboard Replacement, Battery: шаг 1, изображение 1 из 2 Asus MeMO Pad HD 8 ME180A Motherboard Replacement, Battery: шаг 1, изображение 2 из 2
    • Use a plastic opening tool to separate the back half from the front half.

    • Pull the back panel away from the device.

    • The volume buttons can fall out of the case. Be careful not to lose them.

  2. Asus MeMO Pad HD 8 ME180A Motherboard Replacement: шаг 2, изображение 1 из 1
    Инструмент, используемый на этом этапе:
    Anti-Static Wrist Strap
    $7.95
  3. Asus MeMO Pad HD 8 ME180A Motherboard Replacement: шаг 3, изображение 1 из 3 Asus MeMO Pad HD 8 ME180A Motherboard Replacement: шаг 3, изображение 2 из 3 Asus MeMO Pad HD 8 ME180A Motherboard Replacement: шаг 3, изображение 3 из 3
    • Lift the white bar on the ZIF connector and pull the metal connector out.

  4. Asus MeMO Pad HD 8 ME180A Motherboard Replacement: шаг 4, изображение 1 из 2 Asus MeMO Pad HD 8 ME180A Motherboard Replacement: шаг 4, изображение 2 из 2
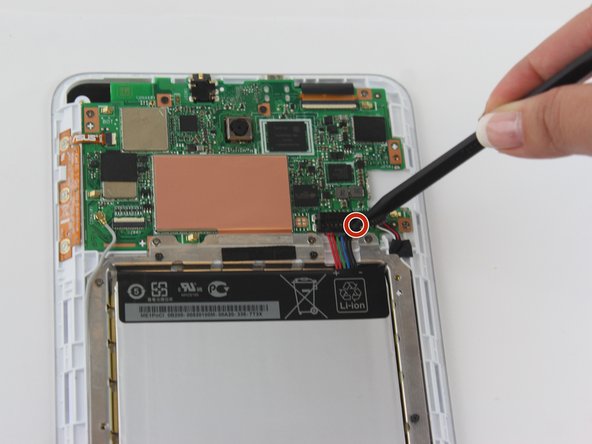
    • Using your spudger, press down on the two spots shown in order to release the cables.

    • Ensure that the touchscreen cables are fully disconnected.

  5. Asus MeMO Pad HD 8 ME180A Motherboard Replacement: шаг 5, изображение 1 из 2 Asus MeMO Pad HD 8 ME180A Motherboard Replacement: шаг 5, изображение 2 из 2
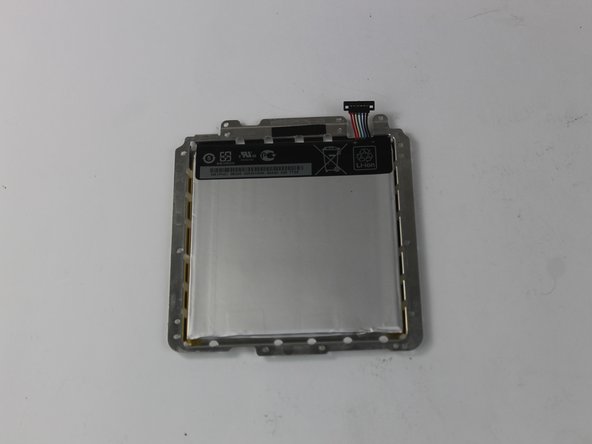
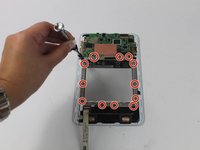
    • Using a PH#0 screwdriver, remove the twelve silver 3.2 mm screws.

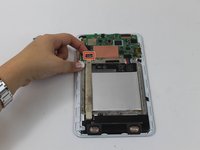
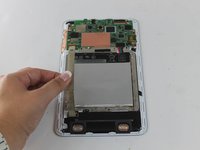
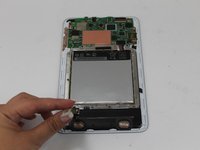
    • Pull the battery out.

  6. Asus MeMO Pad HD 8 ME180A Motherboard Replacement, Motherboard: шаг 6, изображение 1 из 1
    • Disconnect GPS Antenna cable.

  7. Asus MeMO Pad HD 8 ME180A Motherboard Replacement: шаг 7, изображение 1 из 1
    • Flip the latch and pull the ribbon cable to disconnect the ZIF connector.

  8. Asus MeMO Pad HD 8 ME180A Motherboard Replacement: шаг 8, изображение 1 из 1
    • Flip the latch and pull the ribbon cable to disconnect the ZIF connector.

  9. Asus MeMO Pad HD 8 ME180A Motherboard Replacement: шаг 9, изображение 1 из 2 Asus MeMO Pad HD 8 ME180A Motherboard Replacement: шаг 9, изображение 2 из 2
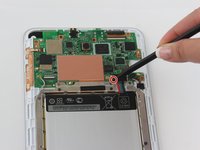
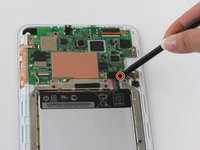
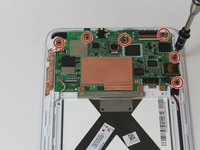
    • Use a PH#0 screwdriver to unscrew the six 3.0 mm black screws.

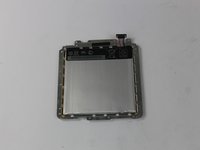
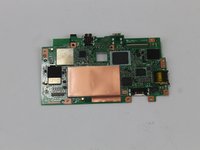
    • Lift the motherboard straight up to remove.

Заключение

To reassemble your device, follow these instructions in reverse order.

2 человек успешно провели ремонт по этому руководству.

Rebecca Ellerhorst

Участник с: 10/04/16

561 Репутация

Автор 5 руководств

Команду

USF Tampa, Team 2-5, Nance Fall 2016 Участник USF Tampa, Team 2-5, Nance Fall 2016

USFT-NANCE-F16S2G5

3 членов

Автор 10 руководств

2 Комментариев

Où je peux avoir une carte mère pour asus memo pad8 me 180

David Leblanc - Ответить

Shouldn’t there be a step to handle the camera?

Haggai Eran - Ответить

Добавить комментарий

Статистика просмотров:

За последние 24 час(ов): 0

За последние 7 дней: 0

За последние 30 дней: 2

За всё время: 796