Перейти к основному содержанию
/
Мой рабочий стол для верстки руководств

Получите быстрый доступ к руководствам, запчастям и ответам касательно ваших устройств

Asus TF300T Tablet Rear Camera Replacement

Asus TF300T Tablet Rear Camera Replacement

Jonathan Barros

Jonathan Barros и 3 другие участники

Последнее обновление May 7, 2024

45 мин. - 1 час
Средне

For those experiencing picture clarity or no response from the rear camera this guide is for you. The Asus TF300T Android Tablet has a rear facing rear camera that is sensitive to pressure and other factors that may damage it. This guide will instruct the user of how to successfully replace the rear camera.

Выберете то, что вам нужно

Запчасти

Инструменты

  • Phillips #00 Screwdriver
    Phillips #00 Screwdriver
  • iFixit Opening Tool
    iFixit Opening Tool
  • Spudger
    Spudger
  • Tweezers

Показать больше…

iFixit получает комиссию, когда вы совершаете покупку по этим ссылкам.
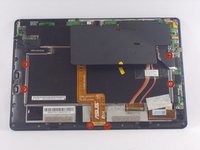
  1. Asus TF300T Tablet Rear Camera Replacement, Back Panel Removal: шаг 1, изображение 1 из 3 Asus TF300T Tablet Rear Camera Replacement, Back Panel Removal: шаг 1, изображение 2 из 3 Asus TF300T Tablet Rear Camera Replacement, Back Panel Removal: шаг 1, изображение 3 из 3
    • Begin the process by making sure that the dock is disconnected and the power is turned off.

    • Start by using the plastic opening tool on the side opposite the dock/ charging port. Begin to open the device along the short sides of the tablet.

    • When you have reached the side with the charging/ dock port be gentle with the opening tool due to the thinner plastic that could be broken with excessive force.

    • Once the opening tools have completely made their way around the device use the spudger to separate the back panel from the screen and expose the inside.

  2. Asus TF300T Tablet Rear Camera Replacement, Turn Off the Power: шаг 2, изображение 1 из 1
    • The Asus Transformer series tablets have a hard power switch. This should be turned off before working on the tablet.

    • Locate the power switch near the power button on the top left. Use a tool to slide it to the position marked 'off'

    • For many repairs, like replacing the screen or digitizer, you do not need to remove the battery once you hve turned the tablet off. Be very careful not to short anything out with metal tools!

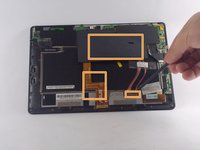
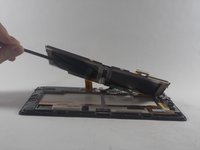
  3. Asus TF300T Tablet Rear Camera Replacement, Battery Removal: шаг 3, изображение 1 из 3 Asus TF300T Tablet Rear Camera Replacement, Battery Removal: шаг 3, изображение 2 из 3 Asus TF300T Tablet Rear Camera Replacement, Battery Removal: шаг 3, изображение 3 из 3
    • Using the Phillips #00 screwdriver remove all of the screws connecting the battery to the mother board.

    • Once the initial screws have been removed as indicated by the photo, use the spudger to remove the cover concealing the the clips for the dock sensor and a few more screws.

    • Again remove the screws with the same screwdriver and use the spudger to disconnect the spudger sesors from their respective clips.

    • Once the battery is freed use the spudger to remove the battery from its spot

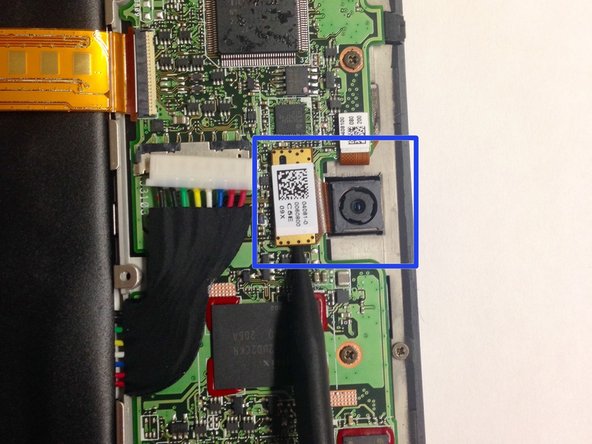
  4. Asus TF300T Tablet Rear Camera Replacement, Replacing the Camera: шаг 4, изображение 1 из 2 Asus TF300T Tablet Rear Camera Replacement, Replacing the Camera: шаг 4, изображение 2 из 2
    Инструмент, используемый на этом этапе:
    Tweezers
    $4.99
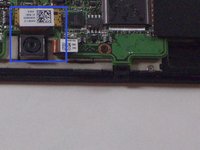
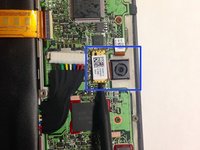
    • Once the back panel is exposed, use the tweezers or thespudger to lift the camera from its spot.

    • Lift from the gold clip and not from the camera itself.

Заключение

To reassemble your device, follow these instructions in reverse order.

Jonathan Barros

Участник с: 10/22/14

1 231 Репутация

Автор 5 руководств

Команду

UMass Dartmouth, Team 2-6, Duarte Fall 2014 Участник UMass Dartmouth, Team 2-6, Duarte Fall 2014

UMASSD-DUARTE-F14S2G6

4 членов

Автор 10 руководств

0 Комментариев

Добавить комментарий

Статистика просмотров:

За последние 24 час(ов): 0

За последние 7 дней: 0

За последние 30 дней: 0

За всё время: 738