Перейти к основному содержанию
/
Мой рабочий стол для верстки руководств

Получите быстрый доступ к руководствам, запчастям и ответам касательно ваших устройств

Dell Latitude 7390 (2-in-1) SSD Replacement

Dell Latitude 7390 (2-in-1) SSD Replacement

Thomas Pryor

Thomas Pryor и 2 другие участники

Последнее обновление October 30, 2024

20 - 30 минут
Средне
Нужно больше изображений

This guide will demonstrate the process on how to replace the Solid State Drive (SSD) card in the Dell Latitude 7390.

The SSD’s primary purpose is to store data on the laptop and can last generally up to 10 years. However, factors including temperature change, external or internal damage shocks, or even virus attacks just to name a few can require replacement sooner.

Before beginning this repair, be sure to power off the laptop and disconnect from the power adapter.

Выберете то, что вам нужно

Инструменты

Показать больше…

  1. Dell Latitude 7390 (2-in-1) SSD Replacement, Bottom Panel: шаг 1, изображение 1 из 1
    • Orient your Dell Latitude 7390 laptop so that it is facing towards you as if you're going to open it.

  2. Dell Latitude 7390 (2-in-1) SSD Replacement: шаг 2, изображение 1 из 3 Dell Latitude 7390 (2-in-1) SSD Replacement: шаг 2, изображение 2 из 3 Dell Latitude 7390 (2-in-1) SSD Replacement: шаг 2, изображение 3 из 3
    • Flip your laptop over so that the bottom is facing up.

  3. Dell Latitude 7390 (2-in-1) SSD Replacement: шаг 3, изображение 1 из 1
    • Using your Phillips #1 screwdriver, remove the eight 6 mm screws around the border of the bottom panel.

  4. Dell Latitude 7390 (2-in-1) SSD Replacement: шаг 4, изображение 1 из 2 Dell Latitude 7390 (2-in-1) SSD Replacement: шаг 4, изображение 2 из 2
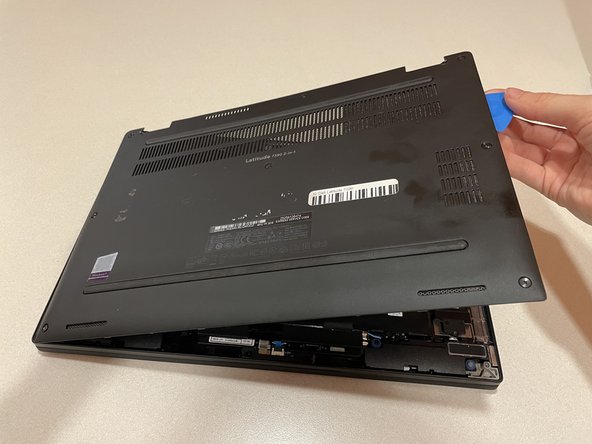
    • Using an opening tool or picks, work your way around the periphery and pry the back case off.

  5. Dell Latitude 7390 (2-in-1) SSD Replacement: шаг 5, изображение 1 из 1
    • Finally, lift the back panel off to uncover the inside of your Dell Latitude 7390.

  6. Dell Latitude 7390 (2-in-1) SSD Replacement, Battery: шаг 6, изображение 1 из 1
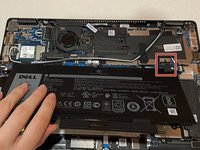
    • Make sure the laptop is turned OFF and unplugged from the power adapter before taking the battery out.

    • Use the Phillips #1 screwdriver to remove the five 6 mm screws holding the battery in place along the edges of the battery.

  7. Dell Latitude 7390 (2-in-1) SSD Replacement: шаг 7, изображение 1 из 3 Dell Latitude 7390 (2-in-1) SSD Replacement: шаг 7, изображение 2 из 3 Dell Latitude 7390 (2-in-1) SSD Replacement: шаг 7, изображение 3 из 3
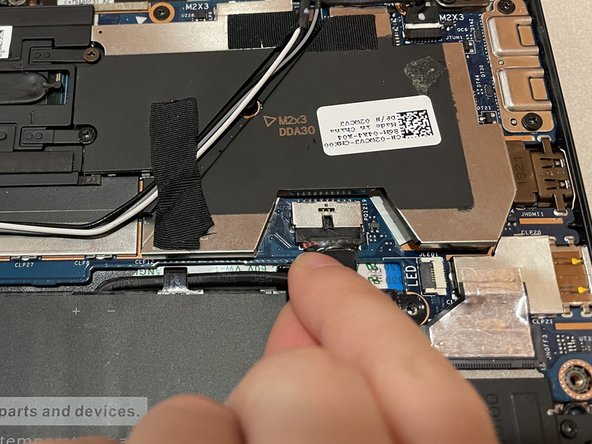
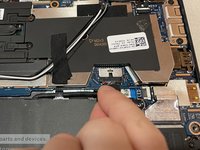
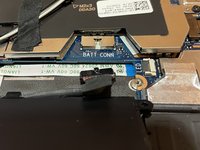
    • Be careful not to break the connector by pulling too hard on the black tab.

    • Pull the black tab on the top of the connector to unplug the battery from the motherboard.

  8. Dell Latitude 7390 (2-in-1) SSD Replacement: шаг 8, изображение 1 из 1
    • Carefully lift the battery out of the laptop.

  9. Dell Latitude 7390 (2-in-1) SSD Replacement, Solid State Drive (SSD): шаг 9, изображение 1 из 1
    • Using a Phillips screwdriver, remove the 6 mm screw from the SSD cover.

  10. Dell Latitude 7390 (2-in-1) SSD Replacement: шаг 10, изображение 1 из 1
    • Remove the SSD card from under the silver plate.

Заключение

To reassemble your device, follow these instructions in reverse order.

2 человек успешно провели ремонт по этому руководству.

Thomas Pryor

Участник с: 02/22/22

122 Репутация

1 руководство автора

Команду

Clemson, Team 1-4, Hunter Spring 2022 Участник Clemson, Team 1-4, Hunter Spring 2022

CLEM-HUNTER-S22S1G4

5 членов

Автор 7 руководств

0 Комментариев

Добавить комментарий

Статистика просмотров:

За последние 24 час(ов): 8

За последние 7 дней: 28

За последние 30 дней: 88

За всё время: 3,502