Введение
Replacing the battery in the Garmin Nuvi 200
Выберете то, что вам нужно
-
-
-
Peel off the sticker from the bottom of the device to reveal two screws.
 Спросите у FixBot
-
-
-
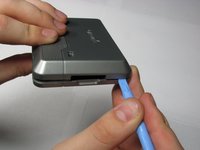
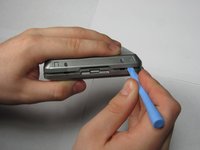
Insert a plastic opening tool in the gap between the front and rear casing.
-
Carefully work the tool around the gap, separating the two halves of the case.
-
-
-
-
-
-
Peel away the tape holding the ribbon cable in place.
-
Disconnect the ribbon cable by using a spudger to flip up the retaining flap on its ZIF-style connector. Then gently remove the cable.
-
-
-
Pull out the cable between the logic board and the speaker to disconnect them.
-
-
-
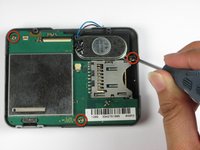
Remove the three screws from the logic board using the #00 Phillips screwdriver.
-
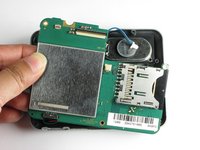
Lift the board away from the case but do not pull the logic board completely off, as it is still attached to the battery by a cable.
-
-
-
Detach the logic board form the battery by pulling out the cable.
-
-
-
-
-
Remove the battery by pulling it away from the casing.
-
-






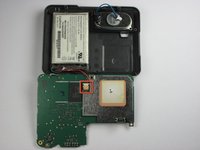
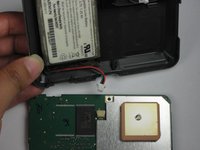


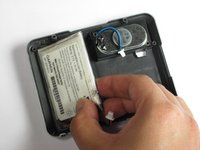
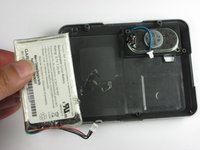
To reassemble your device, follow these instructions in reverse order.
Отменить: Я не выполнил это руководство.
19 человек успешно провели ремонт по этому руководству.

Команда

Cal Poly, Team 25-90, Amido Spring 2010 Участник Cal Poly, Team 25-90, Amido Spring 2010
CPSU-AMIDO-S10S25G90
4 членов
Автор 21 руководств
13 Комментарии к руководству
This document could be improved by including information about where to acquire a replacement battery, and any modifications that might be required to a generic battery.
Seems like there are some on Amazon and Ebay. Not sure how to verify getting the right one. Not that expensive, so maybe worth the risk.
It was a huge mistake to peel away the ribbon cable. It needs matched up precisely and exactly in the same alignment as it was before during reassembly, an apparently impossible task once it's been detached. I'd advise opening the halves in book form, leaving the ribbon cable as a hinge. Have about given up trying to position it.
Nice tutorial, except for the booby trap.
Yep, fell into this trap, too. The Nuvi powers up but no video. Can't place the ribbon cabe just exactly so. Ugh.
Cannot stress enough that the step 5 calling for the removal of the tape holding the ribbon cable be removed from this guide! My Nuvi will not work anymore because I can't get that ribbon cable aligned. I wish I had read all the comments as the above poster warned of this very problem. Please update the guide and remove step 5!
