
HP Compaq 6910p Processor Replacement
Введение
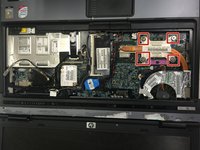
Перейти к шагу 1In this guide, we will illustrate how to remove and replace the processor of this device. Required tools include one Phillips screwdriver, one T9 Torx screwdriver, Arctic Silver Thermal Paste, and thumbs of course. Because the processor is difficult to find, patience will be required as well.
Выберете то, что вам нужно
Инструменты


Показать больше…
-
-
Turn the laptop upside down.
-
Remove the fourteen 1.5 cm Phillips's #1 screws.
-
Remove the battery.
-
Remove three 0.3 cm Phillips #1 screws in the battery compartment.
-
-
-
Slide the tabs upward to release the keyboard
-
Lift up the keyboard
-
Disconnect the cables attaching the keyboard to the laptop by lifting up the release tabs.
-
-
-
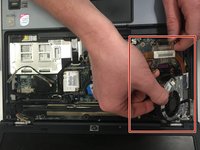
Loosen the four 1.5 cm Phillips #1 screws indicated in red.
-
Remove the heat sink to reveal the processor.
-


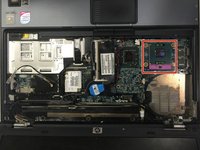

To reassemble your device, follow these instructions in reverse order.
To reassemble your device, follow these instructions in reverse order.
Отменить: Я не выполнил это руководство.
7 человек успешно провели ремонт по этому руководству.
Команду

Montana Tech, Team 3-2, Shirk Fall 2015 Участник Montana Tech, Team 3-2, Shirk Fall 2015
MTUM-SHIRK-F15S3G2
5 членов
Автор 5 руководств