Перейти к основному содержанию
/
Мой рабочий стол для верстки руководств

Получите быстрый доступ к руководствам, запчастям и ответам касательно ваших устройств

HP dv5-1125nr Hard Drive Replacement

HP dv5-1125nr Hard Drive Replacement

Nick Loey

Nick Loey и 4 другие участники

Последнее обновление June 5, 2014

10 - 25 минут
Средне

Before replacing your hard drive make sure you have backed up all of your files and have an OS install disk on hand. Now you're ready to replace your hard drive!

Выберете то, что вам нужно

Инструменты

  1. HP dv5-1125nr Hard Drive Replacement, Battery: шаг 1, изображение 1 из 1
    • Ensure your computer is shut down. Removing the battery while the laptop is still on may corrupt your files. Remove any power adapters and cords connected to the laptop body.

    • Slide the switch to the left until the release clicks.

  2. HP dv5-1125nr Hard Drive Replacement: шаг 2, изображение 1 из 1
    • Remove the battery.

    • The release switch may need to be held down while removing the battery.

  3. HP dv5-1125nr Hard Drive Replacement, Hard Drive: шаг 3, изображение 1 из 2 HP dv5-1125nr Hard Drive Replacement, Hard Drive: шаг 3, изображение 2 из 2
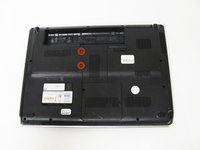
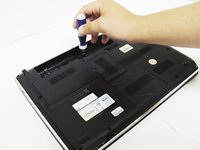
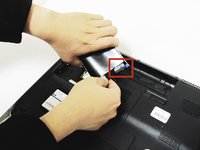
    • Remove the two 5mm Phillips screws on the hard drive cover using a Phillips #00 screwdriver.

  4. HP dv5-1125nr Hard Drive Replacement: шаг 4, изображение 1 из 1
    • Remove the plastic hard drive cover.

  5. HP dv5-1125nr Hard Drive Replacement: шаг 5, изображение 1 из 2 HP dv5-1125nr Hard Drive Replacement: шаг 5, изображение 2 из 2
    • Pull up on the two plastic flaps on the hard drive enclosure to remove it.

  6. HP dv5-1125nr Hard Drive Replacement: шаг 6, изображение 1 из 2 HP dv5-1125nr Hard Drive Replacement: шаг 6, изображение 2 из 2
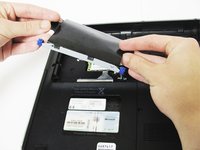
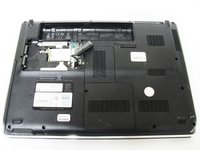
    • Gently lift the ribbon cable away from the hard drive enclosure to free the drive.

  7. HP dv5-1125nr Hard Drive Replacement: шаг 7, изображение 1 из 2 HP dv5-1125nr Hard Drive Replacement: шаг 7, изображение 2 из 2
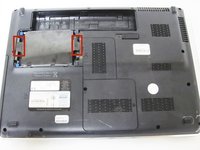
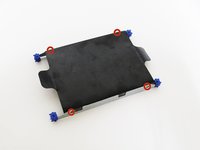
    • Locate four 2mm Phillips screws on the side of the enclosure and remove them using a Phillips #00 screwdriver.

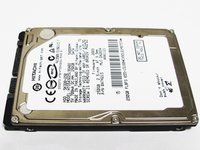
    • Slide the hard drive out of the enclosure to complete the removal process.

Заключение

To reassemble your device, follow these instructions in reverse order.

3 человек успешно провели ремонт по этому руководству.

Nick Loey

Участник с: 04/01/14

1 715 Репутация

Автор 8 руководств

Команду

Cal Poly, Team 9-15, Regan Spring 2014 Участник Cal Poly, Team 9-15, Regan Spring 2014

CPSU-REGAN-S14S9G15

4 членов

Автор 10 руководств

0Комментарии к руководству

Добавить комментарий

Статистика просмотров:

За последние 24 час(ов): 0

За последние 7 дней: 3

За последние 30 дней: 36

За всё время: 2,144