
Lenovo Ideapad 110S-11IBR LCD Replacement
Введение
Перейти к шагу 1This guide will allow any owner of a Lenovo Ideapad 110S-11IBR to undergo the process necessary to remove and replace the screen of the device. To do so, simply follow the given steps, starting with the removal of the back panel, loosening of the screen hinges, and eventually removal of the screen. To reassemble, follow the steps in reverse order.
Выберете то, что вам нужно


-
-
Use a Phillips #0 screwdriver to remove the eleven 3.7 mm screws from the bottom of the Chromebook.
-
-
-
Use a plastic opening tool or spudger to push the battery's bundled connector out of its socket.
-
-
-
Use a Phillips #0 screwdriver to remove six 4.6 mm screws that connect the screen hinge assembly.
-
-
-
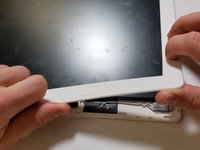
Remove 4-2.7mm Philips size 0 screws from the screen utilizing the iFixit screwdriver.
-


To reassemble your device, follow these instructions in reverse order.
To reassemble your device, follow these instructions in reverse order.
Отменить: Я не выполнил это руководство.
2 человек успешно провели ремонт по этому руководству.
Команду

IUPUI, Team S11-G11, Wilson Spring 2019 Участник IUPUI, Team S11-G11, Wilson Spring 2019
IUPUI-WILSON-S19S11G11
2 членов
Автор 6 руководств