
Lenovo Thinkpad X201 Tablet RAM Replacement
Введение
Перейти к шагу 1Use this guide to remove the RAM (random access memory) from your device.
Выберете то, что вам нужно
Запчасти

-
-
Remove the battery by sliding forward the switch here.
-
For more info on how to remove the battery, refer to battery replacement guide.
-
-
-
The RAM is the small square component on the back. Unscrew all screws using a diamond head screw.
-
There are only two screws to remove as circled here.
-
The screw head used here is a JIS J00 Driver.
-
-
-
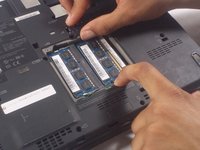
On the edges of the RAM components, push each switch to the side.
-
The RAM chip should pop up on its own once you push each side outwards.
-
-
-
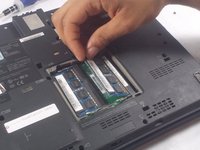
The RAM chip should pop up on its own once the sides are pushed outwards.
-
Gently pull on the RAM to remove.
-


To reassemble your device, follow these instructions in reverse order.
To reassemble your device, follow these instructions in reverse order.
Отменить: Я не выполнил это руководство.
2 человек успешно провели ремонт по этому руководству.
Команду

UMass Dartmouth, Team S5-G7, Peak Spring 2018 Участник UMass Dartmouth, Team S5-G7, Peak Spring 2018
UMASSD-PEAK-S18S5G7
3 членов
Автор 12 руководств