
Lenovo Yoga 710-14IKB Fan Replacement
Введение
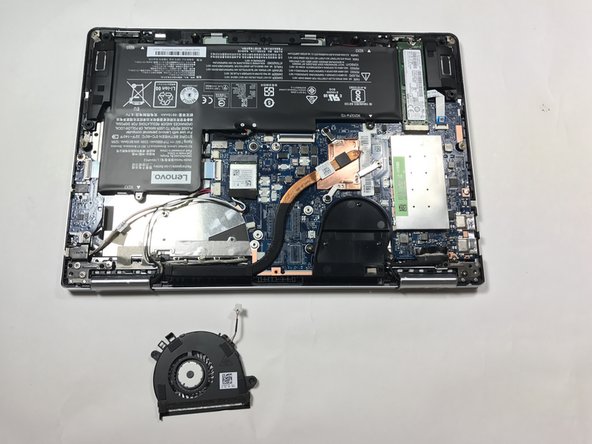
Перейти к шагу 1This guide will teach you how to remove and replace the cooling fan on your Lenovo Yoga laptop.
Выберете то, что вам нужно
Запчасти

Инструменты


Показать больше…
-
-
Use a Torx T4 screwdriver to unscrew the nine 5 mm screws holding the cover in place.
-
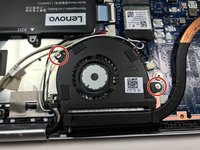
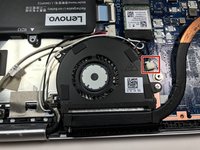
Use a Torx T4 screwdriver to unscrew the 8 mm screw in the center.
-
-
-
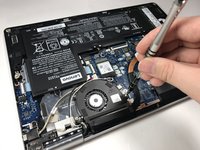
Use the plastic opening tool to pry the cover up and away from the laptop, starting at one end and working your way around the cover.
-
-
-
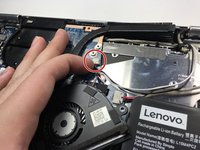
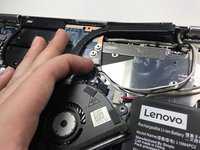
Use your fingernail or a plastic tool to disconnect the fan power cable from the circuit board.
-


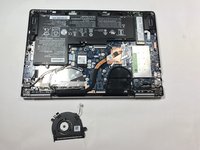
To reassemble your device, follow these instructions in reverse order.
To reassemble your device, follow these instructions in reverse order.
Отменить: Я не выполнил это руководство.
2 человек успешно провели ремонт по этому руководству.
Команду

Cal Poly, Team S14-G5, Banghart Spring 2017 Участник Cal Poly, Team S14-G5, Banghart Spring 2017
CPSU-BANGHART-S17S14G5
4 членов
Автор 27 руководств
4Комментарии к руководству
Thanks for a great guide! This is a great laptop with a really noisy cheep fan... It makes a high pitch sound even under the low load. Is it possible to make it run any better??
I have searched online for a replacement fan for the Yoga 710-14ikb but havent found any. Is it possible to use a fan for another model, perhaps the 14isk or 15ikb?
I did find this but dont want to wait that long. https://www.aliexpress.com/item/New-lapt...
does anyone know the best place to buy a new one of these fans?