
MacBook Pro 13" Retina Display Late 2013 Logic Board Assembly Replacement

Введение
Перейти к шагу 1Prereq to remove the logic board
Выберете то, что вам нужно


-
-
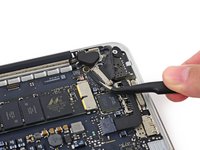
Remove the two 2.1 mm T5 Torx screws securing the I/O board cable bracket to the logic board.
-
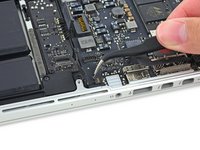
Remove the I/O board cable bracket.
-
-
-
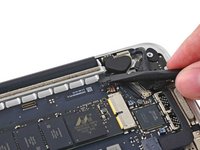
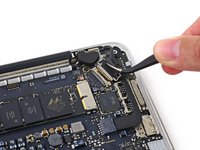
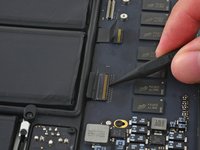
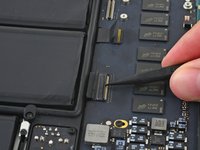
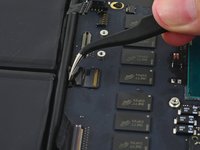
Use the flat end of a spudger to pop the I/O board connector straight up off its socket on the logic board.
-
-
-
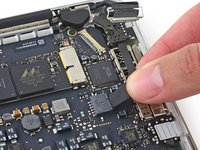
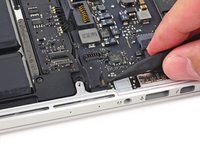
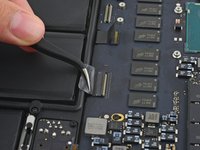
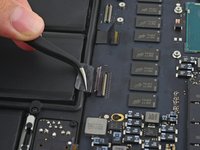
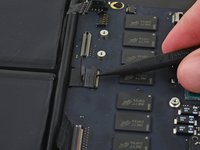
Lift the logic board end of the I/O board cable straight up to bend it out of the way.
-
-
-
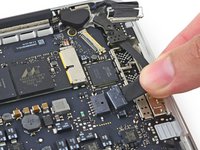
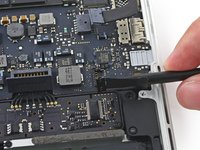
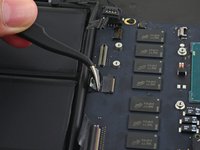
Use the tip of a spudger to lift the right speaker connector straight up out of its socket on the logic board.
-
-
-
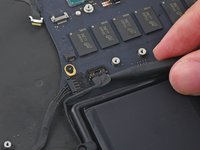
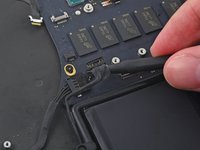
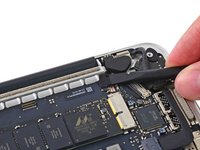
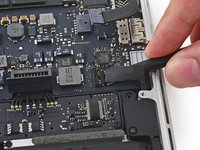
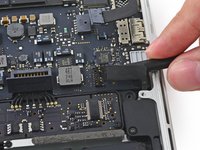
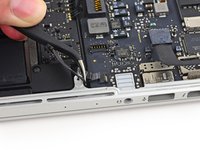
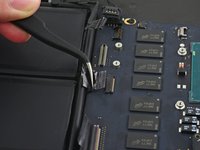
With the tip of a spudger, push on either side of the I/O board connector to walk it out of its socket on the logic board.
-
-
-
Use the flat end of a spudger to disconnect the keyboard backlight cable and bend it up out of the way of the logic board.
-
-
-
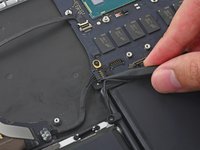
Grab the black plastic tab to flip the display cable connector open and pull it straight out of its socket on the logic board.
-
-
-
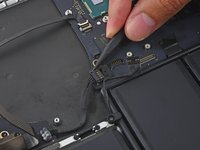
Carefully pull the DC-In board connector straight out of its socket on the logic board.
-
-
-
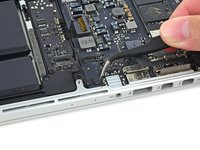
Wedge the flat end of a spudger under the left speaker cable near the connector and lift it straight up out of its socket and fold it out of the way.
-
-
-
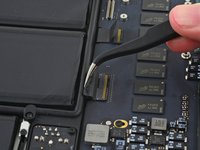
Use the tip of a spudger to flip the retaining tab on the microphone cable ZIF connector.
-
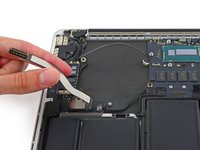
Pull the microphone cable out of its socket on the logic board.
-
-
-
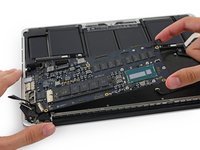
Remove the five 3.5 mm T5 Torx screws securing the logic board to the upper case.
-
-
-
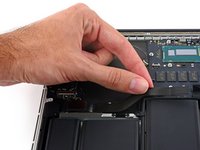
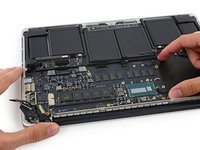
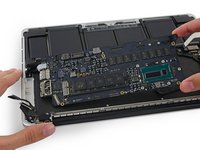
Lift the processor end of the logic board up slightly and pull it toward the fan recess to free the ports from the edge of the upper case.
-
Remove the logic board.
-


To reassemble your device, follow these instructions in reverse order.
To reassemble your device, follow these instructions in reverse order.


Один комментарий
Thanks for the the instructions. I have a question that I couldn’t find on the answers forums. Is there any thermal paste or just general cooling system considerations when replacing the logic board?