
Philips Norelco BeardTrimmer 3100 Front and Back Panels Replacement
Введение
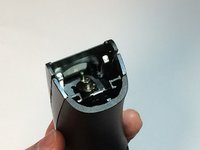
Перейти к шагу 1In order to access the internal components of the beardtrimmer, the front and back panels must be removed. This guide will instruct you on the process.
Выберете то, что вам нужно
Инструменты

-
-
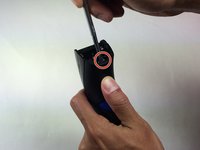
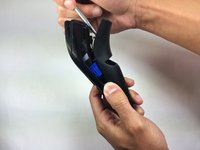
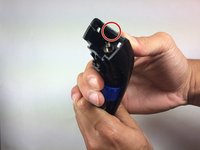
Hold trimmer towards you as shown in the diagram.
-
Insert your prying tool/metal spudger into the marked area.
-
-
-
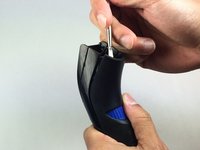
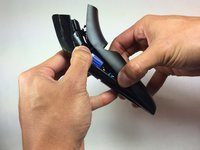
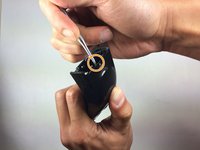
Apply gentle pressure and begin prying open the back panel.
-
Separate the panel one notch at a time. Listen carefully as you're prying the panel apart and notice each individual notch release.
-
-
-
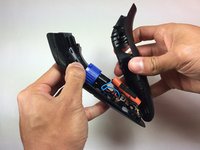
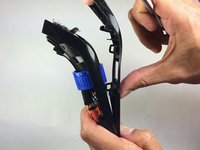
Pull the trimmer apart using your hands once the panel is at least halfway apart.
-
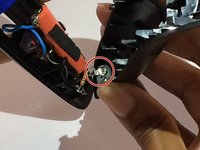
Pull the wires attached to the battery off of the power connectors before completely removing the back panel.
-
-
-
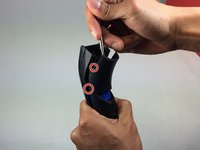
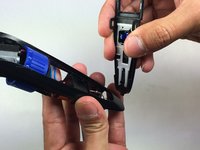
Apply gentle pressure and begin prying the front panel.
-
Separate the front panel one notch at a time.
-
-
-
Pull the trimmer apart using your hands once the panel is at least halfway apart.
-


To reassemble your device, follow these instructions in reverse order.
To reassemble your device, follow these instructions in reverse order.
Команду

USF Tampa, Team 15-2, Blackwell Fall 2015 Участник USF Tampa, Team 15-2, Blackwell Fall 2015
USFT-BLACKWELL-F15S15G2
4 членов
Автор 14 руководств