Перейти к основному содержанию
/
Мой рабочий стол для верстки руководств

Получите быстрый доступ к руководствам, запчастям и ответам касательно ваших устройств

Philips Norelco MultiGroom 3100 Casing Replacement

Philips Norelco MultiGroom 3100 Casing Replacement

ahaharevolution

ahaharevolution и еще один участник

Последнее обновление July 16, 2024

5 - 10 минут
Средне

This guide will show you how to remove the casing in order to access the battery and motor.

Выберете то, что вам нужно

Инструменты

  • iFixit Opening Tool
    iFixit Opening Tool
  • Spudger
    Spudger
  1. Philips Norelco MultiGroom 3100 Casing Replacement, Power Button: шаг 1, изображение 1 из 1
    • Remove the comb from the top of the trimmer.

  2. Philips Norelco MultiGroom 3100 Casing Replacement: шаг 2, изображение 1 из 2 Philips Norelco MultiGroom 3100 Casing Replacement: шаг 2, изображение 2 из 2
    • Grip the attachment and twist it counterclockwise until you hear a click.

    • Pull the attachment up to remove it from the trimmer.

  3. Philips Norelco MultiGroom 3100 Casing Replacement: шаг 3, изображение 1 из 2 Philips Norelco MultiGroom 3100 Casing Replacement: шаг 3, изображение 2 из 2
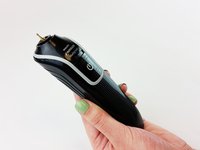
    • Hold the trimmer upright so it is facing you.

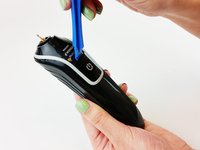
    • Insert the plastic opening tool in the gap at the top of the power button.

  4. Philips Norelco MultiGroom 3100 Casing Replacement: шаг 4, изображение 1 из 1
    • Apply pressure to pry off the power button.

  5. Philips Norelco MultiGroom 3100 Casing Replacement, Casing: шаг 5, изображение 1 из 2 Philips Norelco MultiGroom 3100 Casing Replacement, Casing: шаг 5, изображение 2 из 2
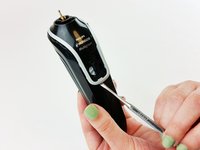
    • Insert the spudger into the bottom of the gray bezel and begin to gently pry it off.

    • Separate the bezel one clip at a time so that the clips do not break.

  6. Philips Norelco MultiGroom 3100 Casing Replacement: шаг 6, изображение 1 из 2 Philips Norelco MultiGroom 3100 Casing Replacement: шаг 6, изображение 2 из 2
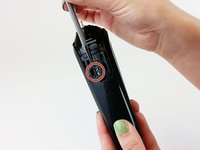
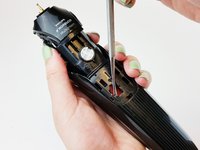
    • Insert the spudger in the indicated hole and apply a tilting force to loosen the outer casing.

    • Pull upward on the top of the inner housing to remove it from the outer casing.

Заключение

To reassemble your device, follow these instructions in reverse order.

9 человек успешно провели ремонт по этому руководству.

ahaharevolution

Участник с: 10/04/15

771 Репутация

Автор 3 руководств

Команду

USF Tampa, Team 1-1, Leahy Fall 2015 Участник USF Tampa, Team 1-1, Leahy Fall 2015

USFT-LEAHY-F15S1G1

2 членов

Автор 6 руководств

0 Комментариев

Добавить комментарий

Статистика просмотров:

За последние 24 час(ов): 0

За последние 7 дней: 7

За последние 30 дней: 22

За всё время: 5,227