
Razer Blade RZ09-0130 2015 Fan Replacement
Введение
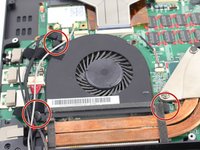
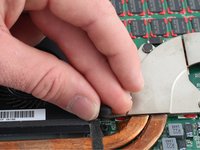
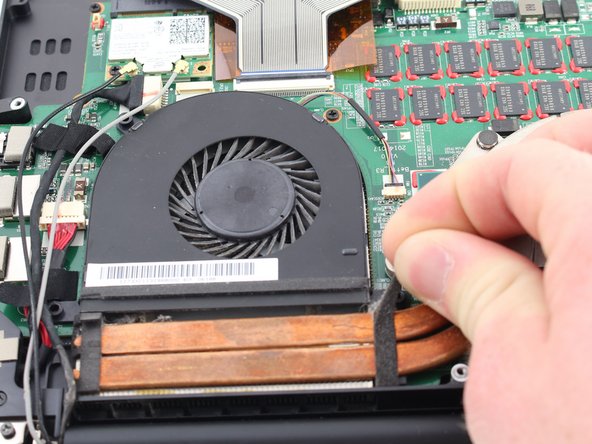
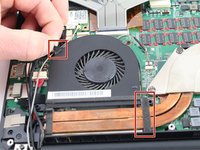
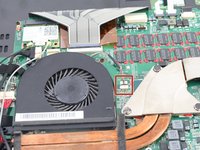
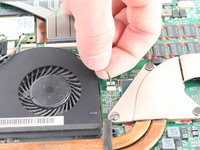
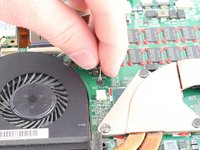
Перейти к шагу 1If you hear abnormal noises (or no noise at all consistently) coming from your Razer Blade RZ09-0130 2015 laptop, it is likely that your fans are malfunctioning due to debris or damage. In addition, if your laptop is overheating too much, then your fans are damaged since there is little ventilation. This guide will teach you how to replace the stock fans inside the 2015 Razer Blade. If you believe there is debris in your fans and you are not looking for a full replacement, this guide will also be of use as you will be able to access both fans after applying this procedure. Do not pry off the fans with another object as it will inflict damage and further issues.
Выберете то, что вам нужно
Инструменты

-
-
Use a Torx T5 screwdriver to remove the ten 3 mm screws along the edge of the back panel.
-


To reassemble your device, follow these instructions in reverse order.
To reassemble your device, follow these instructions in reverse order.
Команду

Cal Poly, Team S18-G1, White Winter 2020 Участник Cal Poly, Team S18-G1, White Winter 2020
CPSU-WHITE-W20S18G1
4 членов
Автор 6 руководств