Введение
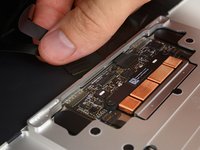
Use this guide to replace the logic board in your Retina MacBook 2015. The logic board includes a flash storage chip containing all of your personal data, so make sure it's backed up (if possible) before attempting this repair.
To avoid logic board damage, when your MacBook repair is complete but before powering it on, connect it to low-voltage power using a 5-Watt iPhone charger and a USB-C to USB-A cable. These accessories are not included with your MacBook, so make sure you have them ready before you begin.
Выберете то, что вам нужно
-
Инструмент, используемый на этом этапе:Magnetic Project Mat$16.96
-
Remove the following eight screws securing the lower case:
-
Two 1.8 mm P5 Pentalobe screws
-
Four 2.9 mm P5 Pentalobe screws
-
Two 6.1 mm P5 Pentalobe screws
-
-
-
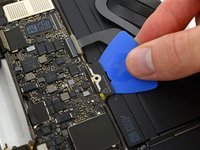
Wedge your fingers between the upper case and the lower case, starting from the rear of the MacBook between the hinges.
-
Keeping a firm grip, lift steadily until the lower case separates slightly from the upper case.
-
-
-
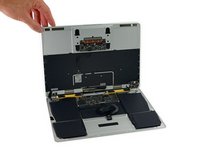
While holding the lower case in place, carefully flip the MacBook over so the Apple logo faces up.
-
-
-
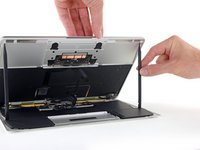
Lift the upper case and display together from the front edge and raise it to about a 45˚ angle.
-
-
-
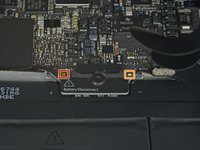
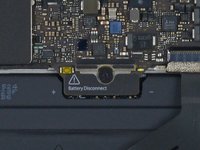
Use the flat end of a spudger to press and hold the small gold 'battery disconnect' button.
-
If the power LED is lit up, continue holding the button until the LED goes dark, and then release. This may take up to 10 seconds.
-
If the LED does not light, release the button after 5-10 seconds. Press and hold it again for 5-10 seconds, and release. Finally, press and hold it a third time for 5-10 seconds, and release.
-
-
Инструмент, используемый на этом этапе:Tweezers$4.99
-
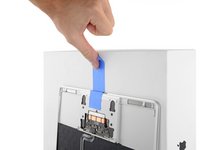
Use tweezers to peel back the tape covering the trackpad cable ZIF connector.
-
-
-
Use a spudger to carefully flip up the retaining flap on the trackpad cable ZIF connector.
-
-
-
Disconnect the trackpad ribbon cable from the trackpad by pulling it gently through its slot in the frame.
-
-
-
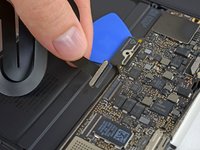
Carefully turn the MacBook over, so that the lower case lays flat.
-
Raise the upper case/display assembly to about a 90° angle, and prop it up against something sturdy so you don't have to hold it.
-
Add a piece of tape near the track pad to secure the upper case and prevent accidental movement.
-
-
-
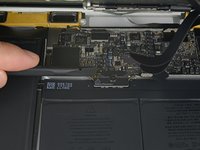
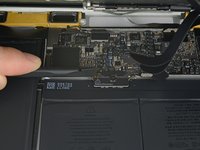
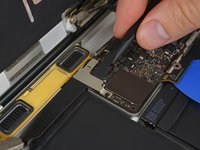
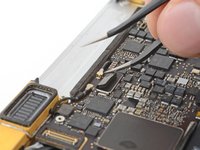
Remove the single 2.9 mm T5 Torx screw securing the battery connector to the logic board.
-
-
-
Инструмент, используемый на этом этапе:Battery Blocker$3.99
-
As an added precaution, you may physically disconnect the battery by inserting a battery isolation pick between the logic board and the battery connector.
-
-
-
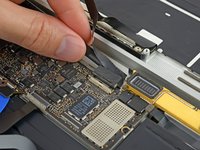
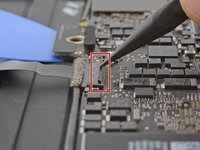
Remove the two screws securing the USB-C port cable bracket:
-
1.1 mm Tri-point Y00 screw
-
3.5 mm T5 Torx screw
-
-
-
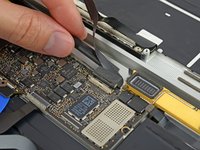
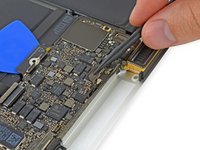
Use the flat end of a spudger to disconnect the USB-C port cable bracket by prying it straight up from the logic board.
-
-
-
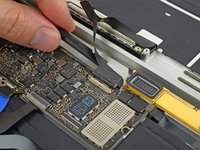
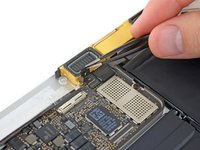
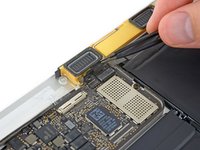
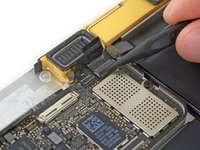
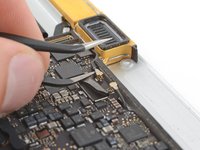
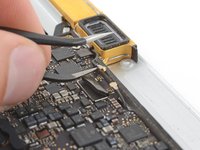
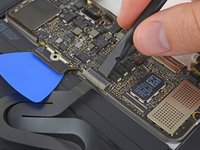
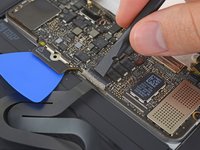
Use a spudger to flip open the retaining flap on the audio jack board cable ZIF connector.
-
-
-
Disconnect the audio jack board ribbon cable by pulling it straight back out of the ZIF connector.
-
-
Инструмент, используемый на этом этапе:Tweezers$4.99
-
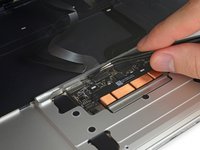
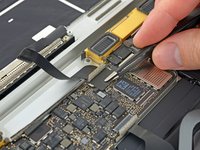
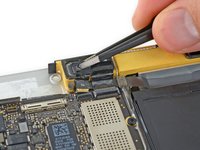
Use tweezers to peel back the tape covering the display cable connector.
-
-
-
If so, use the flat end of a spudger to hold down the retaining flap while peeling the tape away with the tweezers.
-
-
-
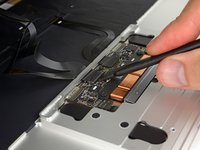
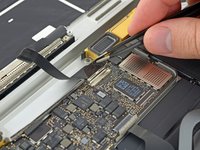
Use the flat end of a spudger to flip open the retaining flap on the display cable connector.
-
Try to keep it clear of the tape, or it may re-adhere and make cable removal difficult.
-
-
Инструмент, используемый на этом этапе:iOpener$14.99
-
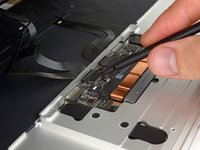
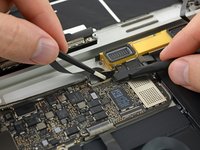
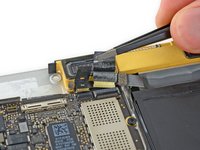
Carefully slide the flat end of a spudger underneath the display cable to separate the adhesive holding it to the lower case.
-
-
-
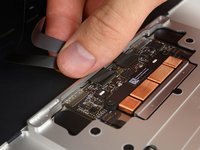
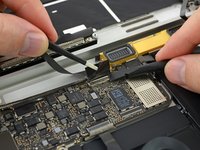
Disconnect the display cable by gently pulling it straight out of its connector.
-
-
Инструмент, используемый на этом этапе:Tweezers$4.99
-
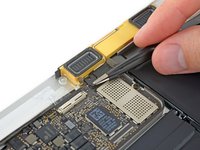
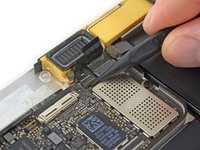
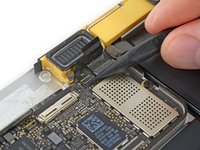
Use tweezers to peel up the tape covering the two ZIF connectors—one for the right speaker cable, and one for the audio jack board cable.
-
-
-
Carefully pull straight back on the two pieces of tape you just peeled up to disconnect the two ribbon cables.
-
-
-
Use the point of a spudger to peel up the foam pad covering the two antenna connectors.
-
-
-
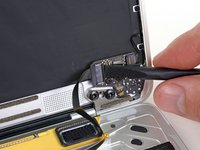
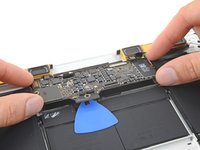
Insert one arm of your angled tweezers under the metal neck of the first antenna connector and pry up to disconnect it.
-
-
-
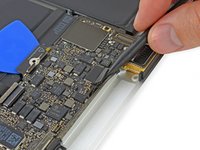
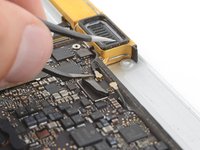
Use a spudger to disconnect the left speaker cable connector by prying it straight up from the logic board.
-
-
-
Use a spudger to flip up the retaining flap on the trackpad cable ZIF connector.
-
-
-
Disconnect the trackpad cable from the logic board by gently pulling it straight out of its connector.
-
-
-
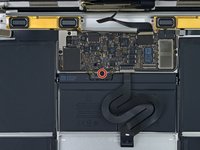
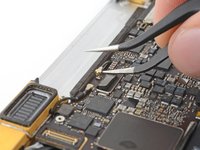
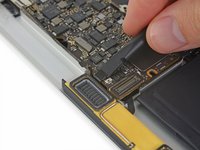
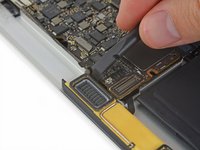
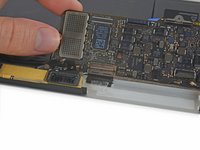
Remove the single 3.5 mm T5 Torx screw securing the logic board to the lower case.
-
-
-
Flip up the front edge of the logic board.
-
Lift and detach the EMI tape securing the logic board to the lower case.
-


To reassemble your device, follow these instructions in reverse order. To avoid logic board damage, when your MacBook repair is complete but before powering it on, connect it to low-voltage power using a 5-Watt iPhone charger and a USB-C to USB-A cable.
Отменить: Я не выполнил это руководство.
46 человек успешно провели ремонт по этому руководству.


7 Комментарии к руководству
successfully change my motherboard..Thanks for the guide
Good Guide, easy to follow. Well Done!
if my 2015 12" macbook 1.3 ghz with 512 gb is slow will swapping out the board make it quick again?
Hi Daniel. Swapping the board is more of a last-resort if something is broken. There are many possible reasons your MacBook is running slow. Running much newer software, having bloatware installed, and a variety of smaller factors all play into the speed of your laptop. Look around online for ways to clean up your drive!