Перейти к основному содержанию
/
Мой рабочий стол для верстки руководств

Получите быстрый доступ к руководствам, запчастям и ответам касательно ваших устройств

Samsung Galaxy J7 Midframe Replacement

Samsung Galaxy J7 Midframe Replacement

Timothy Grubb

Timothy Grubb и 7 другие участники

Последнее обновление January 10, 2025

10 мин.
Средне
Ненаглядные фото
Пропущенные шаги
Лучше введение

Выберете то, что вам нужно

Инструменты

  1. Samsung Galaxy J7 Midframe Replacement, Back Cover: шаг 1, изображение 1 из 2 Samsung Galaxy J7 Midframe Replacement, Back Cover: шаг 1, изображение 2 из 2
    • Locate the Tab: Find the tab at the top left corner of the back cover. (highlighted by red square)

    • Insert the tool: Use a fingernail or a plastic opening tool to lift the tab gently

    • Pry open the cover: Carefully work around the edges to remove the back cover completely

    • If the cover is stuck do not force it open use a plastic opening tool to avoid scratching the case.

  2. Samsung Galaxy J7 Midframe Replacement, Battery: шаг 2, изображение 1 из 2 Samsung Galaxy J7 Midframe Replacement, Battery: шаг 2, изображение 2 из 2
    • Locate the Battery slot: Find the small slit at the bottom right corner of the battery (highlighted by red square)

    • Remove Battery: Gently pop out the edge and carefully pull out the battery.

    • Tip: Ensure the battery is disconnected from the motherboard before removing it.

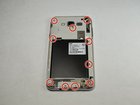
  3. Samsung Galaxy J7 Midframe Replacement, Midframe: шаг 3, изображение 1 из 1
    • Using the Phillips #000 screwdriver, remove the ten 4.2 mm screws around the edge of the midframe.

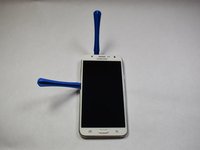
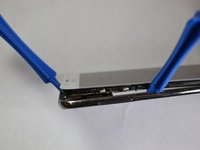
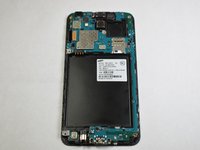
  4. Samsung Galaxy J7 Midframe Replacement: шаг 4, изображение 1 из 3 Samsung Galaxy J7 Midframe Replacement: шаг 4, изображение 2 из 3 Samsung Galaxy J7 Midframe Replacement: шаг 4, изображение 3 из 3
    • Lift up the back of the device with the iFixit opening tool and disconnect it from the front.

    • If the back panel is difficult to remove, gently heat the edges using a hair dryer or heat gun to soften the adhesive.

Заключение

To reassemble your device, follow these instructions in reverse order.

2 человек успешно провели ремонт по этому руководству.

Timothy Grubb

Участник с: 02/05/19

680 Репутация

Автор 3 руководств

Команду

Appalachian State University, Team S2-G5, Menagarishvili Spring 2019 Участник Appalachian State University, Team S2-G5, Menagarishvili Spring 2019

APSU-MENAGARISHVILI-S19S2G5

3 членов

Автор 12 руководств

0 Комментариев

Добавить комментарий

Статистика просмотров:

За последние 24 час(ов): 4

За последние 7 дней: 17

За последние 30 дней: 29

За всё время: 1,343