
Toshiba Satellite A205-S5812 WiFi Card Replacement
Введение
Перейти к шагу 1If your laptop is experiencing failing or unstable network connections, use this guide to replace your computer’s WiFi card.
Выберете то, что вам нужно

-
-
Push the two plastic tabs retaining the battery into the chassis to each respective side. This will push the battery up slightly and release it from the bottom of the notebook.
-
-
-
Using a finger or small prying device, pull the battery upwards from the recessed area. Then, simply pull the battery out of the notebook and gently set it aside.
-
-
-
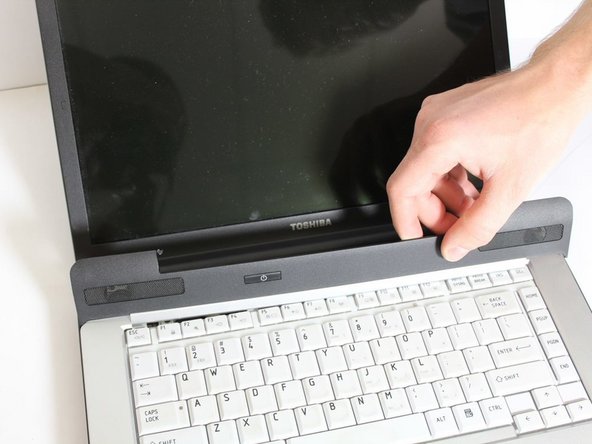
Remove the black plastic bezel above the keyboard by prying upwards with a flat object.
-
-
-
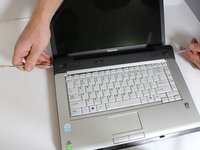
Remove the two Phillips #00 2mm long screws located under the bezel that hold the keyboard to the chassis.
-
-
-
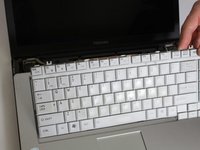
Lift the top of the keyboard and press the pins retaining the keyboard ribbon cable towards the screen with a rubber spudger to release the keyboard from the laptop. Set the keyboard aside.
-
-
-
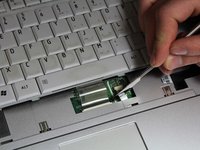
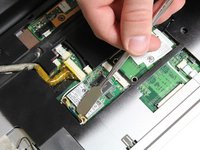
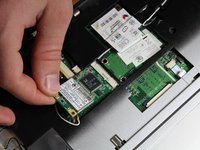
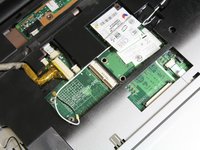
After removing the keyboard, gently pry upwards on the gold contacts holding the white and black WiFi antennae wires using a rubber spudger to release them from the card. Then, simply pull upwards and out to remove the card.
-


To reassemble your device, follow these instructions in reverse order.
To reassemble your device, follow these instructions in reverse order.
Отменить: Я не выполнил это руководство.
Еще один человек закончил это руководство.
Команду

Oregon Institute of Technology, Team S1-G2, Lancaster Spring 2019 Участник Oregon Institute of Technology, Team S1-G2, Lancaster Spring 2019
OIT-LANCASTER-S19S1G2
3 членов
Автор 15 руководств