Перейти к основному содержанию
/
Мой рабочий стол для верстки руководств

Получите быстрый доступ к руководствам, запчастям и ответам касательно ваших устройств

Toshiba Satellite A660-ST3NX2X Hard Drive Replacement

Toshiba Satellite A660-ST3NX2X Hard Drive Replacement

Cassie Pickett

Cassie Pickett и 3 другие участники

Последнее обновление June 24, 2023

1 - 4 минут
Легко

This replacement guide is to walk you through a hard drive replacement on your Toshiba Satellite A660-ST3NX2X. Before starting this replacement, make sure you have a replacement hard drive that is made for this computer and model. Also, make sure the computer is powered off and completely shut down before completing this replacement.

Выберете то, что вам нужно

  1. Toshiba Satellite A660-ST3NX2X Hard Drive Replacement, Battery: шаг 1, изображение 1 из 1
    • Unplug all cables and other devices from the computer before starting this replacement.

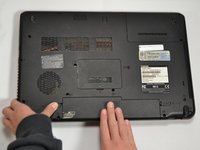
    • Turn the computer over, so the screen is facing down and the battery is positioned in front of you.

  2. Toshiba Satellite A660-ST3NX2X Hard Drive Replacement: шаг 2, изображение 1 из 2 Toshiba Satellite A660-ST3NX2X Hard Drive Replacement: шаг 2, изображение 2 из 2
    • Locate the two sliding tabs on either side of the battery.

    • Using both hands, place one finger on each tab and slide them to the sides and away from each other.

  3. Toshiba Satellite A660-ST3NX2X Hard Drive Replacement: шаг 3, изображение 1 из 3 Toshiba Satellite A660-ST3NX2X Hard Drive Replacement: шаг 3, изображение 2 из 3 Toshiba Satellite A660-ST3NX2X Hard Drive Replacement: шаг 3, изображение 3 из 3
    • Pull the battery out, keeping the tabs pushed to the side.

    • The right tab on this laptop stayed pushed to the right without needing to be held in place.

  4. Toshiba Satellite A660-ST3NX2X Hard Drive Replacement, Hard Drive: шаг 4, изображение 1 из 1
    • Unplug all devices from your computer and power down the device completely.

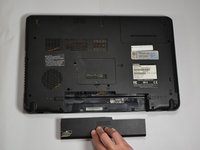
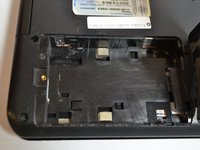
    • Flip the computer over so the screen is facing down.

    • In the image, the hard drive will appear to be in the top right corner where the box indicates.

  5. Toshiba Satellite A660-ST3NX2X Hard Drive Replacement: шаг 5, изображение 1 из 2 Toshiba Satellite A660-ST3NX2X Hard Drive Replacement: шаг 5, изображение 2 из 2
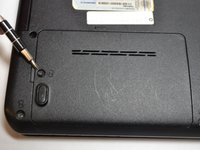
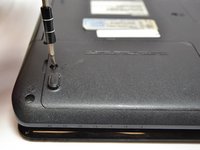
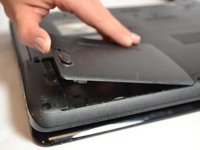
    • Use a J00 bit to unscrew the single 4mm screw that holds the hard drive cover in place.

  6. Toshiba Satellite A660-ST3NX2X Hard Drive Replacement: шаг 6, изображение 1 из 2 Toshiba Satellite A660-ST3NX2X Hard Drive Replacement: шаг 6, изображение 2 из 2
    • Remove the cover that holds the hard drive in place.

    • Remove the hard drive.

    • This computer contains no hard drive, therefore we are unable to show the physical removal of it.

Заключение

To reassemble your device, follow these instructions in reverse order.

Cassie Pickett

Участник с: 03/20/17

201 Репутация

Автор 2 руководств

Команду

Texas Tech, Team S8-G1, Bennett Spring 2017 Участник Texas Tech, Team S8-G1, Bennett Spring 2017

TTU-BENNETT-S17S8G1

4 членов

Автор 15 руководств

0 Комментариев

Добавить комментарий

Статистика просмотров:

За последние 24 час(ов): 0

За последние 7 дней: 6

За последние 30 дней: 9

За всё время: 569