
Toshiba Satellite L305-S5875 RAM Replacement
Введение
Перейти к шагу 1Installing additional RAM modules will increase the performance of your laptop, and is relatively easy to do.
Выберете то, что вам нужно
Запчасти


Инструменты

Показать больше…
-
-
Close the laptop lid and flip the laptop over.
-
Switch the lock button on the left to the unlock position. (The unlock position is to the left side.)
-
-
-
Push the release button to the right.
-
Hold the release button to the right and lift the battery out of its housing.
-
-
-
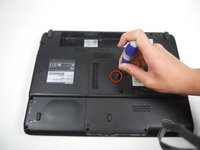
Locate the RAM Module compartment on the bottom side of the laptop.
-
Carefully remove the 4.6mm 0 Phillips head screw and put it in a safe place.
-
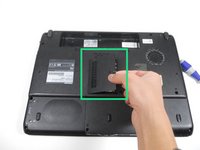
Locate the notch on the screw side of the lid and lift to remove it.
-
-
-
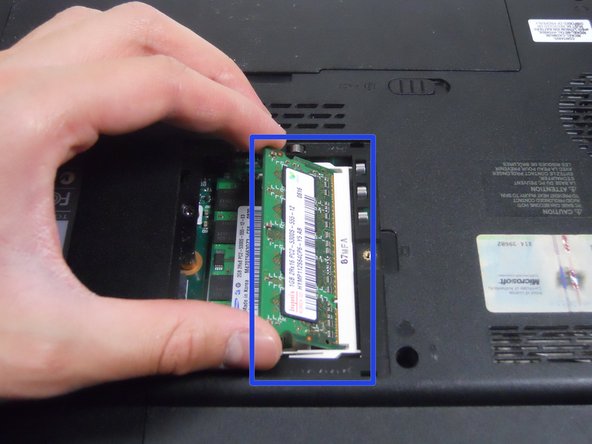
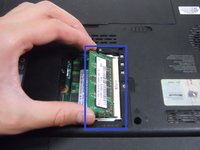
Push the metal tabs on the sides of the RAM outward and the RAM will pop up.
-
Gently pull the RAM out.
-
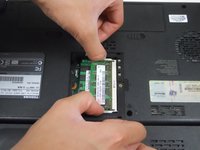
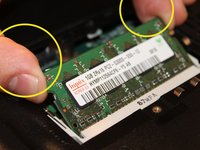
Replace the RAM by sliding the new one into the angled socket similarly to how you removed the old RAM.
-
Gently apply pressure until the metal tabs on the sides click into place.
-


To reassemble your device, follow these instructions in reverse order.
To reassemble your device, follow these instructions in reverse order.
Отменить: Я не выполнил это руководство.
3 человек успешно провели ремонт по этому руководству.
Команду

Cal Poly, Team 20-5, Maness Winter 2013 Участник Cal Poly, Team 20-5, Maness Winter 2013
CPSU-MANESS-W13S20G5
4 членов
Автор 10 руководств