Перейти к основному содержанию
/
Мой рабочий стол для верстки руководств

Получите быстрый доступ к руководствам, запчастям и ответам касательно ваших устройств

Toshiba Satellite Radius P55W-B5220 Motherboard Replacement

Toshiba Satellite Radius P55W-B5220 Motherboard Replacement

Nicole Kohm

Nicole Kohm и еще один участник

Последнее обновление September 23, 2024

20 - 45 минут
Средне

The motherboard of your device acts as a meeting point for crucial components, such as the CPU and input and output devices. To replace a damaged or defective motherboard, you will remove all connected peripherals, replace the motherboard, and reconnect all peripherals.

Выберете то, что вам нужно

Запчасти

Инструменты

  • Spudger
    Spudger
  • Phillips #0 Screwdriver
    Phillips #0 Screwdriver

Показать больше…

iFixit получает комиссию, когда вы совершаете покупку по этим ссылкам.
  1. Toshiba Satellite Radius P55W-B5220 Motherboard Replacement, Motherboard: шаг 1, изображение 1 из 2 Toshiba Satellite Radius P55W-B5220 Motherboard Replacement, Motherboard: шаг 1, изображение 2 из 2
    • Using the plastic opening tool, remove the two rubber feet closest to the hinge.

  2. Toshiba Satellite Radius P55W-B5220 Motherboard Replacement: шаг 2, изображение 1 из 1
    • Remove the 12 M2x4mm PH0 Philips screws.

  3. Toshiba Satellite Radius P55W-B5220 Motherboard Replacement: шаг 3, изображение 1 из 1
    • Near the hinges, wedge a plastic opening tool under the back panel.

  4. Toshiba Satellite Radius P55W-B5220 Motherboard Replacement: шаг 4, изображение 1 из 1
    • Unlatch the LED indicator from the back panel.

  5. Toshiba Satellite Radius P55W-B5220 Motherboard Replacement: шаг 5, изображение 1 из 1
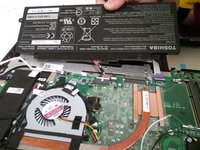
    • Using a P0 Philips head screwdriver, Remove the four M2x2.5mm P0 Philips screws from the battery.

  6. Toshiba Satellite Radius P55W-B5220 Motherboard Replacement: шаг 6, изображение 1 из 2 Toshiba Satellite Radius P55W-B5220 Motherboard Replacement: шаг 6, изображение 2 из 2
    • Lift the battery.

    • Disconnect the battery.

  7. Toshiba Satellite Radius P55W-B5220 Motherboard Replacement: шаг 7, изображение 1 из 3 Toshiba Satellite Radius P55W-B5220 Motherboard Replacement: шаг 7, изображение 2 из 3 Toshiba Satellite Radius P55W-B5220 Motherboard Replacement: шаг 7, изображение 3 из 3
    • Disconnect the ribbon cable of the touchpad from the motherboard.

  8. Toshiba Satellite Radius P55W-B5220 Motherboard Replacement: шаг 8, изображение 1 из 2 Toshiba Satellite Radius P55W-B5220 Motherboard Replacement: шаг 8, изображение 2 из 2
    • Remove the two M2x2.5mm P0 Philips screws from the fan.

  9. Toshiba Satellite Radius P55W-B5220 Motherboard Replacement: шаг 9, изображение 1 из 3 Toshiba Satellite Radius P55W-B5220 Motherboard Replacement: шаг 9, изображение 2 из 3 Toshiba Satellite Radius P55W-B5220 Motherboard Replacement: шаг 9, изображение 3 из 3
    • Disconnect the fan cables.

    • Carefully unhook the wires from the base of the fan.

  10. Toshiba Satellite Radius P55W-B5220 Motherboard Replacement: шаг 10, изображение 1 из 1
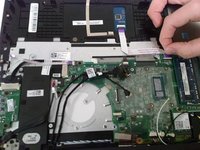
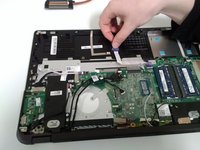
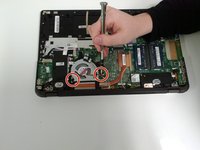
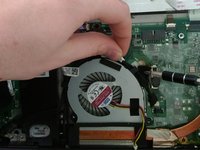
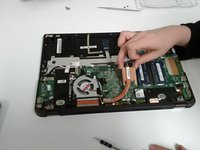
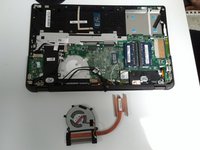
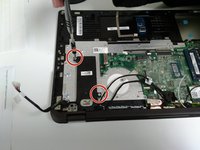
    • Unscrew the four M2x4mm PH0 Philips screws from the CPU mounts on the motherboard.

  11. Toshiba Satellite Radius P55W-B5220 Motherboard Replacement: шаг 11, изображение 1 из 3 Toshiba Satellite Radius P55W-B5220 Motherboard Replacement: шаг 11, изображение 2 из 3 Toshiba Satellite Radius P55W-B5220 Motherboard Replacement: шаг 11, изображение 3 из 3
    • Carefully lift the heatsink off the CPU.

    • Avoid bending or kinking the tubing.

    • Delicately lift the fan out with the heatsink.

  12. Toshiba Satellite Radius P55W-B5220 Motherboard Replacement: шаг 12, изображение 1 из 1
    • Remove the M2x2.5mm P0 Philips screw from the USB controller.

  13. Toshiba Satellite Radius P55W-B5220 Motherboard Replacement: шаг 13, изображение 1 из 3 Toshiba Satellite Radius P55W-B5220 Motherboard Replacement: шаг 13, изображение 2 из 3 Toshiba Satellite Radius P55W-B5220 Motherboard Replacement: шаг 13, изображение 3 из 3
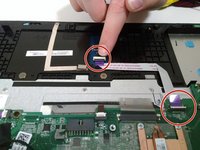
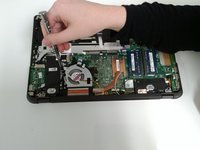
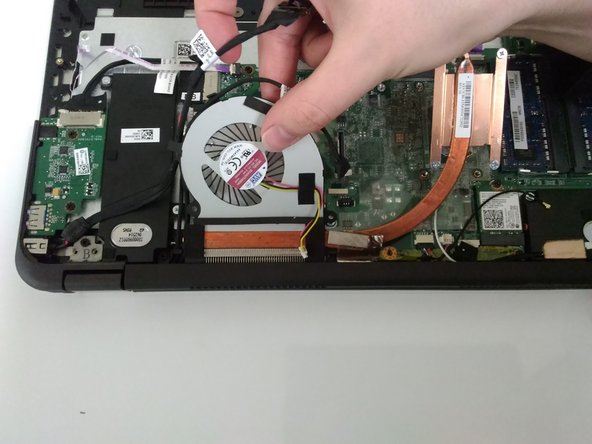
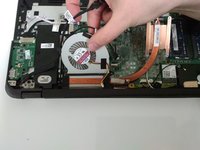
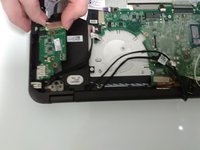
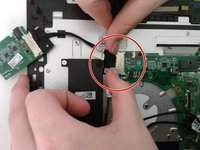
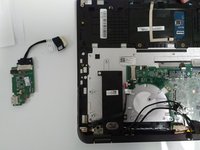
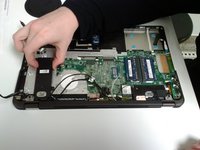
    • Lift the USB controller from the motherboard.

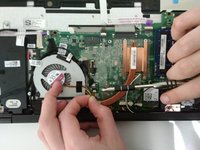
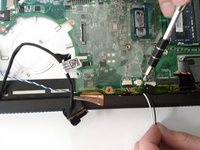
    • Detach the USB controller from the motherboard.

  14. Toshiba Satellite Radius P55W-B5220 Motherboard Replacement: шаг 14, изображение 1 из 1
    • Disconnect the left speaker from the motherboard.

  15. Toshiba Satellite Radius P55W-B5220 Motherboard Replacement: шаг 15, изображение 1 из 2 Toshiba Satellite Radius P55W-B5220 Motherboard Replacement: шаг 15, изображение 2 из 2
    • Remove the two M2x4mm PH0 Philips screws for the speaker mounts.

  16. Toshiba Satellite Radius P55W-B5220 Motherboard Replacement: шаг 16, изображение 1 из 1
    • Unhook the speaker from under the hinge cable mounts.

  17. Toshiba Satellite Radius P55W-B5220 Motherboard Replacement: шаг 17, изображение 1 из 1
    • Unhook the right speaker cable from the motherboard.

  18. Toshiba Satellite Radius P55W-B5220 Motherboard Replacement: шаг 18, изображение 1 из 1
    • Remove the copper tape from the speaker cord.

  19. Toshiba Satellite Radius P55W-B5220 Motherboard Replacement: шаг 19, изображение 1 из 2 Toshiba Satellite Radius P55W-B5220 Motherboard Replacement: шаг 19, изображение 2 из 2
    • Unhook the speaker cables from under the catch under the hinge.

  20. Toshiba Satellite Radius P55W-B5220 Motherboard Replacement: шаг 20, изображение 1 из 1
    • Remove the eight M2x2.5mm P0 Philips screws from the motherboard.

  21. Toshiba Satellite Radius P55W-B5220 Motherboard Replacement: шаг 21, изображение 1 из 1
    • Remove the motherboard.

Заключение

To reassemble your device, follow these instructions in reverse order.

2 человек успешно провели ремонт по этому руководству.

Nicole Kohm

Участник с: 09/20/17

131 Репутация

1 руководство автора

Команду

University of North Texas, Team S5-G6, Thomas Fall 2017 Участник University of North Texas, Team S5-G6, Thomas Fall 2017

UNT-THOMAS-F17S5G6

5 членов

Автор 7 руководств

0 Комментариев

Добавить комментарий

Статистика просмотров:

За последние 24 час(ов): 0

За последние 7 дней: 6

За последние 30 дней: 11

За всё время: 1,748