
Toshiba Satellite S50-B Cooling Fan Replacement
Введение
Перейти к шагу 1The guide demonstrates how to replace a cooling fan for the Toshiba Satellite S50-B. You will need the Phillips #0 screwdriver and the plastic opening tool.
Выберете то, что вам нужно
Инструменты

-
-
Unscrew the two 6.5mm screws below the battery using a Phillips #0 Screwdriver.
-
-
-
Place thumbs on corners of the battery. Pinch the battery between the thumb and index finger and pull.
-
-
-
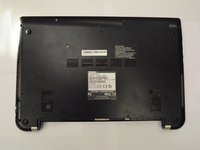
Locate the 10 screws on the bottom of the device, there should be 12 screws in total including the battery screws. Unscrew using a Phillips #0 screwdriver, and set screws aside.
-
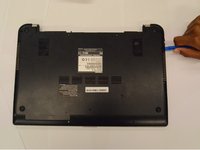
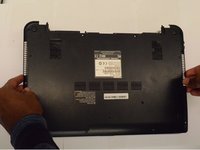
Use a plastic opening tool to remove the bottom panel.
-
-
-
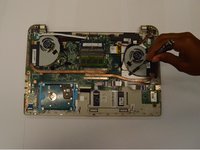
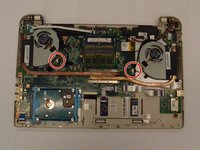
Locate the 2 screws on each fan. Unscrew them.
-
Disconnect the fan by applying gentle pressure to the circled connection with your finger and pulling.
-
Remove the fans. Be sure to keep track of the right and left fans, marked R and L.
-


To reassemble your device, follow these instructions in reverse order.
To reassemble your device, follow these instructions in reverse order.
Отменить: Я не выполнил это руководство.
Еще один человек закончил это руководство.
Команду

UC Santa Barbara, Team S1-G4, Weedon Fall 2017 Участник UC Santa Barbara, Team S1-G4, Weedon Fall 2017
UCSB-WEEDON-F17S1G4
5 членов
Автор 4 руководств