Введение
This guide shows how to remove and replace a worn out battery for the iPad Pro 12.9”. The battery is tucked under the logic board. As part of the procedure, you’ll be moving the logic board out of the way in order to remove the battery.
This iPad uses both stretch-release and normal adhesives to hold the battery in place. Use plenty of high concentration isopropyl alcohol or iFixit adhesive remover to help remove the battery and to clean any adhesive residue.
For your safety, discharge your battery below 25% before disassembling your device. This reduces the risk of a dangerous thermal event if the battery is accidentally damaged during the repair. If your battery is swollen, take appropriate precautions.
Выберете то, что вам нужно
-
-
Completely power down your iPad before you begin.
-
If your screen is cracked, lay overlapping strips of clear packing tape over the iPad's screen until the whole face is covered.
-
Do your best to follow the rest of the guide as described. However, once the glass is broken, it will likely continue to crack as you work, and you may need to use a metal prying tool to scoop the glass out.
-
-
-
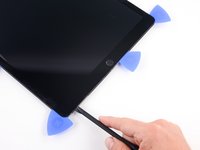
As you slice through the adhesive, note the following:
-
The top has a large patch of thick adhesive. You'll need to slice 1/2" deep in order to cut the adhesive.
-
Don't slice deeper than 2 mm along the long edges of the iPad, or you risk damaging the display panel.
-
The lower edge also has thick patches of adhesive, but there are delicate flex cables in each corner. Don't slice deeper than 1/4" around the lower corners.
I have an A1652 iPad pro 12.9” that was originally my wife’s. The battery doesn’t hold a charge very long in use so I read through this guide and ordered the kit and battery. This iPad has a gold colored case that appears to wrap over the edges of the screen. As a result I could not find any place to slice through the adhesive. Model number brought up on the “about” screen is ML3P2LL/A and serial is DLXR3M7LGMW5. Is this possibly a transition model? Any ideas?
Hello! Based on the model number, it looks like you have the 1st generation cellular version of the iPad Pro 12.9". This guide should work for you. The tolerances on the iPad are very tight—you're looking for the seam between the black bezel and the gold case. You'll need a lot of heat in order to loosen the bezel.
-
-
-
Heat an iOpener and lay it over the left edge of the iPad to soften the adhesive holding the screen in place.
-
Wait two minutes for the adhesive to soften before proceeding to the next step. The edge should be slightly too hot to the touch.
Oven works fine: preheat to ~225 then turn off, protect back with towel and warm for 10-15 minutes. Basically the same as a car interior in summer, this skips about a dozen steps. Used mini plastic pry tools and a few picks/cards, no need for suction or iopener: yet another reason microwaves should be relegated to diners to destroy perfectly good food. Two issues from my surgery: damaged small section of screen border by carding too far inside the device while effortlessly slicing through adhesive, and one of the smart connector pins was revived from bent pin purgatory. Apple’s planned obsolescence genius truly shines through the multipin snap connectors. I detached the screen cable before disabling battery, YMMV; remainder of procedure was done to spec with disabled battery on reinstall. Screw monster only ate about 2, even after breaking an elbow sweat with 70% iso the residual adhesive should outlast the ios nerf that will bring this ipad to the grave. Much easier than first impression with oven.
-
-
Инструмент, используемый на этом этапе:Clampy - Anti-Clamp$24.95
-
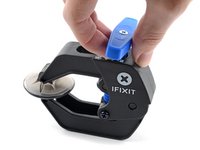
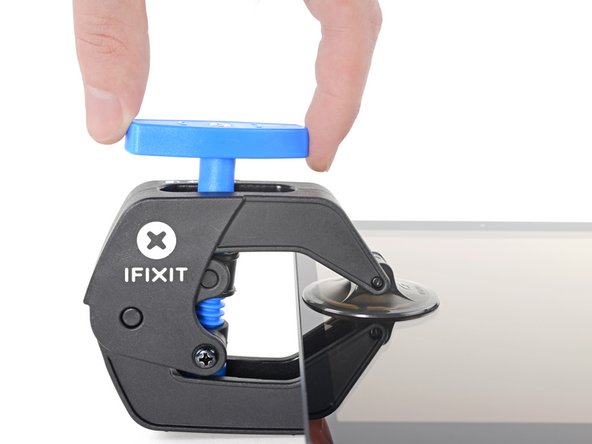
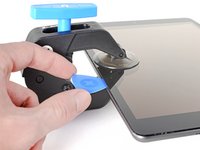
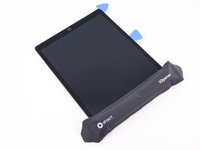
Pull the blue handle backwards to unlock the Anti-Clamp's arms.
-
Place an object under your iPad so it rests level between the suction cups.
-
Position the suction cups near the middle of the left edge—one on the top, and one on the bottom.
-
Hold the bottom of the Anti-Clamp steady and firmly press down on the top cup to apply suction.
-
-
-
Pull the blue handle forward to lock the arms.
-
Turn the handle clockwise 360 degrees or until the cups start to stretch.
-
Make sure the suction cups remain aligned with each other. If they begin to slip out of alignment, loosen the suction cups slightly and realign the arms.
-
-
-
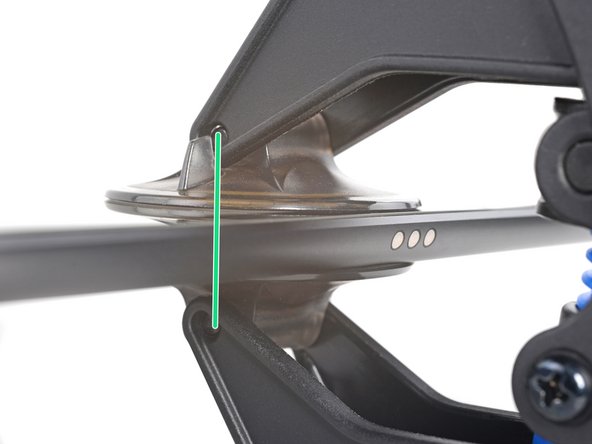
Wait one minute to give the adhesive a chance to release and present an opening gap.
-
If your screen isn't getting hot enough, you can use a hair dryer to heat along the left edge of the iPad.
-
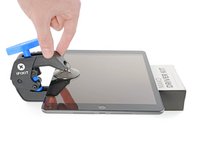
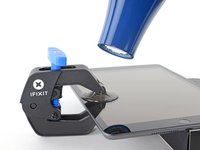
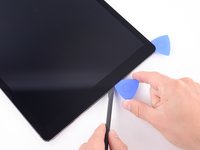
Insert an opening pick under the screen when the Anti-Clamp creates a large enough gap.
-
Skip the next two steps.
-
-
-
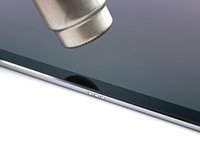
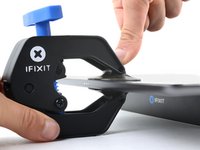
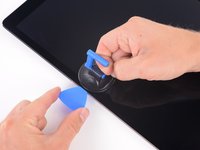
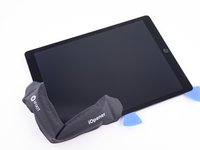
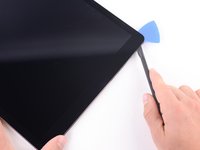
Attach a suction cup to the left edge of the iPad's screen, above the Smart Connector port.
-
-
-
While holding down the corners of the iPad, repeatedly pull up on the screen, then ease it back down to weaken the adhesive. This will eventually create a small gap in the seam.
-
Once you've created a small gap, insert the tip of an opening pick into the gap.
-
-
Инструмент, используемый на этом этапе:Halberd Spudger$2.99
-
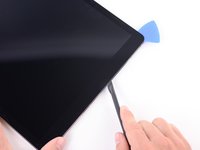
Lay a hot iOpener along the bottom left corner of the iPad, spanning from the opening pick to the home button.
-
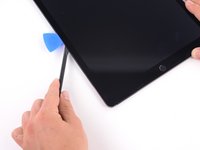
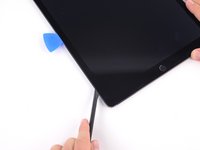
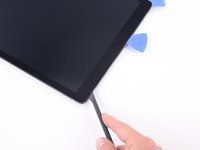
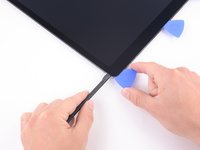
After letting the adhesive soften, insert an opening pick or halberd spudger into the gap next to the Smart Connector.
-
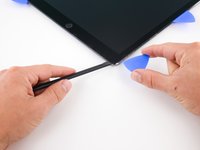
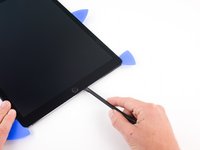
Use an opening pick or halberd spudger to slice the adhesive along the bottom left side of the iPad. If the slicing becomes difficult, reheat the edge and try again.
Well, this is the scariest part so hold my beer. I tried something similar to the “iOpener” which is a gel filled heat/cold pack I could microwave. That was good to start warming, but I was too impatient to get the first pick under, so I got out my heat gun. Mine is a 1200 watt model and I used it on low, the tip about 3 fingers away from the glass, sweeping it over 8” sections about 10 times taking about 3 seconds per pass. It worked ok and I now have 10 picks pried under all edges. Took about 35 minutes to this point. Only difficulty here is bracing the iPad while sliding the picks under the glass - need to be careful to not knock out the picks you already have inserted.
One note I might offer is that it’s not entirely clear from your pics which is the top/bottom/left/right side because it’s hard to see the button on the screen in your pics. Another is to mark your 2mm pick depth with whiteout or something similar.
-
-
-
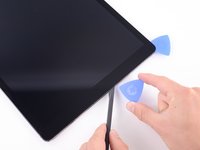
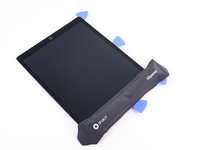
Insert a pick in the bottom left corner of the iPad to prevent the adhesive from resealing.
-
-
-
Lay a hot iOpener along the upper left corner of the iPad, spanning from the opening pick to the front-facing camera. Wait a minute to let the adhesive soften.
-
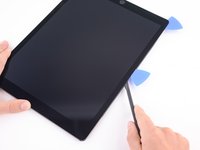
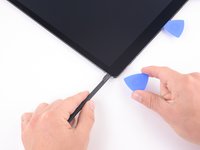
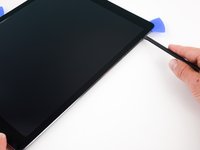
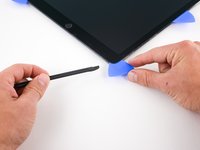
Use an opening pick to slice the adhesive along the upper left side of the iPad. If the slicing becomes difficult, reheat the edge and try again.
-
-
-
Insert a pick in the upper left corner of the iPad to prevent the adhesive from resealing.
-
-
-
Reheat your iOpener and lay it over the top edge of the device. Wait a couple minutes for the adhesive to soften.
-
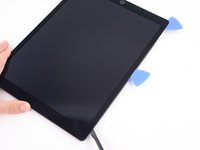
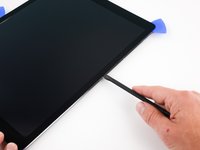
Use an opening pick to slice through the top edge of the iPad, stopping before you reach the front-facing camera.
-
If the slicing becomes hard, reheat the edge and try again.
-
-
-
Insert an opening pick just before the front-facing camera to keep the adhesive from resealing.
-
-
-
Reheat your iOpener and lay it over the top edge of the device. Wait a couple minutes for the adhesive to soften.
-
Insert an opening pick or a halberd spudger blade just past the front-facing camera.
-
Use the opening pick to slice through the adhesive in the upper right corner.
-
If the slicing becomes hard, reheat the edge and try again.
-
-
-
Insert an opening pick in the upper right corner to prevent the adhesive from resealing.
-
-
-
Soften the adhesive by heating the right edge of the iPad using an iOpener.
-
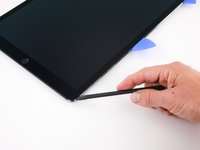
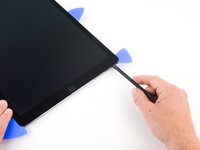
Use an opening pick or halberd spudger to slice along the right edge of the iPad, till you reach the lower right corner.
-
Leave an opening pick in the middle of the right edge to prevent the adhesive from resealing.
-
-
-
Leave an opening pick in the lower right corner of the iPad to prevent the adhesive from resealing.
-
-
-
Use an iOpener to heat the lower edge of the iPad.
-
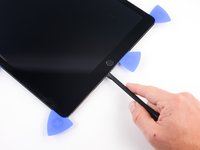
Insert an opening pick or a halberd spudger blade 1/4" into the lower right corner of the iPad.
-
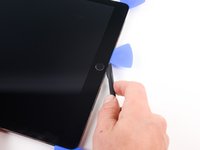
Slide the opening pick along the lower edge of the iPad, stopping short about 1/2" before reaching the home button.
-
-
-
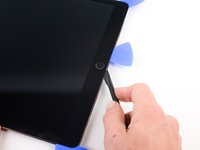
Slide the tip of an opening pick or a halberd spudger to cut the adhesive below the home button.
-
-
-
-
After you slice below the home button, reinsert the tip of an opening pick or a halberd spudger blade 1/4" into the lower edge.
-
Slice along the lower edge until you reach the opening pick.
-
-
-
At this point, you've sliced through most of the screen adhesive. Use an opening pick to carefully slice any remaining adhesive along the edges until the screen is freed. If some parts are stubborn, heat the area with an iOpener to loosen the adhesive.
-
-
-
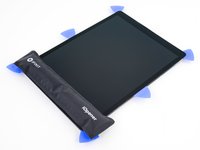
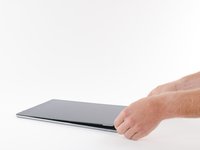
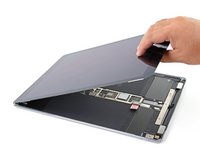
Lift up the upper edge of the screen and slide the entire screen towards the front-facing camera to access the iPad's internal components.
-
Use masking tape to tape the lower edge of the screen to the frame to prevent the screen from slipping.
For me, disaster struck at this step. I was being careful but somehow lifted the wrong end and snapped the ribbon cable.
😟😟😟 Be careful It would have been helpful to label the screen's top and bottom edges with a marker and tape at the beginning of the repair process. For that matter, label right and left edges as well. Then change all dialog to reference top, bottom, left, or right. I think it would make it easier to follow the instructions
-
-
-
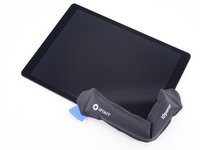
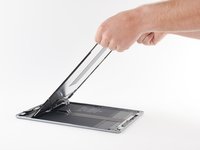
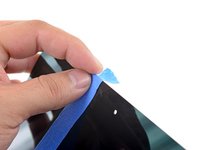
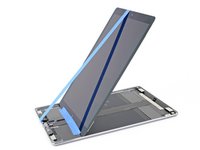
Attach a long strip of masking tape to the top edge of the screen. Fold the tape over the edge and make sure that the tape is attached securely.
-
Attach the other end of the strip to the bottom edge of the iPad frame to hold the screen at an angle. Make sure the tape attaches securely to the frame.
Just make sure you use plenty of tape on the backside of the screen and on the underside of the iPad and the tape won't slip.
-
-
-
Use a Phillips screwdriver to remove the nine screws securing the logic board EMI shield:
-
Eight 1.2 mm screws
-
One 2.4 mm screw
-
-
-
Lift the logic board EMI shield from the edge nearest the top of the iPad.
-
Peel up and remove the EMI shield from the logic board.
-
Remove the logic board EMI shield.
In the iPad 4G version, this is where the cellular radio sits. You might see some different chips underneath the EM shield, and a little adhesive gasket. When I pulled my EM shield off I tried not to disturb that adhesive, and put it back when I was done.
-
-
-
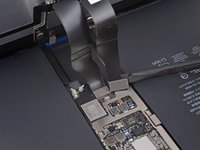
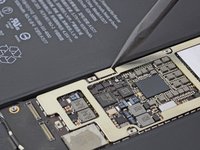
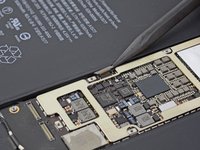
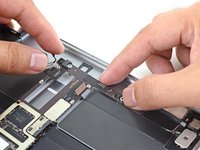
Use a Phillips screwdriver to remove the 1.8 mm screw securing the battery connector.
-
-
-
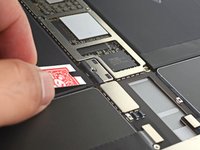
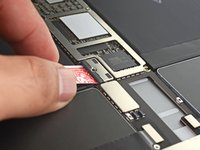
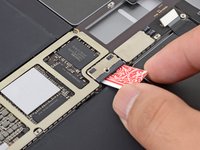
Make a battery blocker using a playing card and slide it underneath the logic board connector to disconnect the battery.
-
Leave the blocker there to prevent the battery connector leads from making contact until you have completed your repairs.
-
-
-
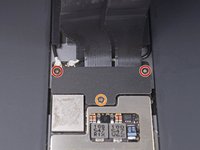
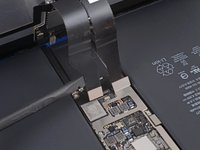
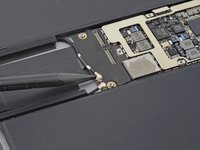
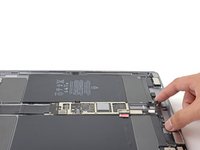
Use a Phillips screwdriver to remove the three screws securing the display cable bracket:
-
Two 2.4 mm screws
-
One 1.2 mm screw
-
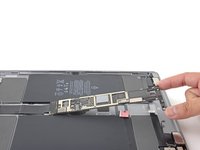
Remove the display cable bracket.
-
-
-
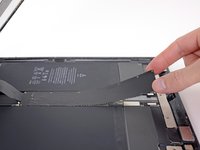
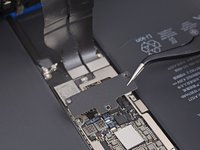
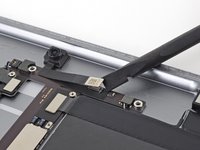
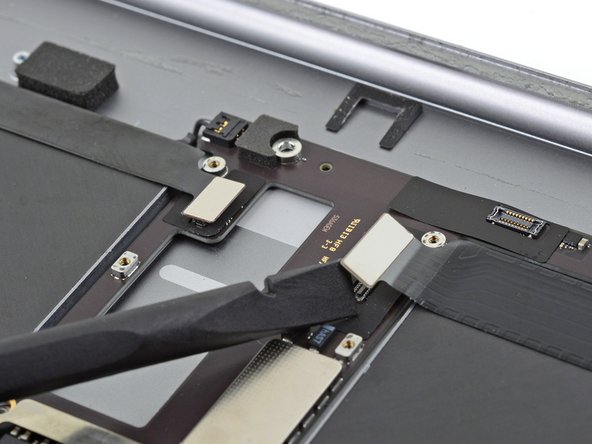
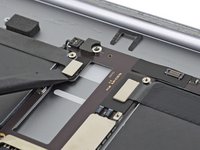
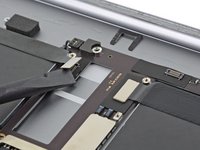
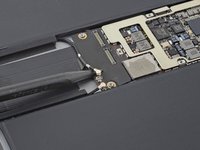
Use the flat end of a spudger to pry up and disconnect the display and digitizer cables from their logic board sockets.
Would it help to draw a sharpie line between the two parts of the connector, so these can be alingned when refitting?
-
-
-
Remove the screen.
-
If your screen didn't come with pre-applied adhesives, use our screen adhesive application guide to install fresh pre-cut adhesive strips when reassembling your iPad.
Phew! One hour 45, took my time, maybe cut that in half if I did it again and pray I don’t have to. Working sideways, the little screws were usually caught by the battery on the bottom edge. Need a shorter Phillips than in the iFixit kit. And looks like I don’t need the pre-cut adhesives I bought as they were on the replacement screen - hopefully I can get a refund.
Good time for a coffee break before cleaning off the old adhesive. Quite a relief to get the screen off & thanks much to you guys for getting me this far.
Es wäre sehr schön, wenn hier noch jemand beschreiben könnte, wie man "unfallfrei" die Klebereste vom Display rundherum entfernt. Ich habe das in meinem Falle ganz vorsichtig mit Isopropanol (hochrein) getan. Die Klebereste gingen damit gut ab - trotzdem ist das eine sehr aufwendige Arbeit, bis man alles sauber hat. Zudem kann man noch so vorsichtig sein, durch die angebrachte Displayunit auf der Rückseite der Displayscheibe und die dadurch entstehende Kapillarwirkung zieht sich immer Isopropanol zwischen Display und Displayunit, was danach zu hellen Flecken führt. Ich hoffe, die verschwinden wieder, wenn das Iso abgetrocknet / ausgetrocknet ist.
Vielleicht hat jemand eine gute Idee, wie man diese Klebereste entfernt, ohne dass das Beschriebene passiert.
Markus,
I just wouldn't use any isopropyl alcohol to remove the residue. We're going to immediately apply more adhesive right after we remove the old adhesive, so if there's a little bit of sticky residue remaining, that's not a problem for us. I would just scrape as best as I could with a spudger, make sure there's no adhesive on the internals, and call it a day.
-
-
-
Use a Phillips screwdriver to remove the three screws securing the top bracket:
-
One 1.2 mm screw
-
Two 2.3 mm screws
-
-
-
Remove the top bracket.
First time I’ve been disappointed with one of your breakdowns. I’m following your instructions to the letter on my iPad Pro A1652. I get to this step, remove the top bracket and instead of just the front facing camera I have a completely different array of stuff. I’m now screwed as I have no idea where to go next. ?
I’m assuming this breakdown is for the WIFI only version? Well, the celular version has way more stuff to accommodate. Would be good if you say from the start that this is only for the WIFI version to save people getting 2 hours into a battery replacement attempt before discovering that it doesn’t cover the model number it says it does.
Craig -
Hi Craig!
I'm sorry about that! You're right—this is the Wi-Fi model only. I'll add a clarification note in the intro.
The extra components underneath the bracket are the cellular antennas. You may need to remove some additional brackets and/or disconnect some additional cables to reach the camera.
-
-
-
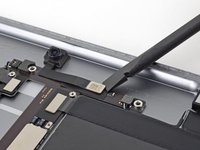
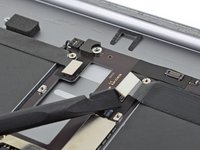
Use the flat end of a spudger to pry up and disconnect the front facing camera connector.
-
-
-
Use a spudger to pry up and disconnect the two press connectors near the top of the logic board.
-
-
-
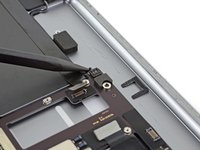
Slide the point of a spudger under the right speaker connector wires near the top right corner of the logic board.
-
Pry straight up to disconnect the right speaker.
-
-
-
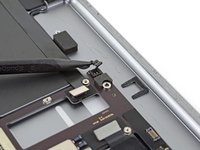
Slide the point of a spudger under the left speaker connector wires near the top left corner of the logic board.
-
Pry straight up to disconnect the left speaker.
-
-
-
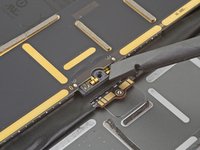
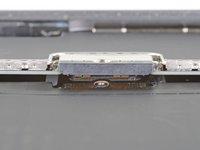
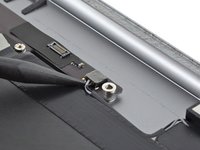
Use the point of a spudger to pry up and disconnect the Smart Connector cable from the logic board.
-
-
-
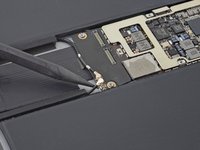
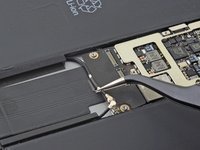
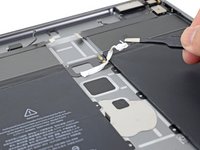
Use the point of a spudger to pry up and disconnect the two antenna cables from the bottom right corner of the logic board.
-
-
-
Heat an iOpener and apply it to the antenna cables below the logic board for a minute.
-
-
Инструмент, используемый на этом этапе:Tweezers$4.99
-
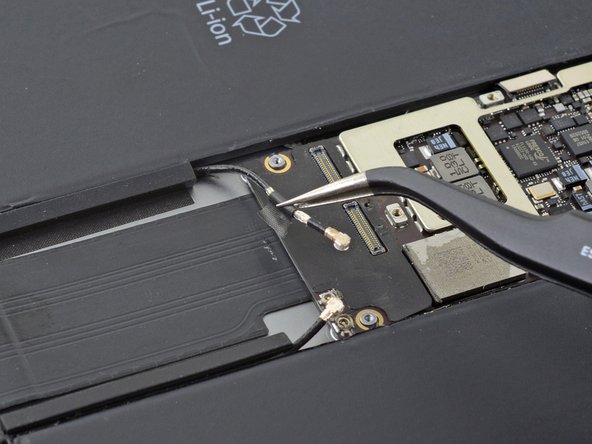
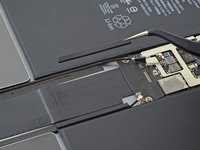
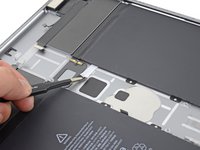
Use tweezers to gently lift the left antenna cable connector away from the frame.
-
-
-
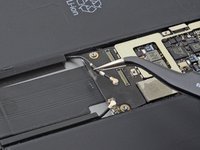
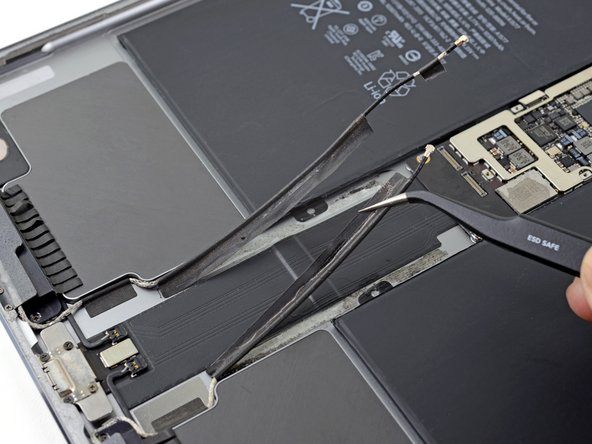
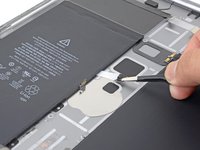
Use tweezers to lift and remove the two lightly adhered antenna channels from the edges of the battery.
-
-
-
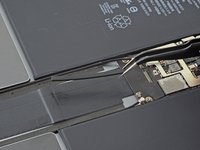
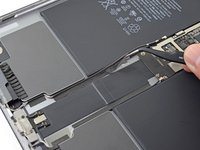
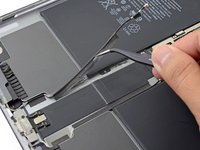
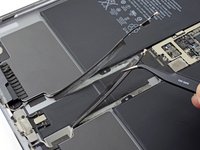
Use your fingers or tweezers to lift and peel up the the two antenna cables from the iPad frame.
-
Bend the antenna cables toward the bottom edge of the iPad.
-
-
-
Be careful not to trap the Smart Connector connector underneath the logic board.
-
Be careful not to trap the two flex connectors and the two speaker connecters underneath the logic board.
-
Reinsert the battery blocker into position.
-
-
-
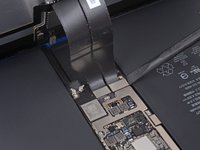
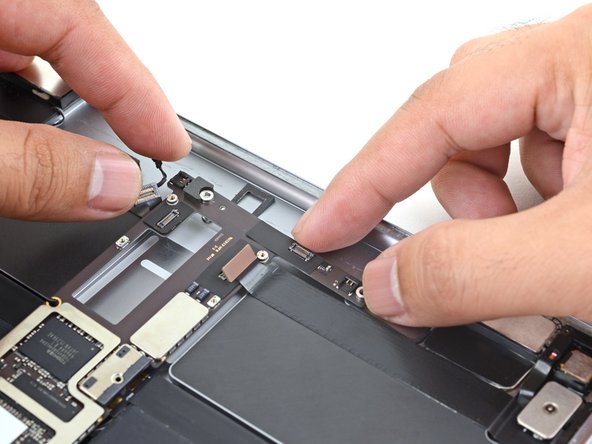
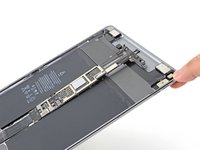
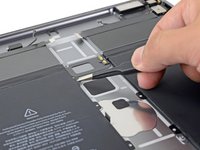
Lift the top edge of the logic board slightly to free it from the top connectors.
-
Remove the loose battery blocker and save it for reassembly.
-
-
-
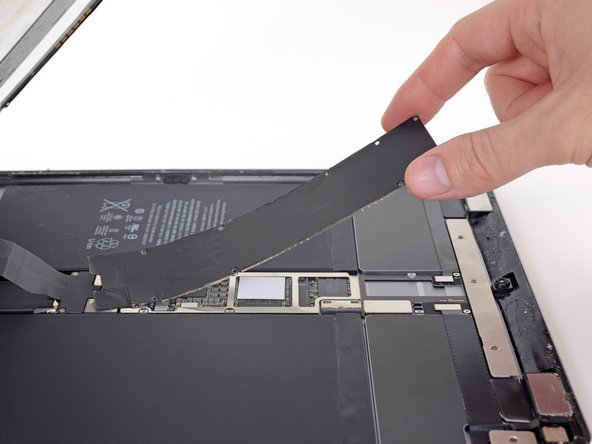
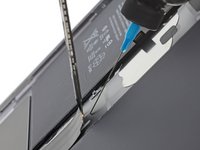
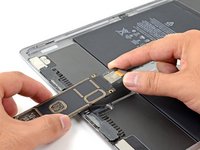
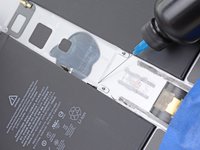
Tilt the iPad to a 45° angle.
-
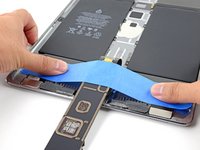
Apply a few drops of high concentration (>90%) isopropyl alcohol underneath the logic board flex cable.
-
Hold the iPad in the tilted position for a minute to allow the alcohol to loosen the adhesive.
-
-
-
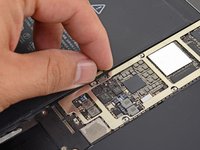
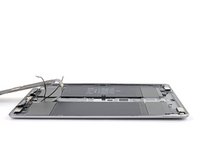
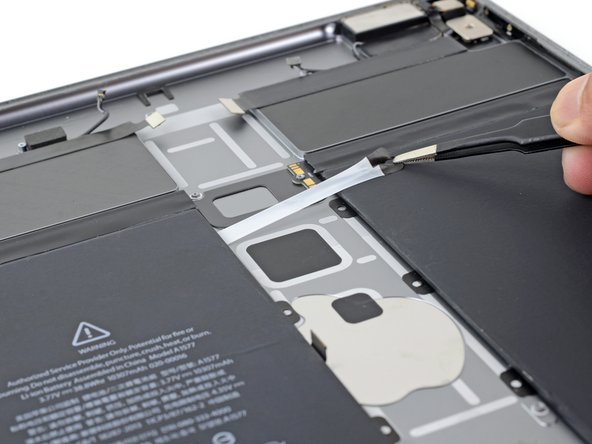
Once you swing the logic board completely over its flex cable, use a piece of tape to secure the logic board out of the way of the battery.
-
-
Инструмент, используемый на этом этапе:Tesa 61395 Tape$5.99
-
Eight stretch-release adhesive strips
-
Two regular adhesive strips
Which adhesive strips should I get to replace these?
Hi Erik,
You can use some double-sided tape like Tesa tape, or you can use some stretch release adhesive. I'll add that info into the step.
-
-
-
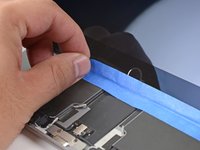
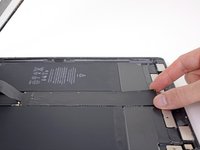
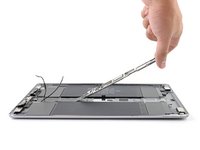
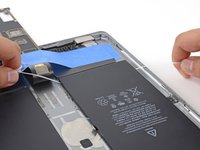
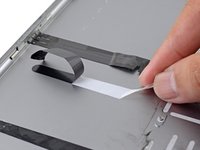
Use tweezers or your fingers to grasp the black pull-tab on one of the adhesive strips.
-
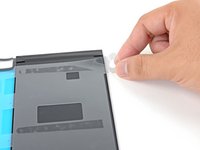
Pull the strip out slowly and steadily at a low angle. Give it plenty of time to stretch and un-stick from under the battery.
-
If the adhesive strip breaks off, try to retrieve it using your fingers or blunt tweezers, and continue pulling—but do not pry under the battery.
-
-
-
Tilt the iPad and apply a few drops of high concentration (>90%) isopropyl alcohol to the broken strip. Wait for a minute to let the alcohol penetrate the adhesive.
-
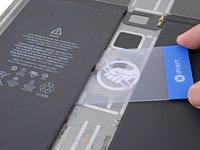
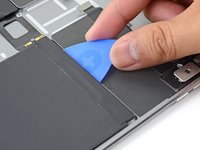
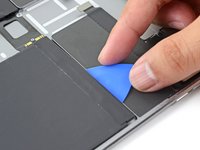
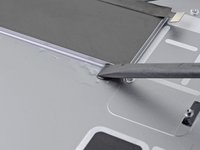
Slowly slide an opening card under the battery to loosen the adhesive.
-
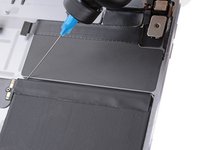
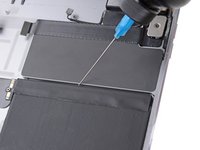
Alternatively, you can use dental floss to slice through the adhesive. Wrap the floss around a bit driver handle or your fingers and thread it back and forth under the battery.
-
-
-
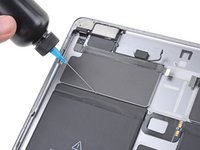
Tilt the iPad up and apply a few drops of isopropyl alcohol to the top right edge of the battery.
-
Keep the iPad tilted for a minute to let the alcohol penetrate the adhesive.
-
-
-
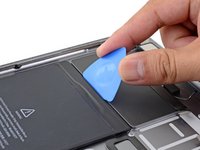
Insert the flat edge of an opening pick into the crevice above the top right edge of the battery.
-
Slowly press the pick under the battery to loosen the adhesive.
-
Slide the pick along the top right edge of the battery to loosen the adhesive.
-
-
-
Tilt the iPad up and apply a few drops of isopropyl alcohol to the top left edge of the battery.
-
Keep the iPad tilted for a minute to let the alcohol penetrate the adhesive.
-
Insert the flat edge of an opening pick into the crevice above the top left edge of the battery.
-
Slowly press the pick under the battery to loosen the adhesive.
-
Slide the pick along the top left edge of the battery to loosen the adhesive.
-
-
-
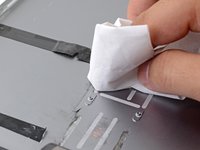
Peel and remove any remaining adhesive strips.
-
Remove all adhesive residue from the iPad frame. Use isopropyl alcohol and a spudger to scrape off any adhesive chunks. Wipe away the adhesive residue with a lint-free cloth.
-
If there's any alcohol solution remaining in the iPad, carefully wipe it off or allow it to air dry.
-
-
-
Peel off the clear plastic liners on your replacement battery to expose the adhesive strips.
-
Align the battery connector with the iPad's battery post and lay the battery in the iPad.
-
Press down on the battery for a minute to stick the battery in place.
Depending on your model: You will need to line up the battery with the metal post and a screw hole. The metal post is located on the inside of the back case where the battery connector rests. The screw hole is located where the keyboard connector is located. Be mindful to maintain the battery alignment as you assembly the iPad since the battery will shift. Confirm that the ribbon connector for the keyboard interface will plug into the battery's connector (a tiny socket) located at the edge of the battery and under the battery tape. You will need to lift the tape. This is model version dependent.
Step 40 above has photographed a representative metal post.
-


To reassemble your device, follow these instructions in reverse order.
For optimal performance, after completing this guide, calibrate your newly installed battery.
Take your e-waste to an R2 or e-Stewards certified recycler.
Repair didn’t go as planned? Try some basic troubleshooting, or ask our Answers community for help.
Отменить: Я не выполнил это руководство.
46 человек успешно провели ремонт по этому руководству.


7 Комментариев
Thanks for instructions!
I changed the battery successfully but while heating in order to remove the screen, 12 small magnets for the Smart Cover came off… any idea how to put them back?
Thanks a lot!
how did you stick the screen back to its original quality?
Thank you for the detailed instructions !
Just done it, thank you for the write-up, it was very helpful! Managed to do it in 3 hours. Not an easy job, but doable.