Перейти к основному содержанию
Присоединяйся к сообществу ремонтников - Создай аккаунт

iPhone 6 Lightning Connector Assembly Replacement

Выберете то, что вам нужно

  1. iPhone 6 Lightning Connector Assembly Replacement, Pentalobe Screws: шаг 1, изображение 1 из 1
    • Before disassembling your iPhone, discharge the battery below 25%. A charged lithium-ion battery can catch fire and/or explode if accidentally punctured.

    • Power off your iPhone before beginning disassembly.

    • Remove the two 3.6 mm-long P2 Pentalobe screws next to the Lightning connector.

    Спросите у FixBot
  2. iPhone 6 Lightning Connector Assembly Replacement, Anti-Clamp instructions: шаг 2, изображение 1 из 3 iPhone 6 Lightning Connector Assembly Replacement, Anti-Clamp instructions: шаг 2, изображение 2 из 3 iPhone 6 Lightning Connector Assembly Replacement, Anti-Clamp instructions: шаг 2, изображение 3 из 3
    Инструмент, используемый на этом этапе:
    Clampy - Anti-Clamp
    $24.95
    • The next two steps demonstrate the Anti-Clamp, a tool we designed to make the opening procedure easier. If you aren't using the Anti-Clamp, skip down three steps for an alternate method.

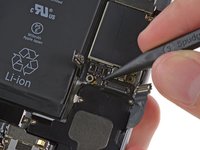
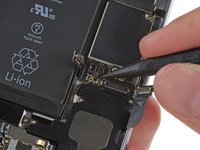
    • For complete instructions on how to use the Anti-Clamp, check out this guide.

    • Pull the blue handle backwards to unlock the Anti-Clamp's arms.

    • Slide the arms over either the left or right edge of your iPhone.

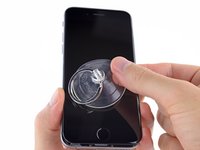
    • Position the suction cups near the bottom edge of the iPhone just above the home button—one on the front, and one on the back.

    • Squeeze the cups together to apply suction to the desired area.

    • If you find that the surface of your iPhone is too slippery for the Anti-Clamp to hold onto, you can use tape to create a grippier surface.

    Спросите у FixBot
  3. iPhone 6 Lightning Connector Assembly Replacement: шаг 3, изображение 1 из 3 iPhone 6 Lightning Connector Assembly Replacement: шаг 3, изображение 2 из 3 iPhone 6 Lightning Connector Assembly Replacement: шаг 3, изображение 3 из 3
    • Pull the blue handle forwards to lock the arms.

    • Turn the handle clockwise 360 degrees or until the cups start to stretch.

    • Make sure the suction cups remain aligned with each other. If they begin to slip out of alignment, loosen the suction cups slightly and realign the arms.

    • Insert an opening pick under the screen when the Anti-Clamp creates a large enough gap.

    • If the Anti-Clamp doesn't create a sufficient gap, rotate the handle a quarter turn.

    • Don't crank more than a quarter turn at a time, and wait a few seconds between turns. Let the Anti-Clamp and time do the work for you.

    • Skip the next three steps.

    Спросите у FixBot
  4. iPhone 6 Lightning Connector Assembly Replacement, Manual Opening Procedure: шаг 4, изображение 1 из 1
    Инструмент, используемый на этом этапе:
    Clampy - Anti-Clamp
    $24.95
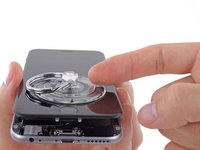
    • If you don't have an Anti-Clamp, use a single suction cup to lift the front panel:

    • Press a suction cup onto the screen, just above the home button.

    • Be sure the cup is pressed securely onto the screen to get a tight seal.

    • If your display is badly cracked, covering it with a layer of clear packing tape may allow the suction cup to adhere. Alternatively, very strong tape may be used instead of the suction cup. If all else fails, you can superglue the suction cup to the broken screen.

    Спросите у FixBot
  5. iPhone 6 Lightning Connector Assembly Replacement: шаг 5, изображение 1 из 1
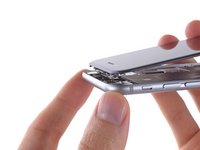
    • While holding the iPhone down with one hand, pull up on the suction cup to slightly separate the front panel assembly from the rear case.

    • Take your time and apply firm, constant force. The display assembly is a much tighter fit than most devices.

    • Using a plastic opening tool, begin to gently pry the rear case down, away from the display assembly, while continuing to pull up with the suction cup.

    • There are several clips holding the front panel assembly to the rear case, so you may need to use a combination of the suction cup and plastic opening tool to free the front panel assembly.

    Спросите у FixBot
  6. iPhone 6 Lightning Connector Assembly Replacement: шаг 6, изображение 1 из 2 iPhone 6 Lightning Connector Assembly Replacement: шаг 6, изображение 2 из 2
    • Pull the plastic nub to release the vacuum seal on the suction cup.

    • Remove the suction cup from the display assembly.

    Спросите у FixBot
  7. iPhone 6 Lightning Connector Assembly Replacement, Opening up the phone: шаг 7, изображение 1 из 3 iPhone 6 Lightning Connector Assembly Replacement, Opening up the phone: шаг 7, изображение 2 из 3 iPhone 6 Lightning Connector Assembly Replacement, Opening up the phone: шаг 7, изображение 3 из 3
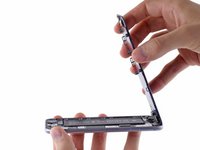
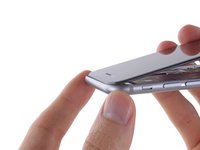
    • Open the iPhone by swinging the home button end of the front panel assembly away from the rear case, using the top of the phone as a hinge.

    • Several clips along the top edge of the front panel form a partial hinge.

    • During reassembly, align the clips just below the top edge of the rear case. Then, slide the front panel upward until its top edge is flush with that of the rear case.

    Спросите у FixBot
  8. iPhone 6 Lightning Connector Assembly Replacement: шаг 8, изображение 1 из 3 iPhone 6 Lightning Connector Assembly Replacement: шаг 8, изображение 2 из 3 iPhone 6 Lightning Connector Assembly Replacement: шаг 8, изображение 3 из 3
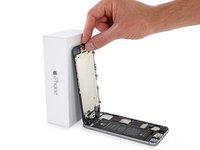
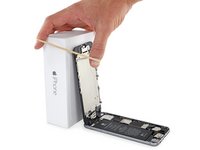
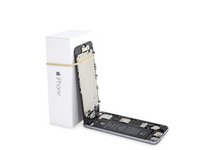
    • Open the display to about a 90º angle, and lean it against something to keep it propped up while you're working on the phone.

    • In a pinch, an unopened canned beverage works well for this.

    • Add a rubber band to keep the display securely in place while you work. This prevents undue strain on the display cables.

    Спросите у FixBot
  9. iPhone 6 Lightning Connector Assembly Replacement, Removing the battery connector bracket screws: шаг 9, изображение 1 из 1
    Инструмент, используемый на этом этапе:
    Magnetic Project Mat
    $19.95
    • Remove the following Phillips screws from the battery connector bracket:

    • One 2.2 mm screw

    • One 3.2 mm screw

    • During your repair, keep track of each screw and make sure it goes back exactly where it came from to avoid damaging your phone.

    Спросите у FixBot
  10. iPhone 6 Lightning Connector Assembly Replacement: шаг 10, изображение 1 из 1
    • Remove the metal battery connector bracket from the iPhone.

    Спросите у FixBot
  11. iPhone 6 Lightning Connector Assembly Replacement, Disconnecting the battery connector: шаг 11, изображение 1 из 1
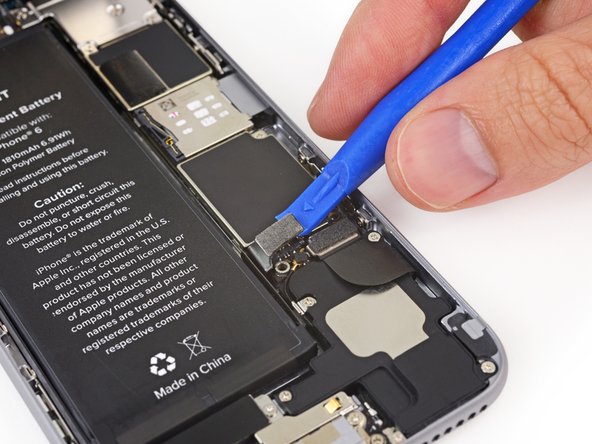
    • Use a plastic opening tool to gently pry the battery connector up from its socket on the logic board.

    • Take care to only pry up on the battery connector, and not the socket on the logic board. If you pry up on the logic board socket, you may break the connector entirely.

    Спросите у FixBot
  12. iPhone 6 Lightning Connector Assembly Replacement, Removing the front panel assembly cable bracket screws: шаг 12, изображение 1 из 1
    • Remove the following five Phillips screws securing the front panel assembly cable bracket:

    • Three 1.2 mm screws

    • One 1.7 mm screw

    • One 3.1 mm screw

    • Incorrect placement of these screws during reassembly will cause permanent damage to your iPhone's logic board.

    Спросите у FixBot
  13. iPhone 6 Lightning Connector Assembly Replacement: шаг 13, изображение 1 из 1
    • Remove the front panel assembly cable bracket from the logic board.

    Спросите у FixBot
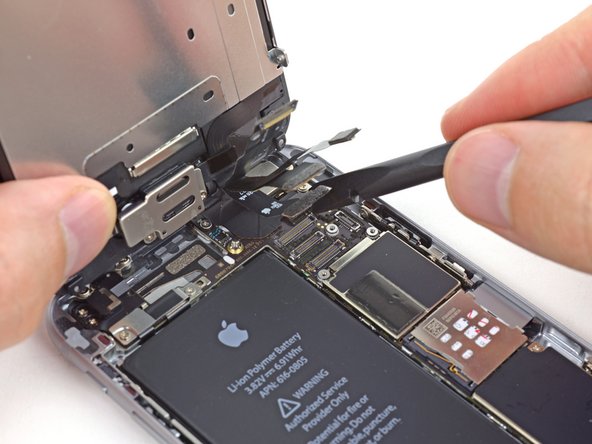
  14. iPhone 6 Lightning Connector Assembly Replacement: шаг 14, изображение 1 из 2 iPhone 6 Lightning Connector Assembly Replacement: шаг 14, изображение 2 из 2
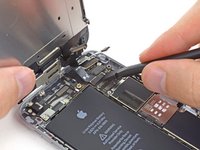
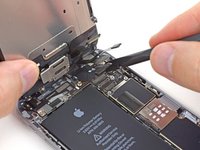
    • In the next four steps, take care to pry up only on the cable connectors, and not on their sockets on the logic board.

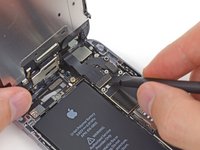
    • Use a spudger or a fingernail to disconnect the front-facing camera and sensor cable connector.

    Спросите у FixBot
  15. iPhone 6 Lightning Connector Assembly Replacement: шаг 15, изображение 1 из 2 iPhone 6 Lightning Connector Assembly Replacement: шаг 15, изображение 2 из 2
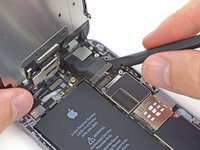
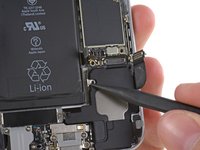
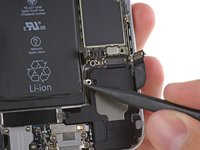
    • Use a spudger or a fingernail to disconnect the home button cable connector.

    Спросите у FixBot
  16. iPhone 6 Lightning Connector Assembly Replacement: шаг 16, изображение 1 из 2 iPhone 6 Lightning Connector Assembly Replacement: шаг 16, изображение 2 из 2
    • Make sure the battery is disconnected before you disconnect or reconnect the cable in this step.

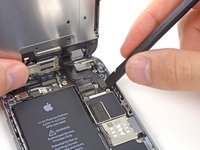
    • Use a spudger or a fingernail to disconnect the display data cable connector.

    • When reassembling your phone, the display data cable may pop off its connector. This can result in white lines or a blank screen when powering your phone back on. If that happens, simply reconnect the cable and power cycle your phone. The best way to power cycle your phone is to disconnect and reconnect the battery connector.

    Спросите у FixBot
  17. iPhone 6 Lightning Connector Assembly Replacement: шаг 17, изображение 1 из 2 iPhone 6 Lightning Connector Assembly Replacement: шаг 17, изображение 2 из 2
    • Use the flat end of a spudger to disconnect the digitizer cable connector.

    • When reconnecting the digitizer cable, do not press the center of the connector. Press one end of the connector, then press the opposite end. Pressing in the center of the connector can bend the component and cause digitizer damage.

    Спросите у FixBot
  18. iPhone 6 Lightning Connector Assembly Replacement, Separating front panel assembly and rear case: шаг 18, изображение 1 из 1
    • Remove the front panel assembly from the rear case.

    Спросите у FixBot
  19. iPhone 6 Lightning Connector Assembly Replacement, Speaker: шаг 19, изображение 1 из 2 iPhone 6 Lightning Connector Assembly Replacement, Speaker: шаг 19, изображение 2 из 2
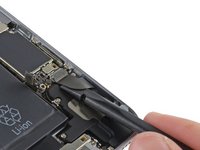
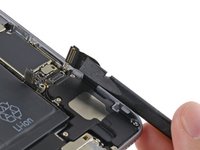
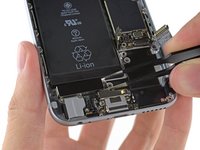
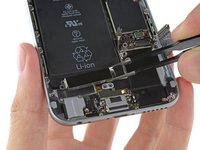
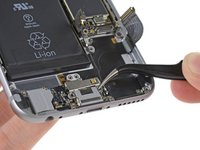
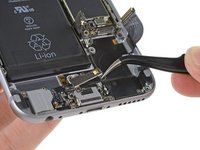
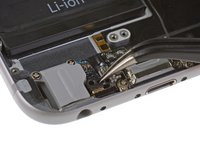
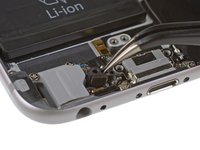
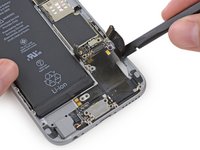
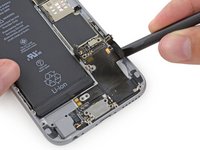
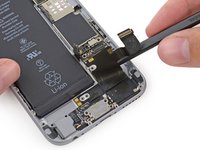
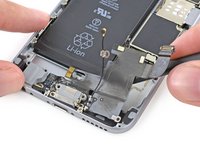
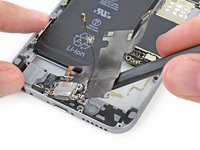
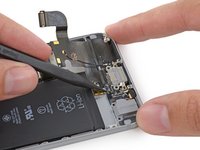
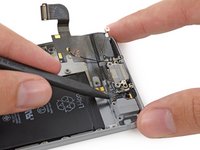
    • Use the flat end of a spudger to disconnect the Lightning connector assembly cable and fold it out of the way of the speaker.

    Спросите у FixBot
  20. iPhone 6 Lightning Connector Assembly Replacement: шаг 20, изображение 1 из 2 iPhone 6 Lightning Connector Assembly Replacement: шаг 20, изображение 2 из 2
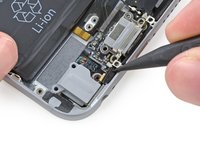
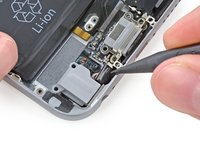
    • Use the point of a spudger to lift the antenna cable connector up off of its socket on the logic board.

    Спросите у FixBot
  21. iPhone 6 Lightning Connector Assembly Replacement: шаг 21, изображение 1 из 1
    • Remove the following four Phillips screws securing the speaker:

    • Two 2.9 mm screws

    • Two 2.3 mm screws

    Спросите у FixBot
  22. iPhone 6 Lightning Connector Assembly Replacement: шаг 22, изображение 1 из 2 iPhone 6 Lightning Connector Assembly Replacement: шаг 22, изображение 2 из 2
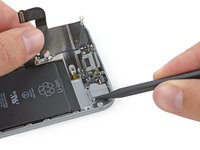
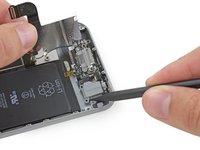
    • Use the point of a spudger to push the antenna interconnect cable clip off of the speaker housing.

    Спросите у FixBot
  23. iPhone 6 Lightning Connector Assembly Replacement: шаг 23, изображение 1 из 3 iPhone 6 Lightning Connector Assembly Replacement: шаг 23, изображение 2 из 3 iPhone 6 Lightning Connector Assembly Replacement: шаг 23, изображение 3 из 3
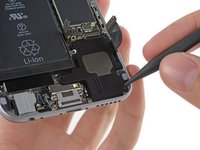
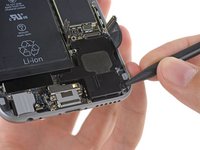
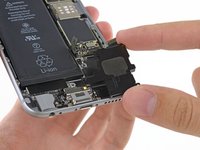
    • Use the tip of a spudger to pry the speaker up and out of the rear case.

    • Remove the speaker from the iPhone.

    Спросите у FixBot
  24. iPhone 6 Lightning Connector Assembly Replacement, Lightning Connector Assembly: шаг 24, изображение 1 из 1
    • Remove the two 1.6 mm Phillips #00 screws securing the vibrator to the rear case.

    Спросите у FixBot
  25. iPhone 6 Lightning Connector Assembly Replacement: шаг 25, изображение 1 из 2 iPhone 6 Lightning Connector Assembly Replacement: шаг 25, изображение 2 из 2
    • Remove the vibrator from the iPhone.

    Спросите у FixBot
  26. iPhone 6 Lightning Connector Assembly Replacement: шаг 26, изображение 1 из 1
    • Remove the two 3.1 mm Phillips #00 screws securing the Lightning port retaining bracket.

    Спросите у FixBot
  27. iPhone 6 Lightning Connector Assembly Replacement: шаг 27, изображение 1 из 2 iPhone 6 Lightning Connector Assembly Replacement: шаг 27, изображение 2 из 2
    • Remove the Lightning port retaining bracket.

    Спросите у FixBot
  28. iPhone 6 Lightning Connector Assembly Replacement: шаг 28, изображение 1 из 1
    • Remove the single 3.6 mm Phillips #00 shoulder screw from the microphone brace.

    Спросите у FixBot
  29. iPhone 6 Lightning Connector Assembly Replacement: шаг 29, изображение 1 из 2 iPhone 6 Lightning Connector Assembly Replacement: шаг 29, изображение 2 из 2
    • Remove the microphone brace from the iPhone.

    Спросите у FixBot
  30. iPhone 6 Lightning Connector Assembly Replacement: шаг 30, изображение 1 из 1
    • Remove the six remaining Phillips #00 screws from the Lightning connector assembly:

    • Two 3.1 mm shoulder screws

    • Two 1.7 mm screws

    • Two 1.5 mm screws

    Спросите у FixBot
  31. iPhone 6 Lightning Connector Assembly Replacement: шаг 31, изображение 1 из 3 iPhone 6 Lightning Connector Assembly Replacement: шаг 31, изображение 2 из 3 iPhone 6 Lightning Connector Assembly Replacement: шаг 31, изображение 3 из 3
    • Use the flat end of a spudger to begin peeling the Lightning connector assembly up from the rear case.

    Спросите у FixBot
  32. iPhone 6 Lightning Connector Assembly Replacement: шаг 32, изображение 1 из 2 iPhone 6 Lightning Connector Assembly Replacement: шаг 32, изображение 2 из 2
    • Carefully pull the Lightning connector assembly up slightly to free it from the vibrator and speaker screw posts.

    Спросите у FixBot
  33. iPhone 6 Lightning Connector Assembly Replacement: шаг 33, изображение 1 из 2 iPhone 6 Lightning Connector Assembly Replacement: шаг 33, изображение 2 из 2
    • Use the flat end of a spudger to lift under the Lightning connector portion of the assembly to free more adhesive.

    Спросите у FixBot
  34. iPhone 6 Lightning Connector Assembly Replacement: шаг 34, изображение 1 из 2 iPhone 6 Lightning Connector Assembly Replacement: шаг 34, изображение 2 из 2
    • Use the point of a spudger to push the microphone portion of the Lightning connector assembly out of its recess in the rear case.

    Спросите у FixBot
  35. iPhone 6 Lightning Connector Assembly Replacement: шаг 35, изображение 1 из 2 iPhone 6 Lightning Connector Assembly Replacement: шаг 35, изображение 2 из 2
    • Gently run the point of a spudger under the assembly between the Lightning connector and the headphone jack to free it from the last of the adhesive.

    Спросите у FixBot
  36. iPhone 6 Lightning Connector Assembly Replacement: шаг 36, изображение 1 из 3 iPhone 6 Lightning Connector Assembly Replacement: шаг 36, изображение 2 из 3 iPhone 6 Lightning Connector Assembly Replacement: шаг 36, изображение 3 из 3
    • Use the tip of a spudger to help guide the headphone jack out of its recess in the rear case.

    • Remove the Lightning connector assembly from the iPhone.

    • Before installing or replacing the Lightning connector assembly:

    • Use a plastic tool to scour any bits of adhesive residue from the rear case behind the cable.

    • Carefully compare your replacement part to your original cable and make sure they match. Your replacement Lightning connector assembly may be missing certain components that need to be transferred from the original.

    • Components that commonly need to be transferred include the headphone jack gasket, microphone bracket, and antenna interconnect clip.

    Спросите у FixBot
Заключение

To reassemble your device, follow these instructions in reverse order.

759 человек успешно провели ремонт по этому руководству.

Прикрепленные документы

Sam Goldheart

Участник с: 10/18/12

477 284 Репутация

Автор 538 руководств

Команда

iFixit Участник iFixit

Staff

123 членов

Автор 25 720 руководств

135 Комментарии к руководству

It isn't necessary to remove the screen as long as you can support it properly while doing the rest of the work. In my experience, unnecessarily removing screens can do more harm than good and causes extra work for yourself

phonesurgeon - Ответить Поделиться
I was trying to find exactly this message. Thanks!

Emilio Zaidman - Ответить Поделиться

I agree with this comment. If you can support it, don’t disconnect the screen connectors. I took the screen off and had two vertical white lines on my display when I was finished. I had to re-seat the connector multiple times to get the problem to go away. It’s working great now.

deshave - Ответить Поделиться

Just completed this in about an hour. Follow the steps slowly and closely, then power cycle your device at the end. BAM you're done before you know!

djhergs - Ответить Поделиться

I changed the charge port on an iphone 6. Apple diagnose the charge port not working to the owner of this iPhone. Now that its changed the phone still wont turn on. It doesnt even show the battery icon that it needs to be charged. What is a most likely scenario for this? Is it a bad LCD? A bad Battery? Someone help me.

Jose Lopez - Ответить Поделиться

Добавить комментарий

Статистика просмотров:

За последние 24 часов: 15

За последние 7 дней: 57

За последние 30 дней: 339

За всё время: 601,044