Введение
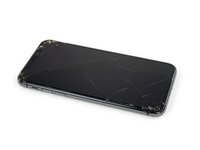
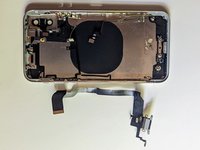
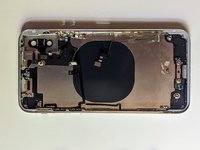
Use this guide to remove all components from the rear case of your iPhone X. This guide will show you how to remove speaker, cables, taptic engine, battery, logic board, and button covers so you can replace a cracked, dented, or bent cover.
Just so you're forewarned; this is the most difficult repair possible on an iPhone X that doesn't involve microsoldering.
Выберете то, что вам нужно
-
-
-
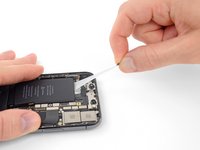
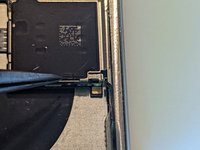
Insert a SIM card eject tool or a paperclip into the small hole in the SIM card tray, located near the side button on the edge of the iPhone.
-
Press firmly to eject the tray.
 Спросите у FixBot
-
-
-
-
-
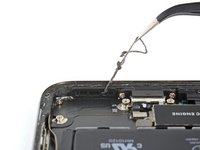
Power off your iPhone before beginning disassembly.
-
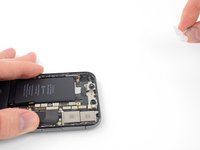
Remove the two 6.9 mm-long pentalobe screws at the bottom edge of the iPhone.
-
-
-
-
-
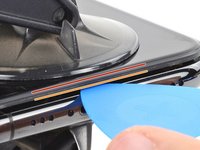
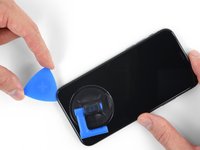
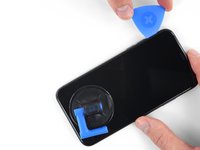
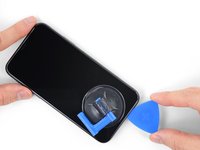
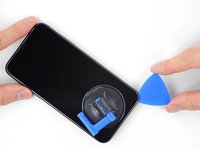
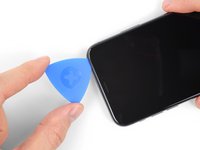
Measure 3 mm from the tip and mark the opening pick with a permanent marker.
-
-
-
-
-
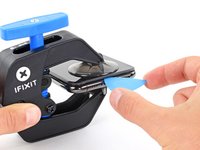
Lay overlapping strips of clear packing tape over the iPhone's screen until the whole face is covered.
-
If you can't get the suction cup to stick in the next few steps, fold a strong piece of tape (such as duct tape) into a handle and lift the screen with that instead.
-
-
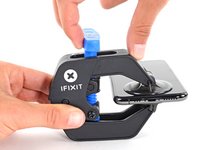
Инструмент, используемый на этом этапе:Clampy - Anti-Clamp$24.95
-
Pull the blue handle backwards to unlock the Anti-Clamp's arms.
-
Slide the arms over either the left or right edge of your iPhone.
-
Position the suction cups near the bottom edge of the iPhone—one on the front, and one on the back.
-
Squeeze the cups together to apply suction to the desired area.
-
-
-
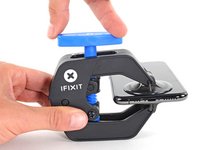
Pull the blue handle forward to lock the arms.
-
Turn the handle clockwise 360 degrees or until the cups start to stretch.
-
Make sure the suction cups remain aligned with each other. If they begin to slip out of alignment, loosen the suction cups slightly and realign the arms.
-
-
-
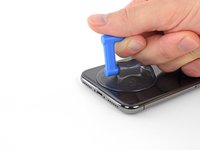
Heat an iOpener and thread it through the arms of the Anti-Clamp.
-
Fold the iOpener so it lays on the bottom edge of the iPhone.
-
Wait one minute to give the adhesive a chance to release and present an opening gap.
-
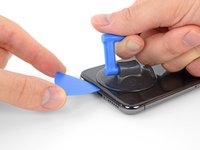
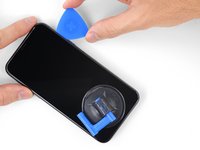
Insert an opening pick under the screen and the plastic bezel, not the screen itself.
-
Skip the next three steps.
-
-
-
Use a hairdryer or heat gun or prepare an iOpener and apply it to the lower edge of the iPhone for about a minute in order to soften up the adhesive underneath.
-
-
-
If using a single suction handle, apply it to the bottom edge of the phone, while avoiding the curved portion of the glass.
-
-
-
Pull up on the suction cup with firm, constant pressure to create a slight gap between the screen and the frame.
-
Insert an opening pick into the gap under the screen's plastic bezel, not the screen itself.
-
-
-
Slide the opening pick around the lower left corner and up the left edge of the iPhone, slicing through the adhesive holding the display in place.
-
-
-
Re-insert your pick at the bottom edge of the iPhone, and slide it up the right side to continue separating the adhesive.
-
-
-
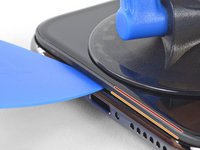
Slide the opening pick around the top corner of the display, while gently pulling or wiggling the display down in the direction of the Lightning port.
-
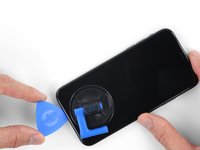
Slide the pick to the opposite corner and cut any remaining adhesive securing the display.
-
-
-
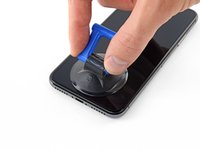
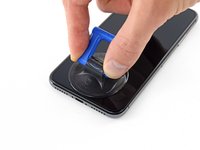
Pull on the small nub on the suction cup to remove it from the front panel.
-
-
-
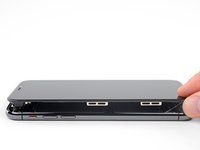
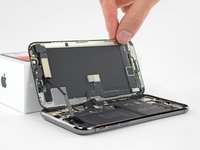
Open the iPhone by swinging the display up from the left side, like the back cover of a book.
-
Lean the display against something to keep it propped up while you're working on the phone.
-
-
-
-
Инструмент, используемый на этом этапе:Magnetic Project Mat$19.95
-
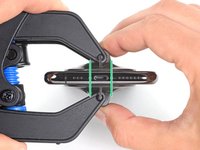
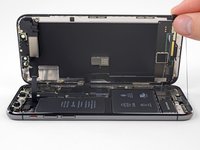
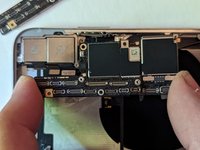
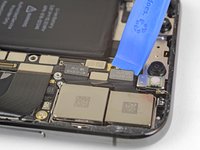
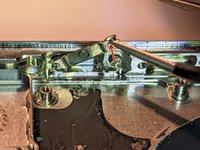
Remove five Y000 screws securing the logic board connector bracket, of the following lengths:
-
Three 1.1 mm screws
-
One 3.1 mm screw
-
One 3.7 mm screw
-
-
-
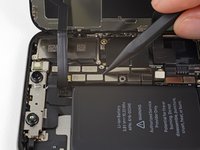
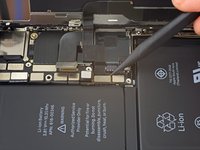
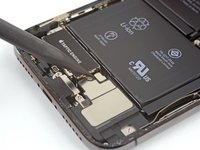
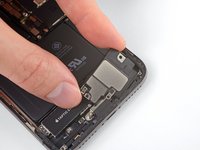
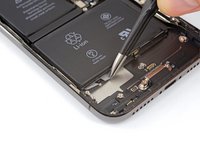
Use the point of a spudger or a clean fingernail to pry the battery connector up from its socket on the logic board.
-
Bend the connector slightly away from the logic board to prevent it from accidentally making contact with the socket and providing power to the phone during your repair.
-
-
-
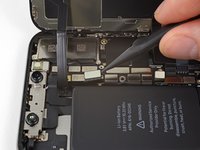
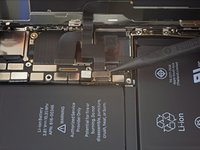
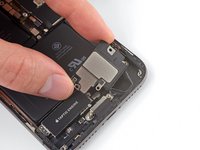
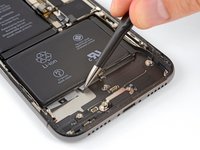
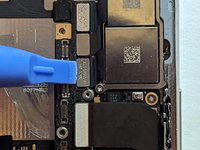
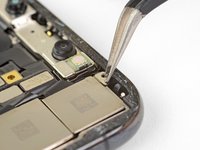
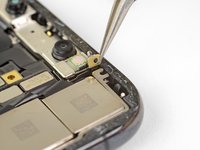
Use the point of a spudger or a fingernail to disconnect the front panel sensor assembly connector.
-
-
-
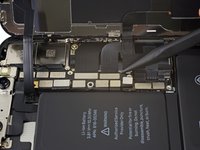
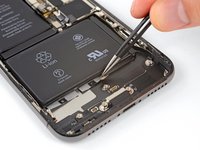
Use the point of a spudger or a fingernail to disconnect the OLED panel cable connector.
-
-
-
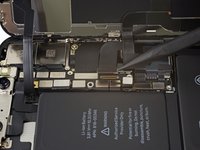
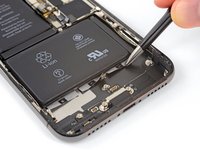
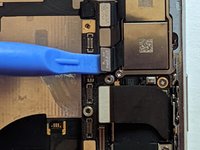
Use the point of a spudger to pry the digitizer cable connector up from its socket.
-
-
-
-
-
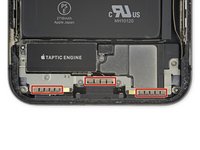
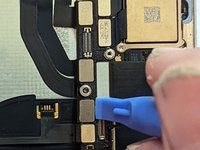
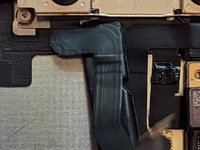
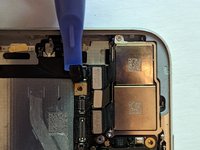
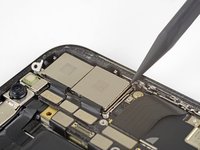
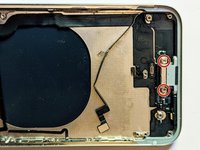
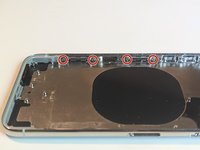
Remove the seven screws securing the bracket below the Taptic Engine and speaker:
-
Two Y000 1.9 mm screws
-
One Y000 1.2 mm screw
-
One Y000 1.6 mm screw
-
One Phillips 2.4 mm screw
-
One Phillips 1.7 mm screw
-
One Phillips 1.5 mm screw
-
-
-
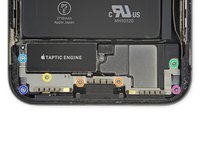
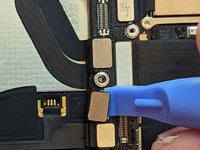
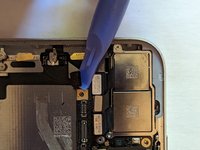
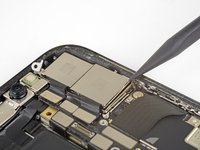
Lift the bracket from the edge nearest the battery. Don't try to remove it fully, as it's still connected via a small flex cable.
-
-
-
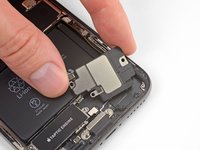
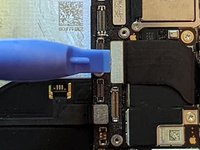
While holding the bracket out of the way, use the point of a spudger to pry up and disconnect the flex cable underneath.
-
-
-
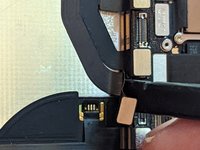
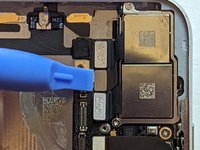
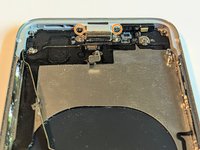
Remove the 2.1 mm Y000 screw securing the speaker connector cover.
-
-
-
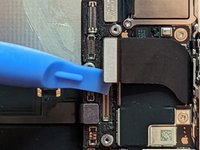
Use the tip of a spudger to pry up and disconnect the speaker connector.
-
-
-
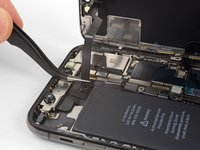
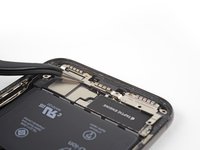
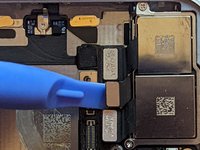
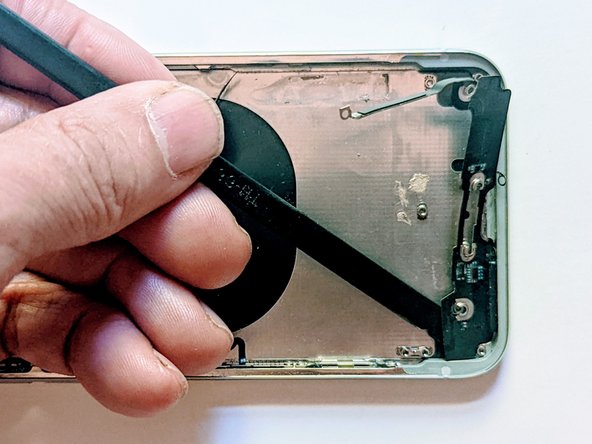
Insert a spudger under the top edge of the speaker near the edge of the iPhone's case.
-
Gently pry up and lift the top edge of the speaker.
-
-
-
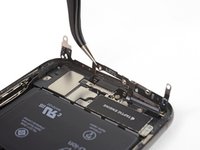
Hold the speaker by its side edges and rock it side-to-side, separating the adhesive securing it to the bottom edge of the iPhone.
-
Pull the speaker away from the bottom edge of the iPhone until the adhesive gasket separates.
-
-
-
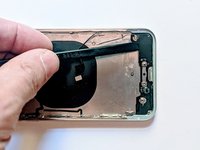
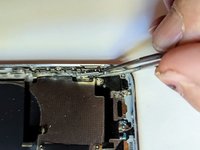
Use tweezers to peel off and remove all the old gasket from the frame and speaker.
-
Use a microfiber cloth and isopropyl alcohol to clean all the gasket's adhesive residue from the frame and speaker.
-
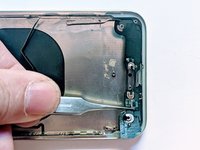
Before installing the speaker gasket, find its proper orientation on the bottom of the speaker—the large cutout on the gasket should go around the speaker grille mesh.
-
Remove the larger, clear liner from the gasket and use tweezers to carefully put the gasket into place on the bottom of the speaker.
-
Use your fingers or a spudger to firmly press the gasket into place to secure it with the adhesive.
-
Remove the remaining liner and put the speaker into place, making sure the speaker connector doesn't get stuck underneath.
-
-
-
-
-
-
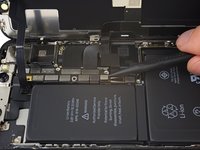
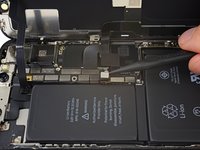
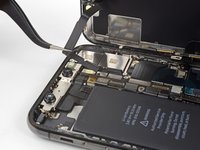
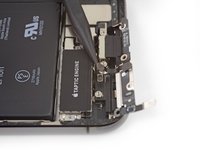
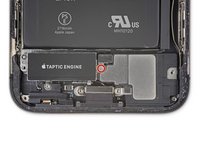
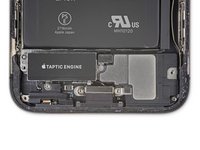
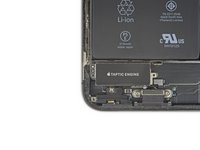
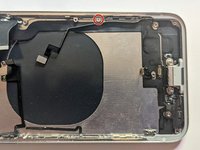
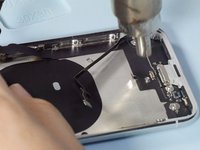
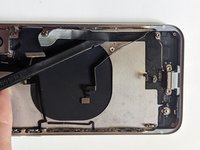
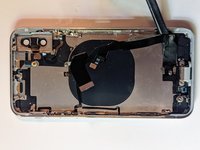
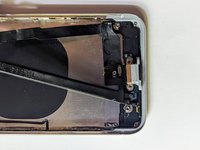
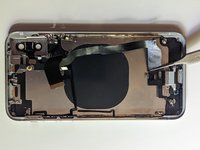
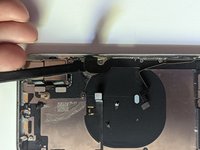
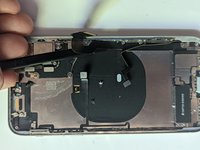
Remove the 2.3 mm Phillips screw securing the Taptic Engine.
-
-
-
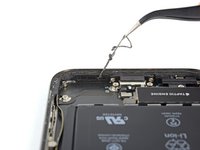
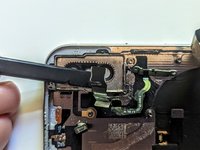
Use a spudger to disconnect the Taptic Engine flex cable by prying it straight up from its socket.
-
-
-
-
-
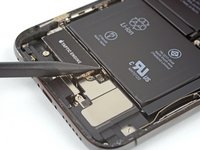
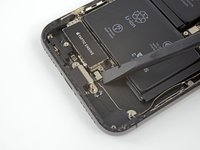
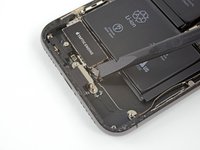
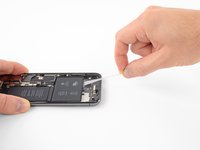
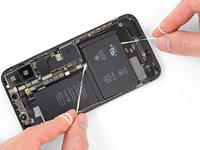
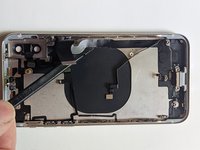
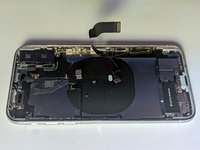
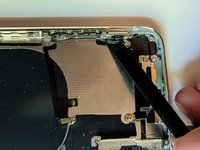
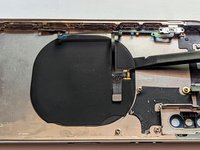
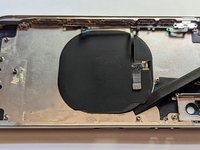
Each piece of adhesive has a black pull-tab at the end, which is lightly adhered to the side edge of the battery.
-
-
-
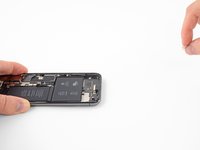
Separate the first battery adhesive tab from the bottom edge of the battery.
-
-
-
Repeat the above step to separate the remaining two adhesive tabs from the bottom edge of the battery.
-
-
-
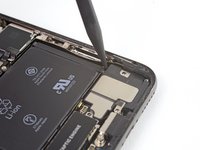
To increase your odds of success:
-
Don't press down on the battery. Hold the iPhone firmly by its sides.
-
Keep the strips flat and unwrinkled as you pull.
-
Pull very slowly, giving the strip time to stretch and separate. It takes around 15-30 seconds of stretching to remove each strip.
-
Pull at a low angle so the strip doesn't snag along the bottom edge of the battery.
-
If a strip does break off underneath the battery and cannot be retrieved, move on to the other strips and then continue with the additional steps below.
-
-
Инструмент, используемый на этом этапе:Tweezers$4.99
-
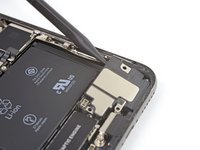
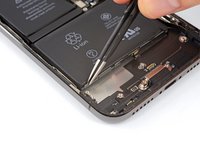
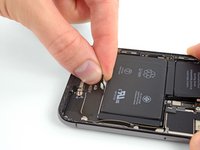
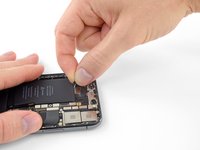
Grab one of the outer battery adhesive tabs and slowly pull it away from the battery, toward the bottom of the iPhone.
-
Pull steadily, maintaining constant tension on the strip until it slips out from between the battery and the rear case.
-
-
-
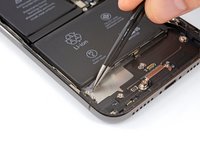
Repeat the previous step to remove the strip on the opposite side, leaving the center strip for last.
-
-
-
Remove the center strip, being careful not to snag it on the speaker flex cable.
-
-
-
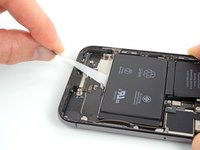
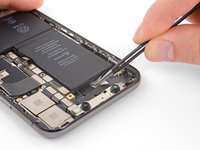
Peel and separate the pull tab on the final adhesive strip, on the top edge of the upper battery cell.
-
-
-
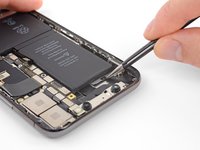
Pull and remove the final adhesive strip.
-
If you removed all four adhesive strips successfully, skip the next step.
-
Wait about one minute for the alcohol solution to weaken the adhesive. Use the flat end of a spudger to gently lift the battery.
-
-
-
If any of the adhesive strips broke off and the battery remains stuck to the rear case, prepare an iOpener or use a hair dryer to heat the rear case directly behind the battery.
-
Flip the iPhone back over and thread a strong piece of string (such as dental floss or a length of thin guitar string) underneath the battery.
-
Wrap the ends of the string around a cloth (or wear gloves) to protect your fingers.
-
Pull the string from side to side in a sawing motion all along the length of the battery to separate the adhesive. This can take some time since the adhesive is slow to deform, but with patience it will come free. Do not deform or damage the battery.
-
-
-
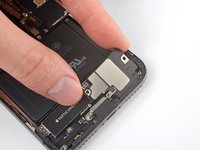
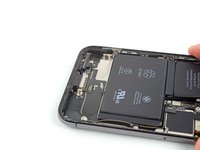
Grasp the battery from the bottom edge and remove it from the iPhone.
-
Adhere the battery, disconnect it, and continue reassembling your device.
-
-
-
-
-
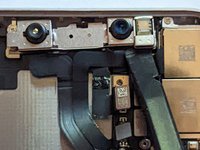
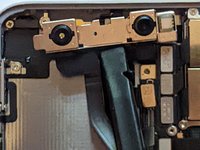
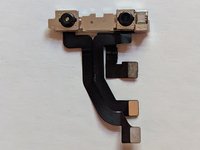
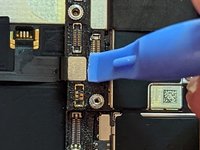
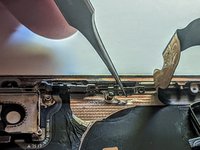
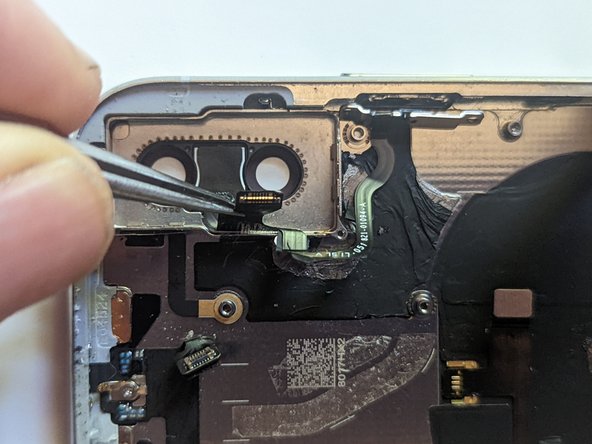
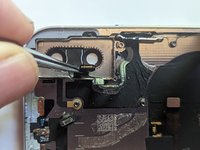
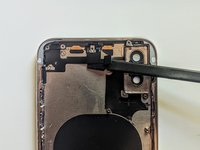
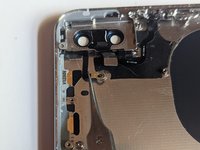
Using the flat end of a spudger, disconnect the three front camera assembly cables:
-
The dot projector.
-
The front camera.
-
The infrared camera.
-
-
-
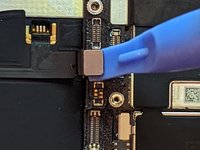
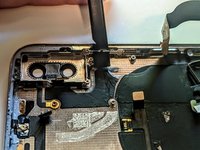
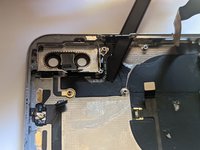
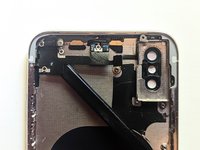
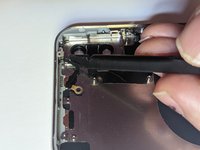
Using the tip of a spudger, start at the connector and slide the spudger between the IR camera cable and the case to separate the cable from the case.
-
Repeat for the front camera cable.
-
-
-
Apply heat to loosen the adhesive on the front camera assembly.
-
-
-
-
-
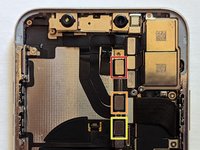
Disconnect the following cable connectors.
-
The WiFi Antenna connector.
-
The Wide-Angle Camera connector.
-
The Power Button / Flash / Microphone connector.
-
The Telephoto Camera connector.
-
The Dock Flex connector.
-
The Button / Wireless Charging connector.
-
The Cellular Antenna connector.
-
-
-
Disconnect the WiFi Antenna cable connector.
-
-
-
Disconnect the Wide-Angle Camera cable connector.
-
-
-
Disconnect the Power Button / Flash / Microphone cable connector.
-
-
-
Disconnect the Telephoto Camera cable connector.
-
-
-
Disconnect the Dock Flex cable connector.
-
Bend the cable 90 degrees straight up to allow clearance to remove the logic board.
-
-
-
Disconnect the Button / Wireless Charging cable connector.
-
-
-
Disconnect the Cellular Antenna cable connector.
-
Bend the cable out of the way.
-
-
-
Remove the two Phillips mounting screws.
-
One 2.7 mm Phillips screw.
-
One 2.1 mm Phillips screw.
-
Remove the 2.0 mm Phillips grounding screw.
-
Remove the grounding tab.
-
-
-
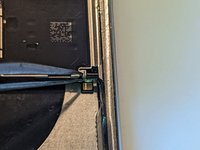
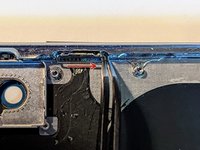
When the SIM card is ejected, a pin slides out from the frame and pushes on the eject lever in the SIM card carrier. The pin needs to be pushed back into the frame so it will not block the removal of the logic board.
-
-
Инструмент, используемый на этом этапе:Tweezers$4.99
-
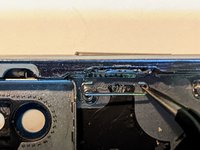
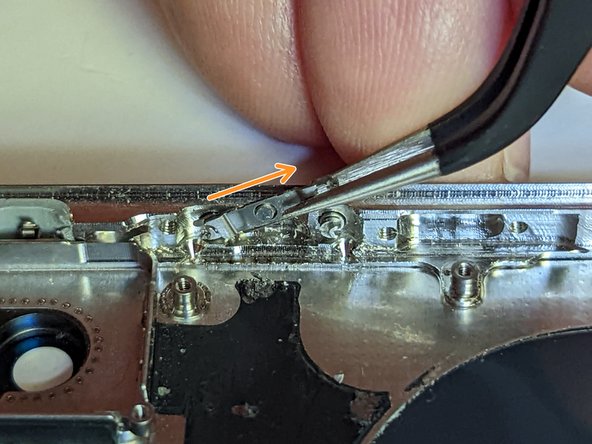
Use a pair of fine tip tweezers to slide the SIM card eject lever toward the side of the case.
-
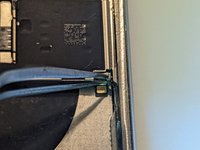
The eject lever should look like this when you're done. The pin will no longer block the removal of the logic board.
-
-
-
The logic board assembly is mounted on two posts going through the lower board and are secured to the upper board. In order to remove it, you must lift it evenly straight up to clear the stand-offs.
-
-
-
-
-
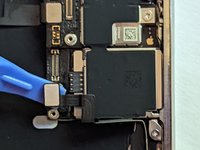
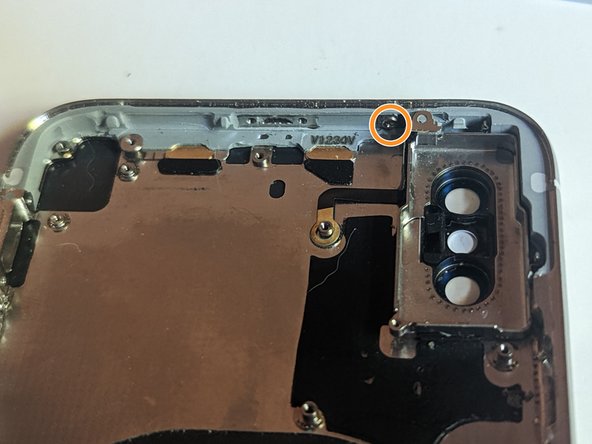
Remove two Phillips screws securing the camera bracket, of the following lengths:
-
One 2.3 mm screw
-
One 2.0 mm screw
-
-
Инструмент, используемый на этом этапе:Tweezers$4.99
-
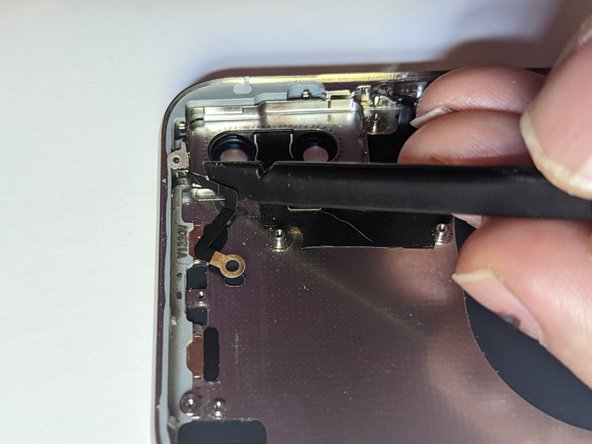
Use tweezers to gently fold the small metal grounding bracket out of the way. Do not pull up on it as it is connected to a fragile flex cable.
-
-
-
Lift the camera bracket from the edge closest to the battery, and remove it.
-
-
-
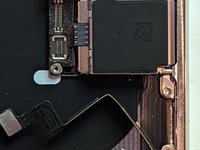
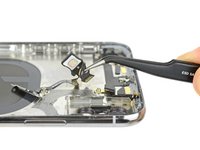
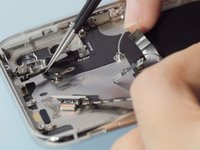
Use an opening tool or fingernail to disconnect the two camera connectors by prying them straight up from their sockets.
-
-
-
Press the point of a spudger against a small notch on the bottom right corner of the camera module.
-
Gently pry up to lever the camera out of the iPhone.
-
-
-
-
-
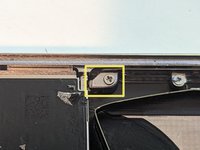
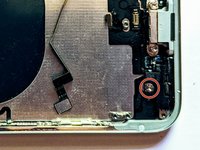
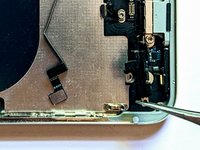
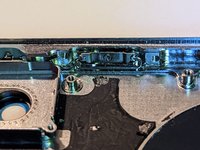
Remove the 1.2 mm Y000 screw securing the cellular antenna cable to the screen retainer.
-
Bend the antenna cable away from the side of the case to allow access to the screws securing the retainer to the side of the case.
-
-
-
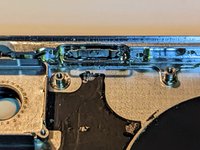
Remove the three 1.5 mm Phillips screws holding the screen retainer.
-
Remove the retainer.
-
-
-
-
Инструмент, используемый на этом этапе:Standoff Screwdriver for iPhones$5.49
-
Remove the 2.3 mm stand-off screw holding the barometric vent.
-
Remove the barometric vent.
-
-
-
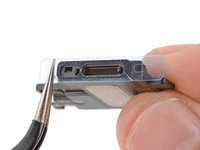
Remove two 2.6 mm stand-off screws securing the Lightning connector to the back of the case.
-
Remove two 2.9 mm Phillips screws holding the charging port to the bottom of the case.
-
-
-
To soften the adhesive holding the flex cable to the case, heat it with a hot air gun or a hair dryer, or heat the back of the case with an iOpener.
-
Peel up the dock connector cable with a spudger.
-
-
-
-
-
To soften the adhesive holding the flex cable to the case, heat it with a hot air gun or a hair dryer, or heat the back of the case with an iOpener.
-
-
-
-
-
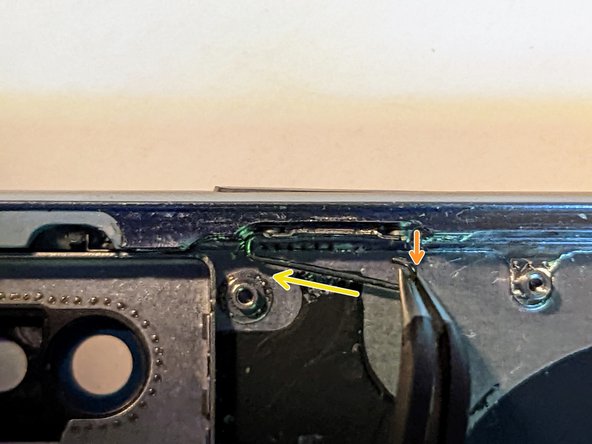
Peel up the end of the dock connector to clear access to the power button and screen retainer.
-
Bend the dock connector up and out of the way.
-
-
-
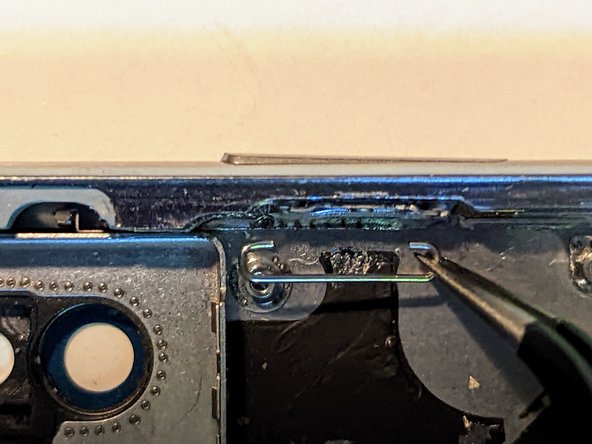
Remove the two screws holding the screen retaining clip.
-
One 2.1 mm Phillips screw.
-
One 1.9 mm Phillips screw.
-
Remove the screen retainer.
-
-
-
-
-
Remove the remaining 2.0 mm Phillips screw securing the power button.
-
-
-
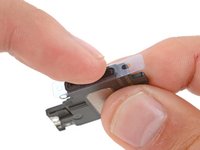
With a spudger, pry out the flash and microphone.
-
Remove the assembly.
-
-
-
-
-
Remove the 1.4 mm Phillips screw holding the grounding tab.
-
Remove the grounding tab.
-
-
-
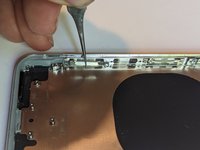
Remove the six screws securing the buttons.
-
Two 1.5 mm Phillips.
-
Two 1.9 mm Phillips.
-
One 2.4 mm Phillips.
-
One 1.7 mm Phillips.
-
-
-
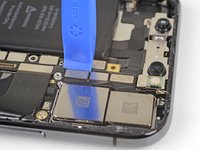
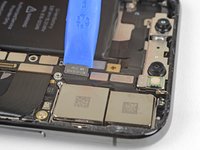
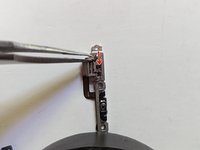
Disengage the ring/silent switch from the side of the case.
-
Use a spudger to peel the flex cable from the bottom of the case.
-
-
Инструмент, используемый на этом этапе:Tweezers$4.99
-
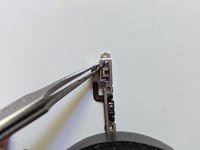
Peel off the button cable.
-
Hold on to the cable with tweezers while lifting and sliding the spudger between the cable and the case.
-
-
-
-
-
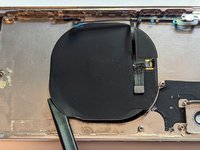
Peel off the wireless charging coil.
-
-
-
-
-
Remove the 1.4 mm Phillips screw holding the first grounding tab.
-
Remove the grounding tab.
-
-
-
Remove two 1.1 mm Y000 screws.
-
Remove the two grounding tabs.
-
-
-
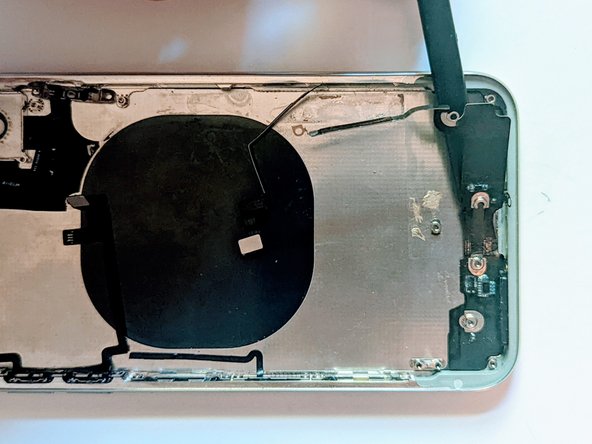
Heat the back of the case with an iOpener, or the WiFi antenna with a hot air gun or hair dryer.
-
Peel the WiFi antenna from the case with a spudger.
-
-
-
-
-
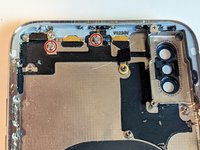
Remove the 2.3 mm Phillips screw securing the antenna to the rear camera frame.
-
Remove the 1.5 mm Phillips screw securing the antenna to the case.
-
-
-
Lift the end of the cable off the post on the back of the case.
-
Peel the cable from the rear camera housing with a spudger.
-
Remove the bluetooth antenna.
-
-
-
-
-
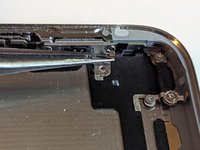
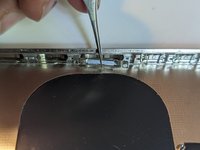
Remove the four 1.5 mm Phillips screws holding the two left side screen retainer clips.
-
Remove the two retainers.
-
-
-
-
Инструмент, используемый на этом этапе:Tweezers$4.99
-
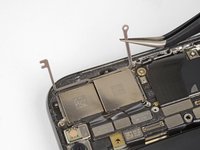
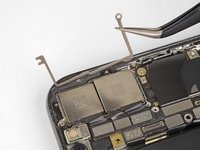
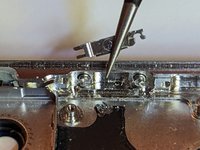
Flip the switch to the left.
-
Grasp the upper arm of the switch with fine tip tweezers and slide it down to clear the retainer.
-
Lift the end up and slide it out from the other side.
-
-
-
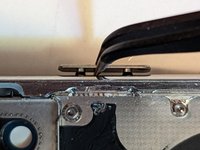
Flip the spring clip up 90 degrees.
-
-
-
Grasp one end of the spring clip with a pair of tweezers.
-
Firmly pull on the end of the clip until it is free of the button.
-
Swing the clip out slightly from the button.
-
Slide the clip back the opposite direction to free the other end.
-
Remove the spring clip.
-
Repeat for the volume up and down buttons.
-
-
-
Pry the right side of the retainer up about 20 degrees.
-
Pull the retainer straight out away from the button.
-
Rinse and repeat.
-
-
-
If you can't get hold of the button from the outside of the case, push the pins out from the inside.
-
Remove the button.
-
Repeat for the remaining buttons.
-
-
-
-
-
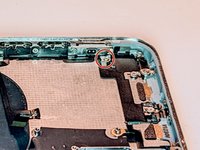
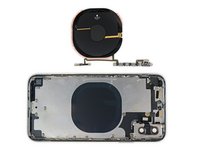
The case has been stripped completely of all parts. You can now replace them into a new case.
-
-


To reassemble your device, follow these instructions in reverse order.
Отменить: Я не выполнил это руководство.
13 человек успешно провели ремонт по этому руководству.

1 Комментарий к руководству
I was able to get through the guide in both directions, but there are a few ways that the steps are pictured or worded that made reassembly confusing. I am still new to this as this is my first repair (I can't believe I started with such a challenging one!) so I am not sure what I am allowed to edit for the pictures and guide step text, so for now I have started by just leaving some comments on what did not make sense to me.