
iPod Nano 7th Generation Volume Rocker Replacement

Введение
Перейти к шагу 1Use this guide to replace the external volume rocker on your iPod. The volume control buttons are soldered to the logic board, this guide will only show you how to replace the button cover, not the mechanical buttons.
Выберете то, что вам нужно
Инструменты


Показать больше…
-
-
Heat the iOpener for thirty seconds.
-
Throughout the repair procedure, as the iOpener cools, reheat it in the microwave for an additional thirty seconds at a time.
-
-
-
Remove the iOpener from the microwave, holding it by one of the two flat ends to avoid the hot center.
-
-
-
Fill a pot or pan with enough water to fully submerge an iOpener.
-
Heat the water to a boil. Turn off the heat.
-
Place an iOpener into the hot water for 2-3 minutes. Make sure the iOpener is fully submerged in the water.
-
Use tongs to extract the heated iOpener from the hot water.
-
Thoroughly dry the iOpener with a towel.
-
Your iOpener is ready for use! If you need to reheat the iOpener, heat the water to a boil, turn off the heat, and place the iOpener in the water for 2-3 minutes.
-
-
-
Lay the iOpener over the plastic tab to loosen the adhesive. Let the bag sit on the device for approximately 90 seconds before attempting to open the panel.
-
-
-
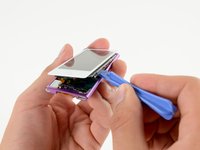
Use a plastic opening tool to pull the rear plastic cover away from the device until there is enough room to insert a spudger.
-
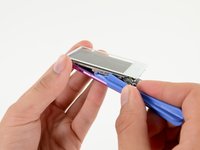
Insert a spudger under the cover, then pry it up and away from the device.
-
Remove the rear plastic cover from the iPod.
-
-
-
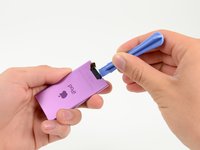
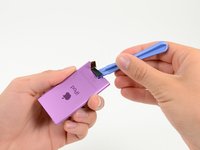
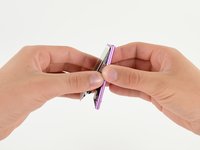
Insert a plastic opening tool into the seam between the white plastic front panel and the rear case.
-
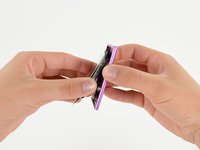
Slide the opening tool along the edge of the front panel to free it from clips and adhesive.
-
-
-
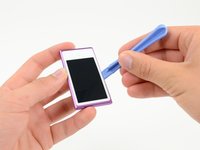
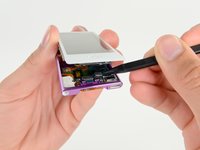
Use a metal spudger to carefully pry near the Lightning connector and under all parts of the front panel assembly: the front glass/digitizer, the LCD display and the metal midframe.
-
-
-
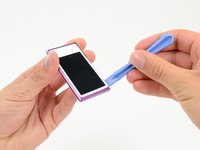
Continue prying along the edges under the front panel assembly, releasing the clips and adhesive along the sides of the device.
-
-
-
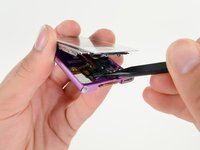
Use a spudger to release the digitizer cable and display data cable connectors.
-
-
-
Remove the two 1.4 mm Phillips #000 screws from the sleep/power button bracket.
-
-
Инструмент, используемый на этом этапе:Tweezers$4.99
-
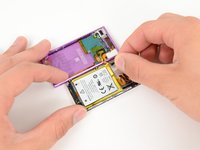
Remove the bracket with a pair of tweezers.
-
-
-
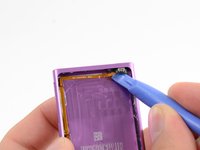
Insert a plastic opening tool under the sleep button, and gently pry upwards to free it from its adhesive.
-
Slide the plastic opening tool along the underside of the sleep button ribbon cable.
-
-
-
Remove the three 1.4 mm Phillips #000 screws securing the volume control button assembly to the rear case.
-
-
-
Use the pointed end of a spudger to pry the volume control button assembly away from the edge of the case.
-
-
-
Using a spudger, gently push the volume rocker into the device from the outside.
-


To reassemble your device, follow these instructions in reverse order.
To reassemble your device, follow these instructions in reverse order.
Отменить: Я не выполнил это руководство.
4 человек успешно провели ремонт по этому руководству.

