Перейти к основному содержанию
/
Мой рабочий стол для верстки руководств

Получите быстрый доступ к руководствам, запчастям и ответам касательно ваших устройств

Reemplazo del panel frontal del iPad Air Wi-Fi

Примечание: Вы редактируете необходимое руководство. Любые внесённые вами изменения влияют на все 76 руководства, которые включают этот шаг.

Английский
Испанский
Шаг 23
iPad Air Wi-Fi Front Panel Replacement: шаг 0, изображение 1 из 3 iPad Air Wi-Fi Front Panel Replacement: шаг 0, изображение 2 из 3 iPad Air Wi-Fi Front Panel Replacement: шаг 0, изображение 3 из 3
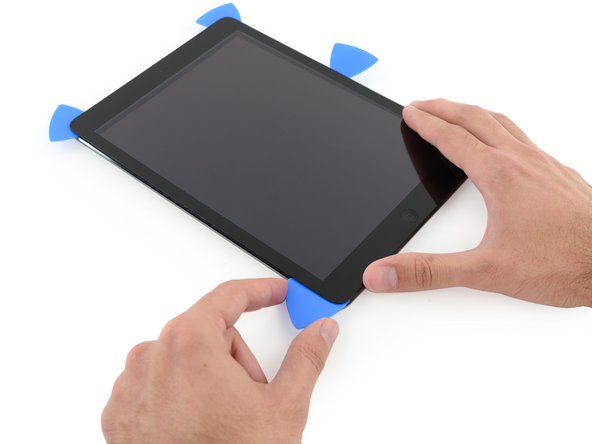
  • Slide the lower left pick to the lower left corner to cut the adhesive on that corner.

  • Leave the pick at the corner. Do not pry any farther, and do not remove the pick from the iPad.

  • The third image shows the two antennas and the home button cavity in the lower case of the iPad.

  • The following steps will direct you where to pry to avoid damage to these components. Only apply heat and pry where directed.

Desliza la púa inferior izquierda hacia la esquina inferior izquierda para cortar el adhesivo en esa esquina.

Deja la púa en la esquina. No hagas palanca más y no quites la púa del iPad.

La tercera imagen muestra las dos antenas y la cavidad del botón de inicio en el cuerpo del iPad.

Los siguientes pasos te indicarán dónde hacer palanca para evitar daños a estos componentes. Solo aplica calor y haz palanca donde se te indique.

Ваш вклад лицензируется под свободной лицензией Creative Commons .