Перейти к основному содержанию
/
Мой рабочий стол для верстки руководств

Получите быстрый доступ к руководствам, запчастям и ответам касательно ваших устройств

Sostituzione pannello frontale iPad Air Wi-Fi

Примечание: Вы редактируете необходимое руководство. Любые внесённые вами изменения влияют на все 76 руководства, которые включают этот шаг.

Английский
Итальянский
Шаг 23
iPad Air Wi-Fi Front Panel Replacement: шаг 0, изображение 1 из 3 iPad Air Wi-Fi Front Panel Replacement: шаг 0, изображение 2 из 3 iPad Air Wi-Fi Front Panel Replacement: шаг 0, изображение 3 из 3
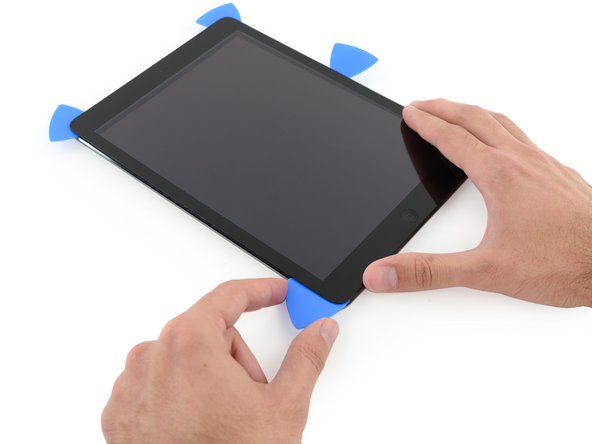
  • Slide the lower left pick to the lower left corner to cut the adhesive on that corner.

  • Leave the pick at the corner. Do not pry any farther, and do not remove the pick from the iPad.

  • The third image shows the two antennas and the home button cavity in the lower case of the iPad.

  • The following steps will direct you where to pry to avoid damage to these components. Only apply heat and pry where directed.

Fai scorrere il plettro nella parte inferiore sinistra fino all'angolo in basso a sinistra per tagliare l'adesivo presente nell'angolo stesso.

Lascia il plettro nell'angolo. Non andare avanti e non rimuovere il plettro dall'iPad.

La terza immagine mostra le due antenne e la cavità del pulsante home nella parte inferiore dell'iPad.

I seguenti passaggi ti diranno dove agire per evitare danni a questi componenti. Applica calore e leva solo dove indicato.

Ваш вклад лицензируется под свободной лицензией Creative Commons .