Перейти к основному содержанию
/
Мой рабочий стол для верстки руководств

Получите быстрый доступ к руководствам, запчастям и ответам касательно ваших устройств

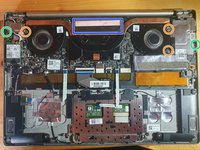
Partial teardown of Lenovo IdeaPad 720S-13IKB.

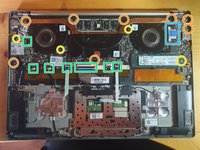
Usefull for

  • wifi/bluetooth
  • fans
  • battery
  • speaker
  • ssd
  • fingerprint

Выберете то, что вам нужно

Инструменты

Показать больше…

Это разборка для изучения а не руководство по ремонту. Чтобы отремонтировать Lenovo IdeaPad 720S-13IKB, воспользуйтесь нашим сервисным руководством.

  1. Lenovo IdeaPad 720S-13IKB Teardown, Remove back cover: шаг 1, изображение 1 из 1
    • Power off Device

    • Remove charger

    • Remove 6 T5 Screws

    • Remove 4 T5 Screws (These Screws are at an angle)

    • Remove the back cover using opening Pics. Start at the back(where the screen is)

  2. Lenovo IdeaPad 720S-13IKB Teardown: шаг 2, изображение 1 из 1
    • SSD/DisplayConnector Cover

    • Battery

    • M.2 Wifi&Bluetooth

    • Speakers

    • RAM Cover

    • CPU

  3. Lenovo IdeaPad 720S-13IKB Teardown, Remove Battery: шаг 3, изображение 1 из 1
    • Unplug battery

    • Remove all 3 Screws using PH1

    • Take out the battery

  4. Lenovo IdeaPad 720S-13IKB Teardown: шаг 4, изображение 1 из 1
    • Fingerprint reader

    • Touchpad

  5. Lenovo IdeaPad 720S-13IKB Teardown, Remove Covers: шаг 5, изображение 1 из 2 Lenovo IdeaPad 720S-13IKB Teardown, Remove Covers: шаг 5, изображение 2 из 2
    • Remove Screws with PH1

    • Remove Screws with PH0

    • Remove RAM cover

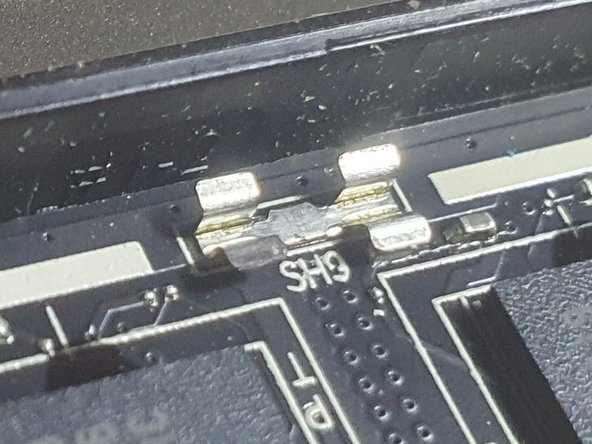
    • All covers are also secured using contact clips (Picture 2). Just pull them out

  6. Lenovo IdeaPad 720S-13IKB Teardown: шаг 6, изображение 1 из 1
    • DRAM (K4aag165wb MCRC)

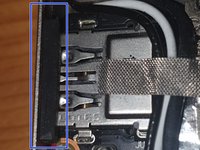
    • Connector To Display

    • M.2 SSD

  7. Lenovo IdeaPad 720S-13IKB Teardown, Remove Speaker: шаг 7, изображение 1 из 1
    • Unplug Fans

    • Disconnect Fingerprint and Touchpad

    • Take out Speakers

  8. Lenovo IdeaPad 720S-13IKB Teardown, Remove Motherboard: шаг 8, изображение 1 из 2 Lenovo IdeaPad 720S-13IKB Teardown, Remove Motherboard: шаг 8, изображение 2 из 2
    • Remove screws using PH0

    • Remove screws using PH1 and take m.2 parts out

    • Dissconnect cables

    • Disconnect Display Cable

    • No Idea how to connect Display Cable (Tips welcome)

    • Push Moterboard to the left and take it out.

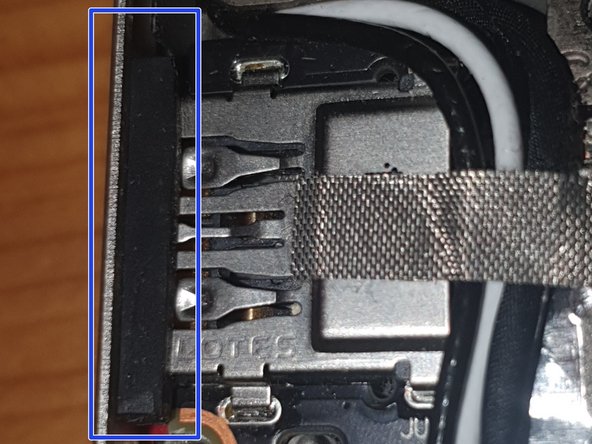
    • At the USB-A Port is some cushion to keep the Motherboard in place.

Hinomi

Участник с: 05/08/24

325 Репутация

Автор 3 руководств

2 Комментариев

Do you have the tear down images of the LCD side?

Ricardo Shiroma - Ответить

unfortunately not, i didn't have to disassemble that far.

I can give you the tip, when removing the latch cover (the plastic at the bottom of screen where it is attached to the rest) start from the Front. There are 4 clips on the cover. under there are 2 screws, which might allow the back of the screen to open.

Hinomi -

Добавить комментарий

Статистика просмотров:

За последние 24 час(ов): 1

За последние 7 дней: 6

За последние 30 дней: 41

За всё время: 659