Перейти к основному содержанию

Эта разборка продолжается – Периодически обновляйте, чтобы увидеть последние изменения!

Выберете то, что вам нужно

  1. Samsung Galaxy S II Teardown, Remove back of phone: шаг 1, изображение 1 из 3 Samsung Galaxy S II Teardown, Remove back of phone: шаг 1, изображение 2 из 3 Samsung Galaxy S II Teardown, Remove back of phone: шаг 1, изображение 3 из 3
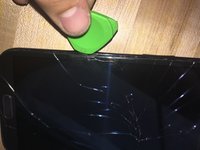
    • Find the small divot and use a plastic tool or your fingernail to remove the plastic cover off the back. This step requires no removal of screws.

  2. Samsung Galaxy S II Teardown: шаг 2, изображение 1 из 2 Samsung Galaxy S II Teardown: шаг 2, изображение 2 из 2
    • Remove the 11 screws from the back of the phone. This will require a Philips #00 screwdriver.

  3. Samsung Galaxy S II Teardown: шаг 3, изображение 1 из 2 Samsung Galaxy S II Teardown: шаг 3, изображение 2 из 2
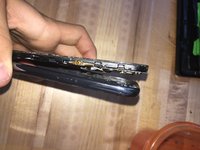
    • Separate the screen and internals from the casing on the back by using a small plastic tool or your fingernail to get under the screen and lift it up. Once it has been unclipped, pull the 2 completely apart.

  4. Samsung Galaxy S II Teardown: шаг 4, изображение 1 из 1
    • The back of the screen should look like this. From here, we have access to any fixes that would nee to be made for the phone.

Devon Crump

Участник с: 11/08/16

284 Репутация

1 руководство автора

Один комментарий

Is this device Galaxy S2 or Galaxy Note2? It seem to be Note2…

jehongjeon - Ответить

Добавить комментарий

Просмотр статистики:

За последние 24часов: 0

За последние 7 дней: 0

За последние 30 дней: 0

За всё время: 680