
Acer Aspire 5 A515-54 Hard Drive Replacement

Введение
Перейти к шагу 1This guide will show you how to replace or upgrade your Acer Aspire 5 A515-54 hard drive. The HDD is used for storing operating systems, software programs and other files.
Before proceeding with the replacement, it is highly recommended to back up any important and necessary files in order to prevent any data loss. You should also power off your laptop and unplug from any power source prior to beginning this repair.
Выберете то, что вам нужно
Наборы для ремонта
Эти комплекты содержат все детали и инструменты, используемые в руководстве.


Запчасти


Инструменты


Показать больше…
-
-
Turn off and unplug your Acer Aspire 5 A515-54.
-
Flip it over so the backside is facing up.
-
-
-
Use the Phillips #0 screwdriver to remove eleven 9 mm screws securing the back cover.
-
Use a prying tool to gently open the back cover of the laptop.
-
-
-
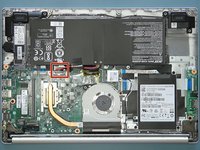
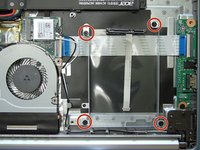
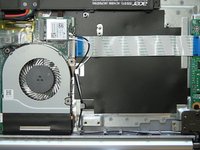
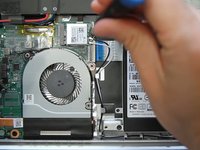
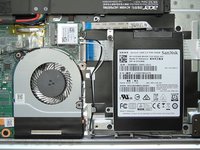
Notice there is a mounting tray with a cable for the additional HDD. Remove the four 3 mm screws with a Phillips #0 screwdriver.
-
Take out the mounting tray and connector to prepare for the hard drive installation in the next step.
-
-
-
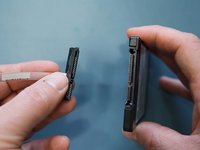
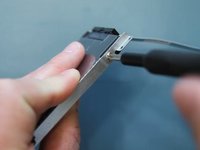
Take the connector from previous step and connect it to the new hard drive.
-
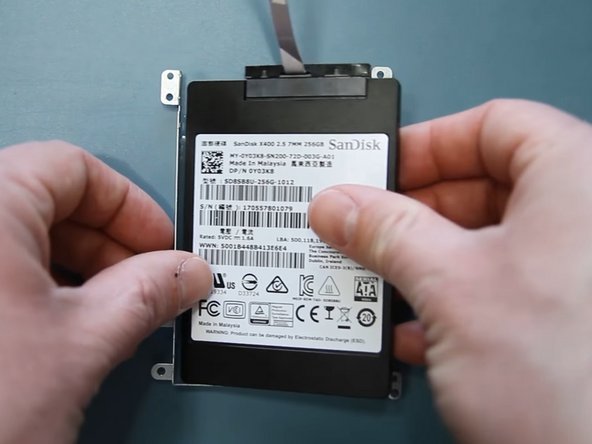
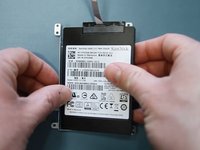
Insert the drive into the mounting tray.
-
-
-
Use the Phillips #0 screwdriver to secure the 2 mm screws to the mounting tray, which holds the HDD .
-
-
-
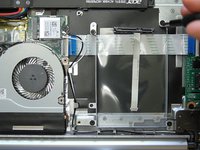
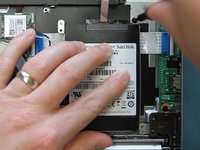
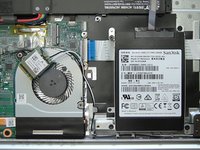
Slide the mounting bracket with the hard drive into the socket (with the cable facing towards the battery).
-
Use the Phillips #0 screwdriver to replace the 3 mm screws and hold the bracket in place.
-
-
-
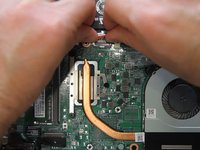
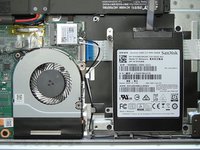
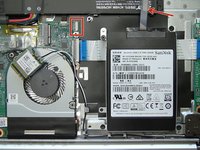
Use the Phillips #0 screwdriver to remove the single screw attaching the wireless card to the motherboard.
-
Gently slide the wireless card out of the socket and set it aside in order to connect the hard drive to the motherboard.
-
-
-
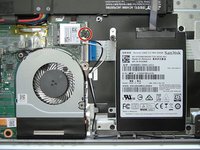
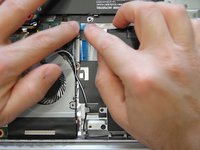
Gently insert the hard drive cable into the connector on the motherboard and lock it in place.
-


To reassemble your device, follow these instructions in reverse order.
After replace and install the new hard drive to the laptop, you need to format the new drive and that's it. You have upgraded the hard drive of your laptop.
To reassemble your device, follow these instructions in reverse order.
After replace and install the new hard drive to the laptop, you need to format the new drive and that's it. You have upgraded the hard drive of your laptop.
Отменить: Я не выполнил это руководство.
2 человек успешно провели ремонт по этому руководству.

Команду

York University, Team M-27, Allen Summer 2022 Участник York University, Team M-27, Allen Summer 2022
YORK-ALLEN-SU22SMG27
1 член
Автор 2 руководств
2 Комментариев
I currently have a 256gb ssd in my Acer Aspire 5 A515-54. I would like to upgrade to a 1TB ssd and this guide is great but how can I transfer the data to the new ssd?
Try using a hdd cloning software.