Перейти к основному содержанию
/
Мой рабочий стол для верстки руководств

Получите быстрый доступ к руководствам, запчастям и ответам касательно ваших устройств

Dell G3 3590 (2019) Hard Drive Replacement

Dell G3 3590 (2019) Hard Drive Replacement

Bryan Tang

Bryan Tang и 3 другие участники

Последнее обновление November 15, 2022

15 мин.
Легко
Рекомендуемое руководство ученика

The potential for the hard drive to fail can happen with any computer. With laptops, this is especially the case due to their portable nature and limited protection. Replacing the hard drive is a useful skill in extending the lifespan of your laptop as well as maintaining storage space. In this guide, we will demonstrate how to replace the hard drive in a Dell G3 3590 (2019). No specialized skills are required for this replacement.

Выберете то, что вам нужно

Наборы для ремонта

Эти комплекты содержат все детали и инструменты, используемые в руководстве.

Запчасти

Инструменты

Показать больше…

  1. Dell G3 3590 (2019) Hard Drive Replacement, Hard Drive: шаг 1, изображение 1 из 1
    • Shut down the laptop.

  2. Dell G3 3590 (2019) Hard Drive Replacement: шаг 2, изображение 1 из 2 Dell G3 3590 (2019) Hard Drive Replacement: шаг 2, изображение 2 из 2
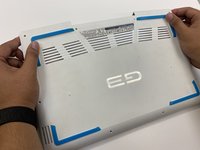
    • Use a Phillips #00 screwdriver to loosen the four captive screws in the bottom cover.

    • The captive screws will not come out. If you keep loosening the captive screws and hear clicks, then they are loosened enough.

    • Remove six silver 7 mm screws using a Phillips #00 screwdriver.

  3. Dell G3 3590 (2019) Hard Drive Replacement: шаг 3, изображение 1 из 2 Dell G3 3590 (2019) Hard Drive Replacement: шаг 3, изображение 2 из 2
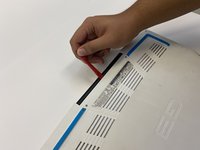
    • Use the opening tool to pry the base cover from the laptop.

    • Lift the base cover off.

  4. Dell G3 3590 (2019) Hard Drive Replacement: шаг 4, изображение 1 из 3 Dell G3 3590 (2019) Hard Drive Replacement: шаг 4, изображение 2 из 3 Dell G3 3590 (2019) Hard Drive Replacement: шаг 4, изображение 3 из 3
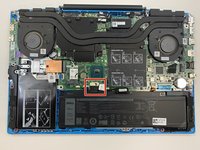
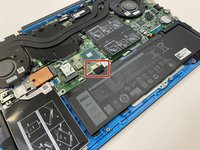
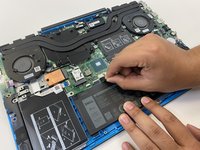
    • Disconnect the battery cable from the system board.

    • Disconnecting the battery cable will require some gentle wiggling.

  5. Dell G3 3590 (2019) Hard Drive Replacement: шаг 5, изображение 1 из 3 Dell G3 3590 (2019) Hard Drive Replacement: шаг 5, изображение 2 из 3 Dell G3 3590 (2019) Hard Drive Replacement: шаг 5, изображение 3 из 3
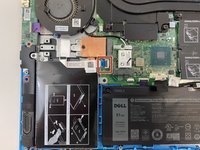
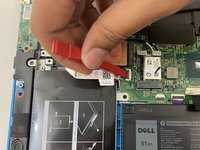
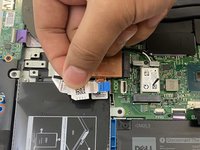
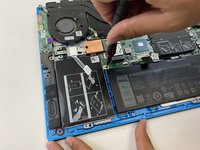
    • Open the latch.

    • Disconnect the hard drive cable from the system board.

    • The latch does not need the opening tool to open. You can use your fingernail.

  6. Dell G3 3590 (2019) Hard Drive Replacement: шаг 6, изображение 1 из 3 Dell G3 3590 (2019) Hard Drive Replacement: шаг 6, изображение 2 из 3 Dell G3 3590 (2019) Hard Drive Replacement: шаг 6, изображение 3 из 3
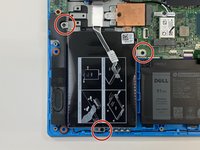
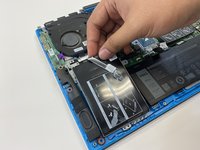
    • Use a Phillips #00 screwdriver to remove three black 3 mm screws.

    • Lift the hard drive assembly to remove it from the laptop.

  7. Dell G3 3590 (2019) Hard Drive Replacement: шаг 7, изображение 1 из 3 Dell G3 3590 (2019) Hard Drive Replacement: шаг 7, изображение 2 из 3 Dell G3 3590 (2019) Hard Drive Replacement: шаг 7, изображение 3 из 3
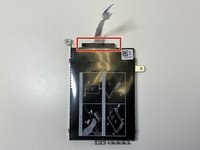
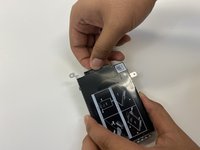
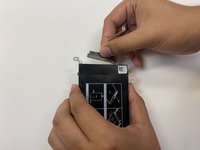
    • Gently pull the interposer from the hard drive.

    • Removing the interposer will require some work. Alternate pulling on one side, then the other until the interposer comes out.

  8. Dell G3 3590 (2019) Hard Drive Replacement: шаг 8, изображение 1 из 3 Dell G3 3590 (2019) Hard Drive Replacement: шаг 8, изображение 2 из 3 Dell G3 3590 (2019) Hard Drive Replacement: шаг 8, изображение 3 из 3
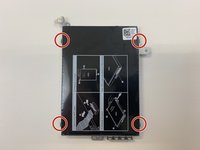
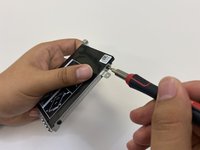
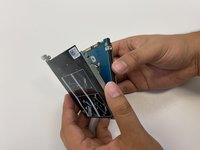
    • Use a Phillips #00 screwdriver to remove four black 3 mm screws from the hard drive bracket.

    • Remove the hard drive from the hard drive bracket.

    • Add the new hard drive into the hard drive bracket.

Заключение

Once you’ve inserted the new hard drive into the hard drive bracket, reassembling the device can be done by reversing the instructions back to step one. You should hear clicks when you put the base cover back. The clicks ensure that the base cover is secured to the laptop. After this, start up the laptop and ensure it properly starts up.

4 человек успешно провели ремонт по этому руководству.

Bryan Tang

Участник с: 09/28/21

253 Репутация

1 руководство автора

Команду

University of North Texas, Team 1-3, Raign Fall 2021 Участник University of North Texas, Team 1-3, Raign Fall 2021

UNT-RAIGN-F21S1G3

2 членов

Автор 1 руководств

0 Комментариев

Добавить комментарий

Статистика просмотров:

За последние 24 час(ов): 11

За последние 7 дней: 70

За последние 30 дней: 466

За всё время: 4,846