
Lenovo Essential G560 Optical Drive Replacement

Введение
Перейти к шагу 1Follow this guide to remove the optical drive from the computer.
Выберете то, что вам нужно
Инструменты

-
-
Turn off the computer.
-
Disconnect the charging cable from the computer.
-
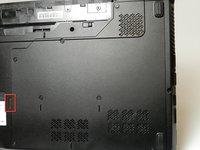
Flip the computer upside down.
-
-
-
Locate the two switches that lock the battery. Push the right-hand switch outward into the "unlocked" position.
-
-
-
Push and hold the left hand switch outward in the "unlocked" position, then gently slide the battery away from the computer.
-
-
-
Remove the seven 5.3 mm Phillips #1 screws holding the back panel in place.
-
-
-
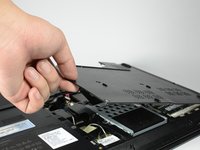
Pull the back panel off using the highlighted tab. The tab should give you enough leverage to pull the panel off smoothly.
-
-
-
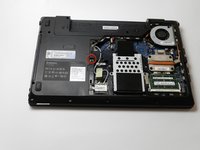
The computer should be open with many of the internal components shown. You can now access the hard drive, the RAM, and the keyboard.
-
-
-
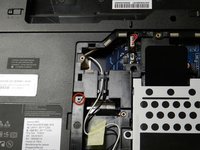
Locate the Optical Drive 4.7 mm Philips #1 screw, which secures the Optical Drive into the body of the laptop.
-
-
-
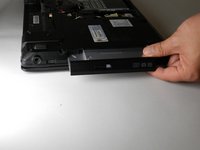
Using the Philips #1 Screwdriver, remove the Optical Drive 4.7 mm Philips #1 screw. Once you remove the screw, locate the metal tab beneath the screw and push it outwards.
-


To reassemble your device, follow these instructions in reverse order.
To reassemble your device, follow these instructions in reverse order.
Отменить: Я не выполнил это руководство.
7 человек успешно провели ремонт по этому руководству.

Команду

Cal Poly, Team 18-40, Regan Winter 2013 Участник Cal Poly, Team 18-40, Regan Winter 2013
CPSU-REGAN-W13S18G40
5 членов
Автор 13 руководств